A Method for Instantaneous and Accurate Measurement of Burrs
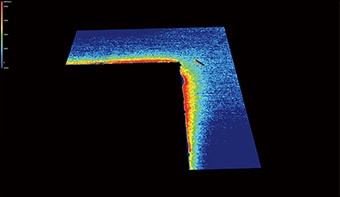
The term “burr” is commonly used in pressing, cutting, and other metalworking workplaces, however, the term may be unfamiliar to persons who are not involved in such work. This page explains what burrs are and why they are formed. It also introduces problems in burr measurement performed for quality control, and a solution to these problems.
- Burrs
- Types and Categories of Burrs
- Problems in Conventional Burr Measurement
- Solution to Problems in Burr Measurement
- Summary: Dramatic Improvement and Higher Efficiency in Difficult Burr Shape Measurement
Burrs
A burr is a raised metal edge formed on the cut surface during shearing and hole punching using a press. Burrs are also known as "flash".

- A
- Burr base thickness
- B
- Burr height
Contact with burrs left on an edge can injure the person’s hand. Burrs can also hinder correct assembly and joining. To prevent these problems, burrs should be removed by polishing the edges. However, when burrs cannot be completely removed, it is necessary to provide drawing instructions regarding the surfaces where burrs are permitted.
Burr size is indicated by the height or base thickness.
Types and Categories of Burrs
In addition to pressing, cutting, and other machining, burrs are also produced by various other forming methods such as casting, forging, and plastic molding. Burrs can be categorized into the following types according to the forming method, and each type has its own specific causes.
Burrs generated by cutting or grinding
- [Forming method]
- Machining (lathe turning, milling, drilling, grinding)
- [Cause]
- Plastic flow occurred in a part of the material when chips were generated.
Burrs generated by shearing
- [Forming method]
- Plastic working (shearing, pressing)
- [Cause]
- Plastic flow occurred in a part of the material in the clearance between the die and the punch.
Burrs generated by casting or plastic molding
- [Forming method]
- Casting, plastic molding
- [Cause]
- Plastic flow occurred in a part of the material surface at the mating surface of the casting die or mold.
Burrs generated by plastic deformation
- [Forming method]
- Forging, rolling
- [Cause]
- Plastic flow occurred in a part of the material at the die flash land or gutter.
Problems in Conventional Burr Measurement
Burrs exceeding the permissible range (tolerance) on pressed parts can cause fitting failures (when the parts are mounted), welding failures (when the parts are joined) and connection failures.
Measuring and inspecting the cut surfaces of pressed parts can ensure the quality, assembly, and reliability of the part after shipment.
Conventional measurement of burrs generated by pressing uses profile measurement systems. However, this method involves the following problems.
Problems in burr measurement using a profile measurement system
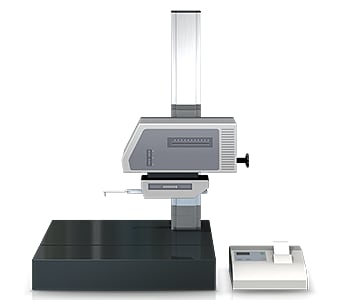
A profile measurement system measures and records the profile of a target by tracing its surface with a stylus. In recent years, profile measurement systems have been developed that use a laser instead of a stylus to measure complex shapes by tracing the profile in a non-contact manner. Some models are even able to perform measurement of both the top and bottom surfaces.
A profile measurement system must trace an accurate measurement line for the shape of the burrs being measured.
This involves the following problems.
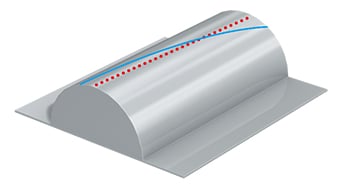
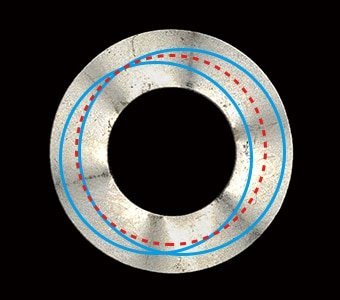
- Measurement work requires much time, including time for fastening the sample to the jig and leveling it. Knowledge and skills related to using profile measurement systems are also required in order to level a target accurately.
- The stylus of a profile measurement system moves up and down in an arc centered on the fulcrum of the stylus arm; the tip of the stylus also moves in the X-axis direction producing error in the X-axis data.
- Tracing the desired line with the stylus is extremely difficult work, and even slight displacement of the stylus produces error in the measured values.
- It is also difficult to increase the number of targets because of the need to pinpoint specific locations for measurement.
- Only part of a target can be measured, and evaluation of the entire surface is not possible.
Solution to Problems in Burr Measurement
The measuring instruments typically used to measure burrs are limited to measuring three-dimensional targets and areas by means of point or line contact, resulting in low reliability of the measurement values. To resolve these measurement problems, KEYENCE has developed the 3D Optical Profilometer VR Series.
The VR Series accurately captures the 3D shape of the entire target surface without contacting the target. A 3D scan of the target on the stage can be completed in as little as one second, for high accuracy measurement of the 3D shape. It is capable of instantaneous and quantitative measurement with no errors in the measurement results. This section introduces some specific advantages of the VR Series.
Advantage 1: Measure the full surface for analysis of the entire shape.
With the VR Series, 3D information for the entire surface is obtained with a single measurement. Users can identify the overall shape of the target, including the highest points and lowest points. Because the measurement locations can be quickly identified by anyone, this eliminates the need to perform repeated measurements when the specific location to target is not known. Measurement can be performed simply by placing the target on the stage and clicking a button. There is no need to make adjustments for each measurement, so the same measurement results can be obtained even with different operators.
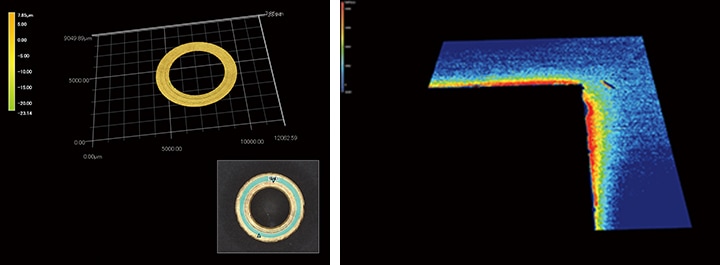
Unlike conventional measuring instruments, the VR Series is capable of easily measuring burrs that are formed over a wide area, something which previously required much time and effort to measure. Measurement tools that allow a variety of measurements to be easily performed are also included. This makes it possible for even an operator, who is unfamiliar with measurement, to easily and instantaneously perform measurement and eliminates the need to assign a specialized operator to measurement work.
Advantage 2: Perform rapid, high-accuracy measurement.
A single measurement which covers the entire surface can be completed in as little as one second. Because measurement using conventional measuring instruments requires time, it was not easy to achieve a large increase in the number of samples.
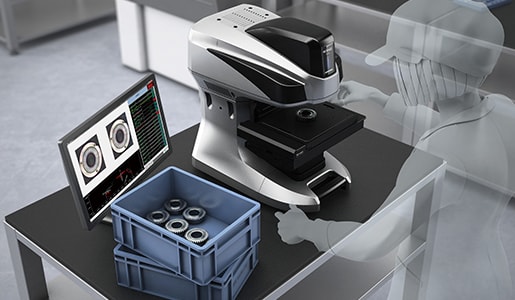
The VR Series is capable of measuring targets quickly and easily. It can be used in high-accuracy 3D measurement for a wide range of purposes. In addition to development and trials, it can also be used for sampling inspections or 100% inspections of small-lot or high-value products. It can reduce the outflow of defective products and allows reports to be created easily. This contributes to earning trust without having to invest an excessive amount of man-hours.
Summary: Dramatic Improvement and Higher Efficiency in Difficult Burr Shape Measurement
The VR Series can measure 3D target shapes accurately and instantaneously by high-speed 3D scanning without contacting the target. Even difficult measurement such as the heights and locations of burrs can be completed in as little as one second. The VR Series can solve all the problems involved with conventional measuring instruments.
- Because the entire surface is measured, the VR Series can easily measure a wide area. Precise evaluations can be performed, ensuring that even fine burrs are not overlooked. The short measurement time makes it easy to increase the number of measured samples.
- This eliminates variation resulting from human factors, making true quantitative measurement possible.
- Without the need for positioning or other preparation, measurement can be performed simply by placing the target on the stage and pressing a button. This eliminates the need to assign a specialized operator for measurement work.
- 3D shapes can be measured easily at high speeds with high accuracy. This makes it possible to measure a large number of targets in a short time, helping to improve quality.
The VR Series also allows comparisons with past 3D shape data and CAD data, as well as easy data analysis such as distribution within tolerances. It can be used effectively for a wide range of purposes including product development, manufacturing trend analysis, and sampling inspections.


