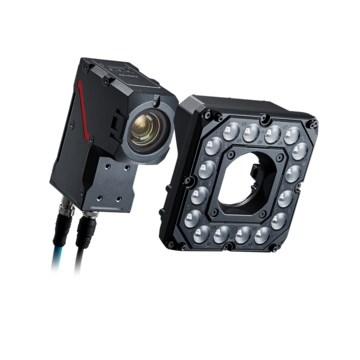
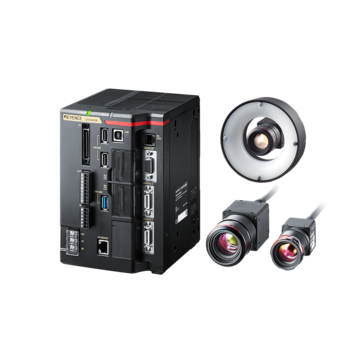
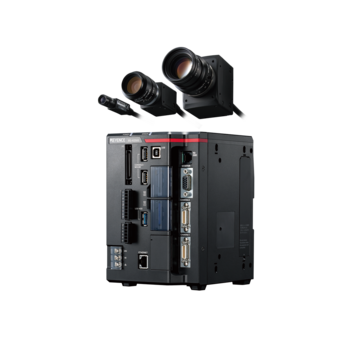
Vision Systems
Fundamentals of Image Processing Filters

Explore how image processing filters optimize machine vision applications and learn about their types, principles, and selection criteria for enhanced performance.
Basic Pretreatment Filters
The purpose of understanding image processing fundamentals is to enable users to capture the most accurate images. In addition, by using pretreatment filtering image content inspections can process an optimal image (correct focus and contrast).
The potential for stable examination is increased by implementing pretreatment filters before the processing of flaw detection, dimensional measurement, and other forms of inspections occur. Selecting the optimal pretreatment filter is explained in greater detail ahead.

Basic Types of Pretreatment Filters

Example of the original image
Below, four types of pretreatment filters are described. Each filter uses a 3 × 3 principle to perform pretreatment calculations, and process the image.
-
13 × 3 pixel rule
-
2Image data

Expansion
Expansion Filter
The maximum density (brightest value) of nine pixels are inspected and the center pixel is adjusted to the largest density value.

Shrinkage
Shrinkage Filter
The minimum density (darkest value) in nine pixels is identified and the center pixel is adjusted to that value. Dark pixels are therefore emphasized and a more stable flaw detection is performed.

Averaging
(2 + 5 + 9 + 4 + 7 + 3 + 0 + 1 + 2) / 9 = 3.66
Round down decimal values to obtain 3.
Averaging Filter
The average density of nine pixels is calculated (2 + 5 + 9 + 4 + 7 + 3 + 0 + 1 + 2 / 9 =3.66, rounded to the 1/100 decimal point) and the center pixel is adjusted to the average value.
This stabilizes the image and reduces the effect of noise which may cause blurry images.

Median
Median Filter
The density of the center pixel is adjusted to the fifth element in the order of density value. This allows for a more stable removal of noise.
For image processing, it is important to capture clear images to exactly reproduce the image seen by the human eye. For some inspection purposes, enhancing features (expand, shrink) or blurring them to reduce noise components (averaging, median) may yield more appropriate inspection results, instead of using precisely reproduced images.
To understand image enhancement, remember to perform these image enhancement methods for all pixels.

Edge Extractions and Enhancement Filters

Original image
Below, pretreatment filters such as Edge Extraction and Edge Enhancement are used to emphasize the characteristics which are contrasting to the original image. Edge filters have many purposes and selecting the appropriate one for each situation should be based on the knowledge and theory of each filters correct use. The use of Sobel and Prewitt and the extraction of edges in the X and Y directions are described ahead.
Sobel and Prewitt
Sobel and Prewitt are edge extraction processes that extract edges in the X and Y direction separately and then combine the results. After multiplying by a determined coefficient the center pixel is then replaced with an appropriate added density value.

Sobel

Prewitt
Edge Extraction Series Summary
When intensity is high, changes that should be ignored as noise may also be extracted.
| Differential | Horizontal direction | Vertical direction | Diagonal direction | Others | |
|---|---|---|---|---|---|
| Prewitt | First differential | Stronger | Stronger | Strong | |
| Sobel | Second differential | Strongest | Strongest | Stronger | |
| Roberts | First differential | Strong | Strong | Stronger | |
| Laplacian | Second differential | Strong | Strong | Strong | Doesn't depend on the direction |
Direction Specific Edge Extraction Filter
Edge extraction in the X and Y direction using sobel is leveraged by the limitations of the defect length in both the vertical and horizontal directions.

Edge extraction X (X Direction Sobel)

Edge extraction Y (Y Direction Sobel)
Differences Between the Edge Extraction Filter and the Edge Enhancement Filter

Edge enhancement
Edge enhancement is a process that clarifies blurred images. It is different from the Edge Extraction filter in that it emphasizes the concentration of the center pixel by adjusting the combined result of nine pixels to zero and one. As for edge extraction, if the nine pixels have the same data, the density will be 0. However, the density of the center pixel is emphasized and remains.
The Edge Extraction filter processes the concentration of the center pixel of the 3 × 3, top and bottom (X direction), and right and left (Y direction), and replaces them. It is necessary to select the type of noise presence and the direction to emphasize. Furthermore, please note that even though the Edge Enhancement filter is uniform, the center pixel of the noise element will increase.

Example Filter Technique Applications
The CV-X is capable of inspecting one region with two or more pretreatment filters able to repeatedly inspect one region with two or more pretreatment filters. It is possible to process the optimal image using each filter if the theory of the filter is known.
EXAMPLE 1. Outline Smoothing: Expand(X) + Shrink(Y)

The expand and shrink filters are applied at the same time and are able to remove uneven contours and burrs, thereby, maintaining an even surface for inspection.
EXAMPLE 2. Emphasize Microscopic Flaws: Sobel + Binary + Expansion

Sobel + Binary + Expand (stain enhancement)
First, the sobel filter extracts the edges of the flaw. Then, using binarization to compile a black and white image and emphasizing the white pixels using the expansion filter the flaw is made to clearly stand out.
-
1Before filtering
-
2Sobel
-
3Binarization + expansion
EXAMPLE 3. Smoothing Noise Components Averaging + Median

This technique is effective for stabilizing measurements in edge detections. This method uses the averaging filter to eliminate the effect of blurred images and the median filter to more accurately stabilize noise.
-
1Before filtering
-
2After filtering
-
3Waveform of edge intensity(Conceptual image)
Typical Repeatability of unstable edge detections
|
No filter
|
6.27 pixels
|
|---|---|
|
Averaging + Median
|
0.3 pixels (Stabilized)
|
Summary of Image Enhance Filters (Part 1)
These are the basics of image enhancement.
-
1.
First, capture a good source image (clear focus, high contrast).
If there are features that need enhancement, perform image modification (image enhance filters). - 2. Typical image enhancement replaces the value of the center pixel in every set of 3 × 3 pixels to a desired enhancement result obtained with various coefficients applied to the density values of the surrounding pixels.
- 3. You can ensure stable inspection by understanding the principles of individual image enhance filters and using the image enhance filters, solely or in combination, most effective for your application.
The next topic is the image enhance filters (part 2) to modify images to obtain optimum results. In addition to the basic image enhance filters described above, there are other new, advanced image enhance filters such as the subtraction and real-time image extraction filters. Let's look at the effects of these filters in detail.

Selecting and Setting Image Enhance Filters
Subtract Filter
The Subtract filter is a pretreatment function that compares the input image against the registered master image and extracts the differences between them. In consideration of the minor differences between individual items for inspection, it is possible to adjust the extent to which a slight difference between objects is recognized as defective.

The real time image compared to the registered image. The flaw is isolated and then extracted.
-
1Registered image (PASS)
-
2Input image (DEFECTIVE)
-
3Difference filter image
-
4(Detected Flaw)

Process
It calculates the difference absolute value between the registered image and the density value of the input image and outputs the difference image.
Conventionally, image sensors have focused on detecting scratches and small imperfections such as spots and dirt. However, in addition to these types of detections, the KEYENCE CV-X Series can be used for distinguishing profile changes - something that was difficult with normalized correlation values.
Real-Time Subtract Filter
The Real-Time Subtract filter compares the raw image with a copy of the raw image that has been processed with the Expand and Shrink filters, and extracts spots and other small faults. This filter eliminates the need for target misalignment correction and allows inspection to be conducted with a single setting.

Fault detection on the inside of a cup-normal image(Area settings are complex because they must be adjusted according to target shape)

Real-Time Subtract image(Allows inspection of small areas)

Principles of the Real-Time Subtract filter
The black spot disappears when Image 1 is expanded. Image 2 is shrunk and returned to the same size as the raw image. Image 3 is subtracted from Image 1 to leave only the black spot. This process is executed on every captured image, so even if the shape of the raw image changes, stable detection is still obtained.
-
11. Raw image
-
22. Expand filter image (black spot deleted)
-
33. Shrink filter image
-
44. Real-Time Subtract image (image 1 minus image 3)

Improved Contrast
Contrast Conversion Filter
In order to increase the contrast and the stability of external inspection, the CV-X300 Series is equipped with a Contrast Conversion filter. This pretreatment filter turns the camera's span and offset functions into independent pretreatment filters, which allows them to be adjusted on a window-by-window basis. This allows the contrast of specific tones in the raw image to be emphasized.
-
1Raw image
-
2Image after contrast conversion

Multi-Filter Effects
The CV-X Series includes a variety of pretreatment filters. Several of these filters can be applied at once to the same area to create images that are suitable for external inspection. In the following example, the Real-Time Subtract filter has been combined with the Shrink, Average, and Contrast Conversion filters to produce an almost completely white image with only a black flaw remaining.
-
1Raw image
-
2Real-Time Subtract filter image
-
3Image after multi-filter processing
Roles of the filters in this example
|
Real-time image extraction
|
This filter leaves only black spots on the target.
|
|---|---|
|
Shrink
|
This filter enlarges the remaining black spots so that they are one size larger.
|
|
Averaging
|
This filter smooths surrounding noise.
|
|
Contrast conversion
|
This filter enhances the contrast between black spots and their surrounding areas.
|
Summary of Image Enhance Filters (Part 2)
Remember the following points regarding image enhance filters using image calculation and brightness correction.
- 1. Image calculation filters extract differences between the input and source images and can be used effectively for stain/flaw inspection.
- 2. The contrast conversion filter allows contrast adjustment based on the adjustment of the slope of shade data for each window.
- 3. You can obtain an optimum image for inspection by combining the image enhance filters described in Part 1 and Part 2.
The next topic is practical knowledge about appearance inspection settings that can be used in the field. In addition to the knowledge of hardware and software already described, it is helpful to know some practical knowledge and techniques.

Machine Vision Filters FAQs
What are Image Processing Filters in the Context of Machine Vision?
Image processing filters in machine vision are algorithms that the machine vision system applies to the images captured by optical transducers (machine vision sensors) to enhance said images in order to extract information or prepare them for subsequent analysis.
Machine vision image processing filters modify an image in a way that makes it easier for machines to understand and analyze visual data. As such, they play an important role in object detection, pattern recognition, and image enhancements.
How Do Machine Vision Filters Contribute to Enhancing Imaging Quality?
Machine vision filters contribute significantly to image quality enhancement by preprocessing the images, making them easier to subsequently analyze, extract information, and support decision-making. These enhancements usually include noise reduction, contrast improvement, edge enhancement, and other modifications made to the images to highlight any features of interest.
By preprocessing the images, machine vision systems produce images better suited for automated quality inspection, leading to more accurate and reliable results. Regardless of whether the machine system recognizes characters for optical character verification or checks for presence/absence in an image, image filters improve image quality at the preprocessing stage, which is vital for the machine vision system’s workflow.
Which Types of Image Processing Filters are Commonly Used in Industrial Machine Vision Applications?
Some of the most commonly used image processing filters in industrial machine vision applications include a low-pass filter, which reduces noise and smooths an image; high-pass filters, which are used to enhance the edges within the image by highlighting high-frequency information; binarization, which is the most basic filter that provides a black-and-white image to the machine vision system.
Other image processing filters include a “shrink” filter, which increases dark pixels and decreases light ones. The opposite of shrink is expand, which enhances bright pixels at the expense of dark pixels. Bandpass filters filter out frequencies outside a particular range, polarization filters allow for better imaging of specular objects, etc.
What Considerations Should Be Taken Into Account When Selecting Imaging Filters for Machine Vision?
Selecting the appropriate image processing filters depends on specific applications and typically involves considering a number of different factors, such as the objective and goal of filtering, types of noise, image characteristics, the computational complexity of the filter, spatial and frequency domains, lighting conditions, and real-time processing requirements.
How Do Image Processing Filters Address Challenges in Machine Vision Applications?
Image processing filters address several challenges associated with machine vision applications, mostly by filtering an image to facilitate feature extraction. Noise is one of the biggest challenges, as it can lead to inaccurate analysis, such as edge detection, low contrast, background noise, and uneven lighting.
By addressing these challenges, image processing filters increase the effectiveness of machine vision systems, making them more accurate and versatile across a wide range of applications.
If you’re interested in integrating our vision systems into your existing production line, contact KEYENCE today—well-trained and professional personnel will answer any inquiries regarding automation and machine system quality assurance.
Related Downloads


This guide is a compilation of trivia pertaining to vision systems. Figures are used to provide easy-to-understand explanations of principles and characteristics for items ranging from lenses, image capturing, lighting, and color to communication and preprocessing. This guide is a must-read for anyone wanting to learn all about vision systems.
Related Products
Industries
- Automotive
- Automation Equipment/Machine Building
- Electric Vehicles
- Medical Device Manufacturing
- Food/Beverage Packaging
- Semiconductor/Manufacturing Electronics
- Vision-Guided Robotics
- Solar
- Logistics
- Commodities
- Paper Manufacturing
- Machine Tools
- Electronic Device
- Printing
- Mining/Metals
- Fabric/Textile
- Tobacco
- Marine
- Aerospace