Film and Sheets Inspection and Process Control
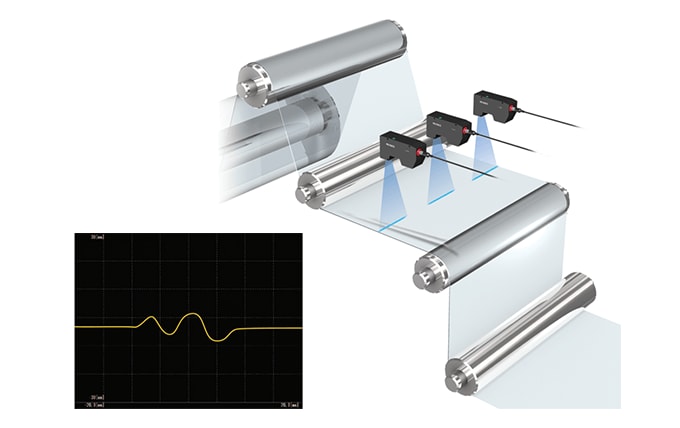
When a coating on film or sheet, coating defects such as thickness variations, ribbing, cascading, roping, or high edges in the coat greatly affect the quality. The causes of defects can vary, including the amount of material feeding, the speed of the substrate, the rotation behavior of coater rolls, the roll gap, and the position of the target (substrate).
Recent advancements in thin-film multi-layer coating have led to more complicated equipment and processes. This section introduces inline inspection solutions that are indispensable for maintaining high film-forming accuracy and current quality requirements.
- Coating thickness measurement of opaque materials
- Column: Measuring end shapes, and monitoring and controlling equipment status
Coating thickness measurement of opaque materials
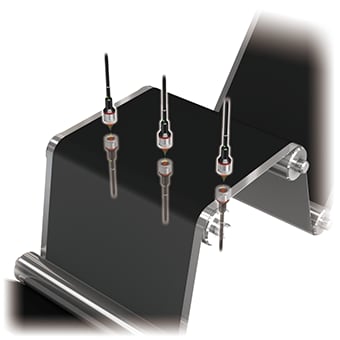
Coating opaque materials such as electronic component sheets and the electrodes of secondary batteries or solar cells is done in many fields as a way of making thinner and more functional products, or for improving production efficiency. With wet coating using various materials in recent years, measurement that is not affected by target surface conditions is indispensable for maintaining and controlling stable coating quality.
Thickness measurement of wet opaque material immediately after coating

Various materials are used for wet coating, including materials that produce coarse coated surfaces and those that do not reflect lasers very well. For thickness measurements/inspections to assure coating quality, using an inline, non-contact measurement system that can be used with various coated surfaces and production speeds is absolutely necessary.
The Confocal Displacement Sensor CL-3000 Series features a unique engine that ensures stable thickness measurement of coated surfaces in any condition. The controller provides simultaneous measurement by using up to three pairs of optical units installed across the width of the target, thereby enabling inline thickness measurement and control at a finer interval.
Column: Measuring end shapes, and monitoring and controlling equipment status
To achieve stable, high-quality coating, the substrate (web) and equipment must be in a stable condition, regardless of whether the coating material is transparent or opaque. In addition to measuring the coated surfaces, measuring and monitoring the gaps between rolls and for rotation run-out that may cause defective coating are also important.
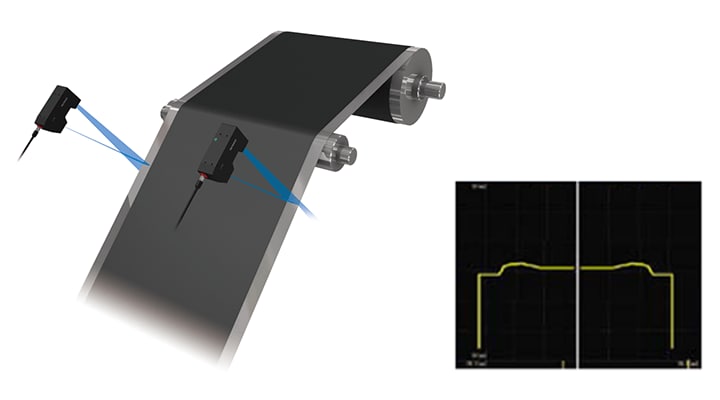
Measurement of substrate and coated surface end shapes (wrinkles or high edges)
- Measurement of wrinkles on film substrate edges
-

Conventional methods use video cameras to determine the conditions to prevent the release of products with defective end shapes such as substrate wrinkles or high coated surface edges.
The High-speed 2D/3D Laser Scanner LJ-X8000 Series uses a wide laser beam to allow inline measurement of cross-sectional shapes along the width direction. This enables inspection over the entire width of the substrate, thereby reliably preventing the release of defective products.
- Inspection for high edges at coated sheet ends
-

The LJ-X8000 Series is capable of real-time measurement even when with wet end shapes immediately after coating. Because the measurement is not affected by the color of the target, stable detection and inspection is possible even with a black coated surface.
Monitoring and controlling equipment status
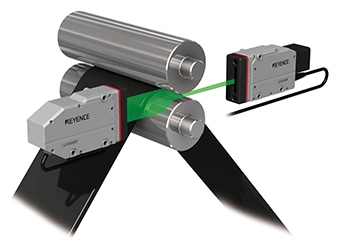
- Measurement of roll gap, run-out, and sheet thickness
-

Conventional roll gap adjustment methods required the operator to stop the production line temporarily to adjust the gap with a thickness gauge or dial gauge. This made it necessary to provide equipment adjustment time (line stop time).
Adoption of the High-speed Optical Micrometer LS-9000 Series enables inline and non-contact roll gap measurement, sheet thickness control, and real-time feedback control without the need to stop the line.
The LS-9000 Series also makes it possible to measure and monitor minute rotational run-out of the rolls that might cause irregular coating or other defects. This is effective for reducing the adjustment time and improving quality.


