Measuring Machines
Roundness Measuring Instrument
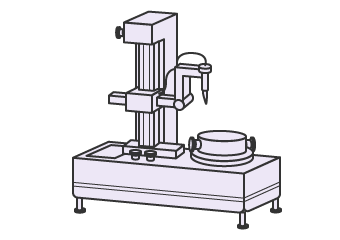
This measuring instrument can measure straightness, roundness, cylindricity, parallelism, perpendicularity, coaxiality, circular run-out, and total run-out. Generally, roundness measuring instruments are equipped with a rotary table and use a stylus that touches targets to measure various geometrical characteristics.
Coordinate Measuring Machine (CMM)
Coordinate Measuring Machines (CMMs) can measure different geometrical characteristics for form tolerance, orientation tolerance, and location tolerance.
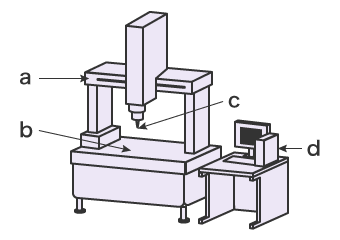
- a
- Moving bridge
- b
- Stage
- c
- Trigger probe
- d
- Controller
A contact-type coordinate measuring machine detects three-dimensional (X-Y-Z) coordinates when the operator specifies the target’s measurement point or line with the spherical stylus, which is at the tip of the probe. Because the elements (straight lines, planes, circles, spheres, etc.) are calculated from a set of detected coordinates, a coordinate measuring machine can precisely measure angles, positional relationships between elements, profile, and geometrical deviations, in addition to lengths of complex stereoscopic objects.
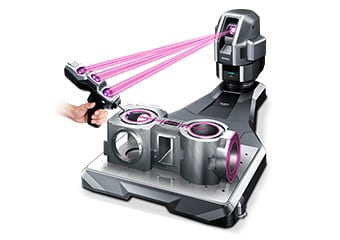
While stationary models were previously more common, they had temperature regulation requirements as well as restrictions of installation space and measurable target size based on the size of the machine. Operating them was also stringent and required a high level of mastery from the operator.
In recent years, movable, compact types of coordinate measuring machines that use handheld probes have been developed, resolving many of the issues the stationary types had.
- Column
-
- Least-squares method
-
Even when the points necessary for measurement are specified using the stylus of a coordinate measuring machine, the shape that passes all of such points may still deviate from the true form. In such a case, the least squares fitting method is used after measurement.
Taking a circle, for example: a circle is formed by calculating the average that minimizes the sum of squares of deviation in the radial direction of each measurement point.
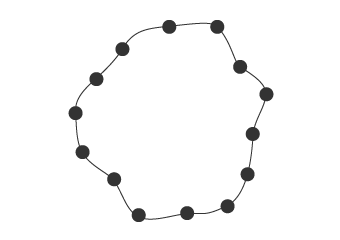
Measurement points 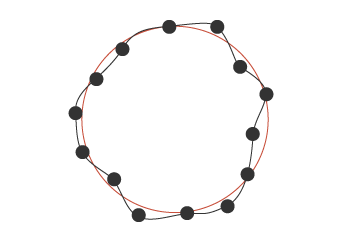
Form generated by least squares fitting
(red line)


