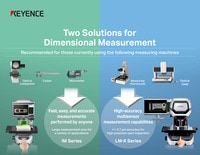
Optical Comparator (Profile Projector)
How to Inspect Precision Machined Medical Parts
The medical industry is saving lives every day with specialized devices for patient care. The industry’s success is no mistake—devices endure rigorous medical equipment inspection before reaching health facilities. This strict regulation process was put in place by the ISO 13485 and the FDA for accountability and quality assurance.
In the following, we discuss the medical equipment inspection process as it pertains to medical machined parts and equipment. By the end, you will better understand the communication between manufacturers and the FDA, what inspections are required, and how our KEYENCE Multisensor Measurement System is the ideal machine for medical part inspection.
What Are Medical Machined Parts?
Medical machined parts are generally metal-based parts created by machining processes like milling, turning, and grinding. Machining makes precise and customizable parts that fit specific patient needs. Alternatively, non-machined parts are made from other processes such as injection molding, casting, extrusion, etc. These can still be precise, but machined parts often hold the best accuracy and are therefore most common in the medical industry.
We’re here to provide you with more details.
Reach out today!

Medical Equipment Inspection Process
The medical equipment inspection process includes registering your manufacturing site, conducting visual/biocompatibility/functional inspections, inspecting the unique device identifier (UDI), and reporting any changes or problems to the FDA. This process is one of the strictest because of the equipment’s direct interaction with the human body.
Register Medical Equipment Inspection With the FDA
Before any medical equipment inspection takes place, any site that is planning on producing or distributing medical devices must register information on what is being manufactured and the intended purpose of the equipment.
Inspect Medical Machined Parts
Once a site is registered, it can conduct the actual medical equipment manufacturing and inspection. The inspection follows a strict checklist for visual, functional, and biocompatible characteristics. Inspecting requires detailed documentation to be uploaded to the AccessGUDID, which is the UDI database.
Inspect UDI on Medical Machined Parts
After the equipment is inspected for functionality, visual defects, and biocompatibility, technicians must inspect the UDI.
The UDI is a 2D code that is read by humans and scanned by a machine that gives supply chain information about the part. The FDA requires that the UDI be readable in plain text and use Automatic Identification and Data Capture (AIDC) technology.
Report Medical Equipment Inspection to the FDA
Any changes or problems in the medical equipment inspection must be reported to the FDA. Changes include any thrown-out part, defective part, or part that was corrected.
Discover more about this product.
Click here to book your demo.

Key Tests in Precision Medical Part Quality Control
The key tests for medical precision parts are visual, biocompatibility, and functional tests. Below, we go over each one and its purpose.
Visual/Dimensional Testing for Precision Medical Machined Parts
Visual testing for precision medical machined parts includes dimensional, GD&T, and surface inspection.
Dimensional inspection includes ensuring the dimensions of the equipment are within tolerance of what they’re supposed to be.
GD&T precision part inspection includes inspecting geometric features like straightness, flatness, circularity, angularity, perpendicularity, and symmetry. GD&T features ensure that the equipment geometries are as close to perfect as possible.
Defective seals and labels are the top FDA reasons why medical machined parts are recalled. This highlights the importance of surface visual inspection. Visual defects include surface texture problems, contaminants, partial sealing, labels, pinholes, punctures, and incorrect positioning.
Biocompatibility Testing for Precision Medical Machined Parts
Biological inspection is the inspection that evaluates how a device interacts with a human body. It evaluates the risk of the part being defective in comparison to the patient that it is serving. Risk depends on how often a part is recalled, the vulnerability of the patient, the longevity of the part, and more.
Functional Testing for Precision Medical Machined Parts
Functional testing for medical machined parts ensures that the part can perform its expected functions. This includes executing part functions, enduring stress or different environmental conditions, and showing accuracy.
Contact us to learn more about how our advanced technology can help take your business to the next level.
Contact Us
Multisensor Systems for Medical Part Visual Inspection Applications
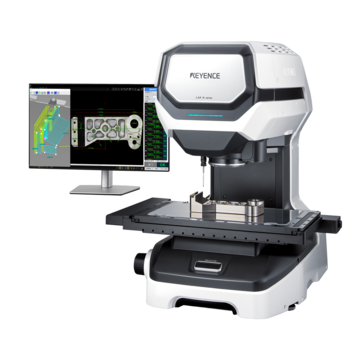
A Multisensor Measurement System is ideal for medical part visual inspection applications. Multisensor systems use three sensors: probe, optics, and laser. These systems measure dimensions, evaluate GD&T features, and inspect surfaces all in one.
In this section, we discuss how KEYENCE’s LM-X Multisensor System works to inspect your parts to ensure they meet all tolerances.
Optics for Implant Precision Part Inspection
The LM-X includes an ultra-high resolution camera with a 20-megapixel CMOS sensor, four illumination angles, and five color illumination options. High-resolution imaging, illumination angles, and color options help technicians find defects that are beyond the human naked eye's vision.
The LM-X camera’s abilities are especially useful for medical devices because a small defect in an implant’s dimensions could be life-threatening if placed in the human body.
Laser for Orthopedic Bone Plate Precision Part Inspection
The white confocal laser is beneficial for height and depth measurements for bone plate parts. Since bone plates are machined to fit the contour of a bone and include screw holes, measuring precise height and depth is necessary. The laser achieves instantaneous and accurate measurement.
Get detailed information on our products by downloading our catalog.
View Catalog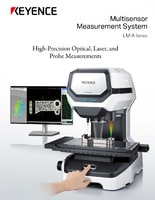

Implement High Precision Medical Part Inspection Into Your Applications
High-precision medical part inspection is valuable to your business and its consumers. Inspection ensures that medical parts are helping patients—not hurting them—because a part failure can lead to the loss of human life.
KEYENCE’s Multisensor Measurement System is built for visual inspection of medical machined parts. The laser, optics, and probe work together to cover every aspect of visual inspection, and the integrated software supports documentation for your FDA requirements. Data transfer software can send measurement information into a database for less paperwork.
Medical part inspection is a large responsibility, but our Multisensor Measurement System makes it easier to manage. Contact us today for a free demo.
Contact us to learn more about how our advanced technology can help take your business to the next level.
Contact Us
Related Downloads

Brochure for the LM-X Series Multisensor Measurement System. Using optics, probes, and a multi-color laser to automatically measure all of your parts features.
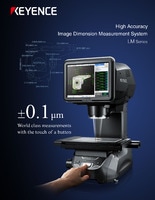
Brochure for the LM-1100 Series High Accuracy Image Dimension Measurement System. Submicron accuracy part inspection with non-contact height measurement.
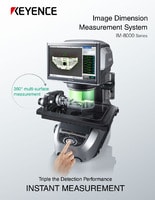
Brochure for the IM-8000 Series Image Dimension Measurement System. Accurately measure parts in seconds at the push of a button.

