Vision Systems
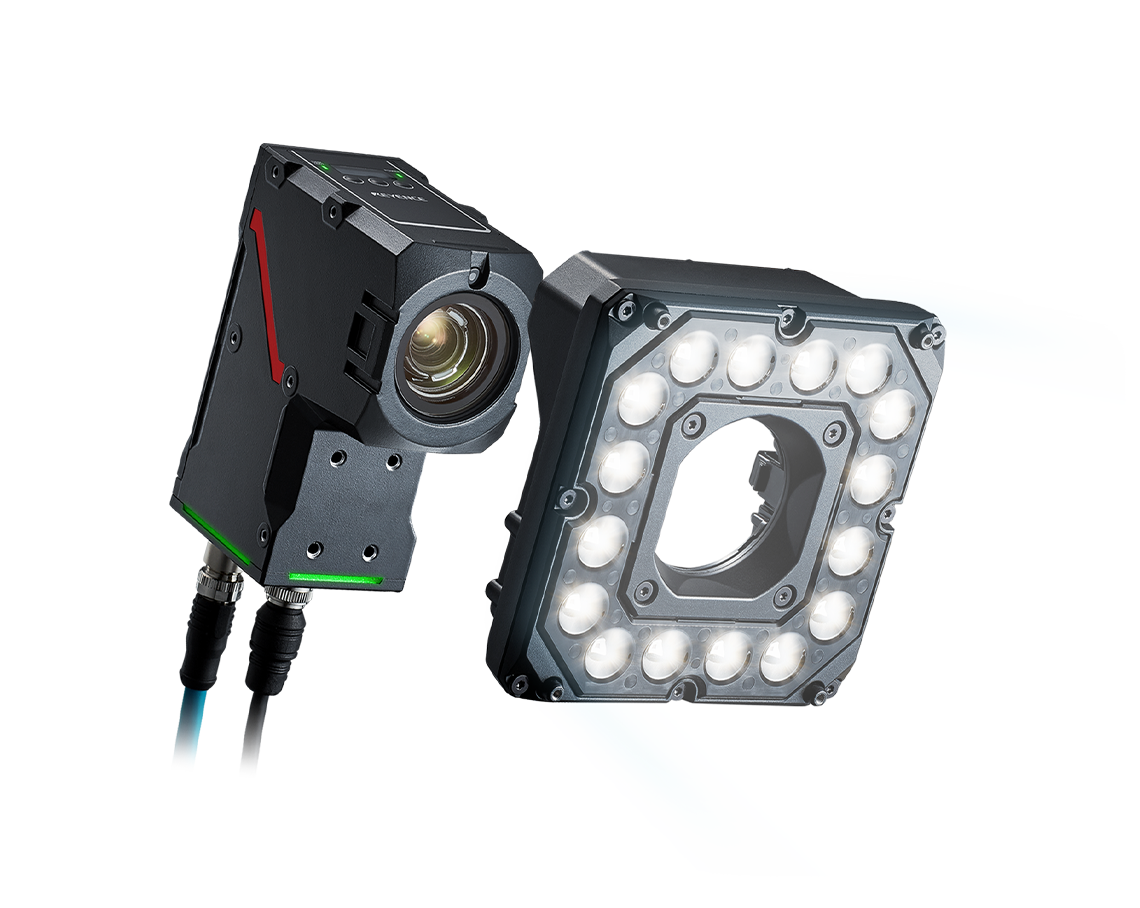
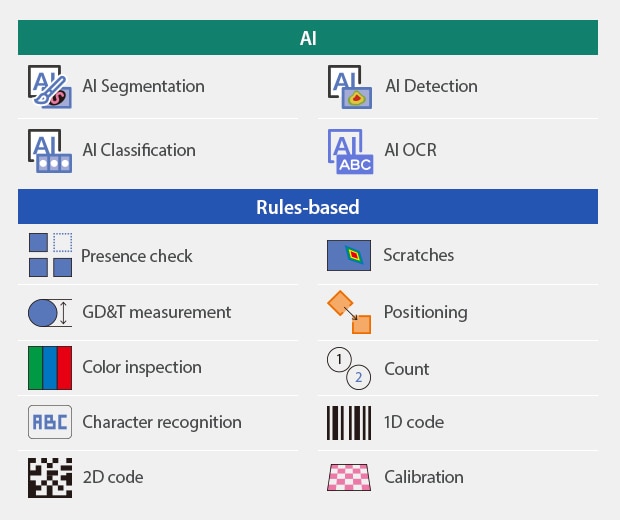
KEYENCE is constantly developing advanced, proprietary vision system technology. With such a range of innovative products, this lineup provides solutions to numerous problems that occur every day at manufacturing sites. These products include all-in-one smart cameras as well as modular high-speed controllers for 2D, line scan, and 3D cameras. When building vision inspections, AI and rule-based vision tools provide options for any application. In addition to worldclass hardware and powerful software, this lineup extends to lenses, lighting, and peripheral equipment for simple optimal image creation with all necessary equipment.
Product Lineup : Vision Systems
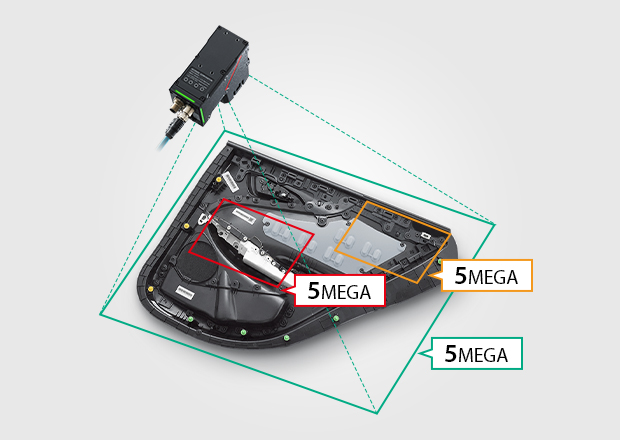
The VS Series delivers rapid machine vision solutions for a wide range of applications at any experience level. This smart camera includes the industry’s first optical zoom function to create optimal images with a single click. The simple-to-use software also enables quick setup of a variety of inspections for both AI and rule-based vision tools. With this simplified setup and ease-of-use interface, the VS Series provides optimized vision solutions as quickly as possible.
Features
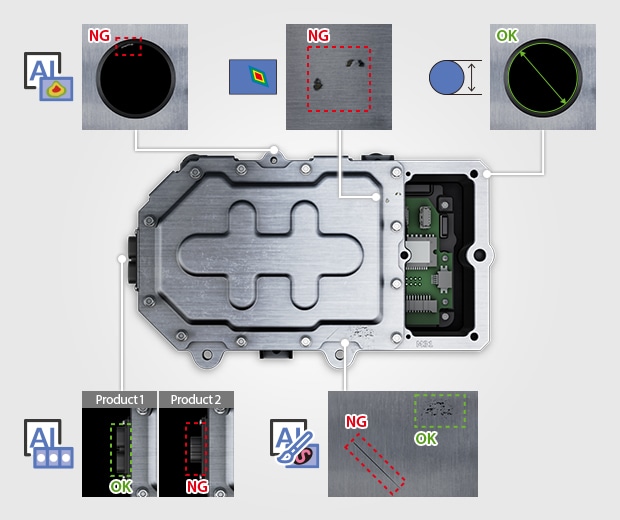
Two AI Technologies for Automation of Previously Impossible Vision Inspections
[Technology 1] Increased detection performance: Proprietary KEYENCE algorithm for smart camera-based 25-megapixel high-accuracy AI inspection
[Technology 2] Increased operational efficiency: Quick and easy startup using a general-purpose PC and only a few dozen images for learning
Best Image with a Single Click
WORLD’S FIRST Optical System with Uncompromised Flexibility with ZoomTrax
The VS Series incorporates advanced lens control technology, effectively managing 19 lenses within an IP67 smart camera. This innovation eliminates the need for manual lens selection or physical adjustments, thus empowering a single camera model to seamlessly adapt to various imaging requirements with the click of a button.
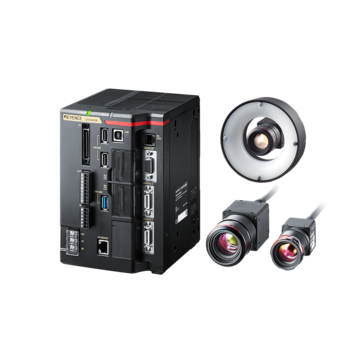
The CV-X Series is an innovative, user-friendly vision system that uses high-speed cameras to solve inspection applications across all manufacturing industries. The CV-X vision system incorporates cameras and lighting to stably image parts in-line to improve efficiency and ensure quality. Industries served include automotive, electronics, medical, food and packaging, and any process that requires inspection on high-volume parts. Common applications include defect detection and surface inspection, presence of parts and features, assembly verification, vision guided robotics, measurement, and code reading.
Features
Intuitive, Icon-Driven Vision System Allows Anyone to Setup Reliable Product Inspections
A tool catalog that makes it easy to understand which tool is best to use from the features that you wish to inspect has been adopted. This makes it possible for the users to select the best tools without comprehensively understanding all the included algorithms.
-
1TOOL CATALOG
-
2APPLICATION NAVIGATOR
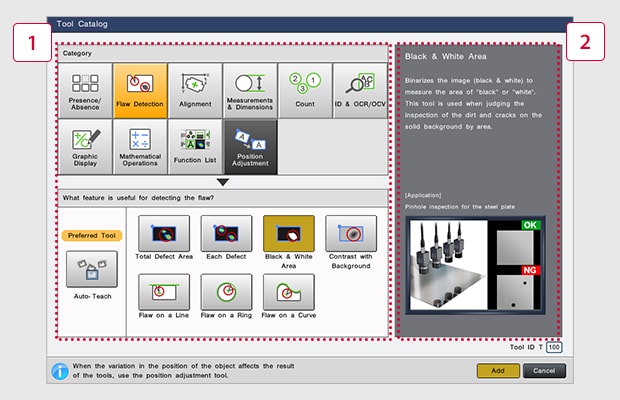
Just select the inspection category from the tool catalog.
64 and 21 Megapixel Cameras
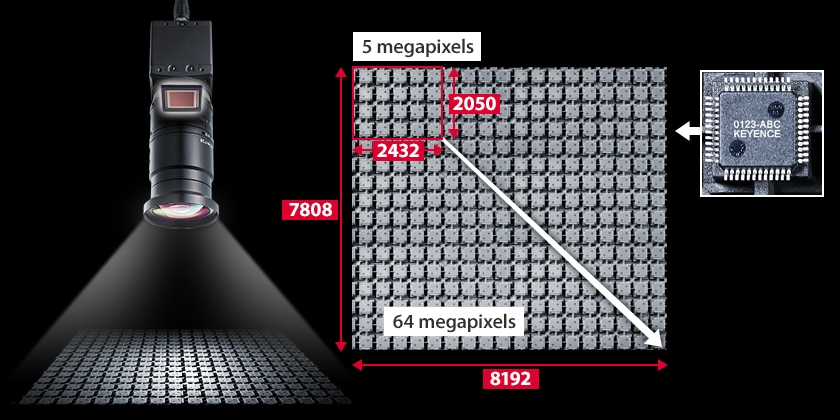
The new high-resolution 64 megapixel camera significantly improves accuracy in conventional inspections. A single image capture delivers a wider range with clear details for increased inspection stability.
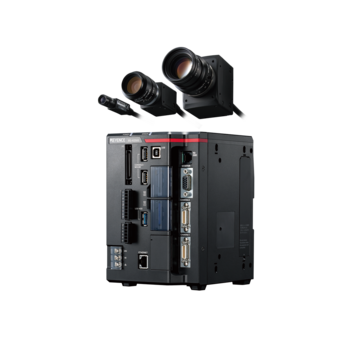
The XG-X series is a customizable vision system with advanced imaging and programming capabilities. Developed with the advanced user in mind, the XG-X gives flexibility to the user with flowchart style programming. Supporting all KEYENCE cameras including Line Scan and 3D, the XG-X vision system is the solution to challenging inspection applications as well as solving issues with part-to-part variation.
Features
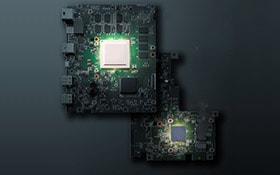
Flexibility Made Possible By the Fastest Performance in the Industry
Abundant processing power is available even with multiple camera connections, including the 64 megapixel color camera, line scan cameras, or 3D cameras.
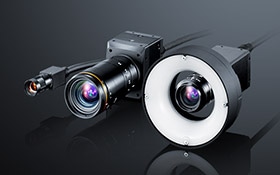
Offers the Best Solution with Many High-Resolution Camera Options
XG-X Series offers high-speed, high-resolution cameras for high-accuracy inspection, providing powerful solutions for a variety of problems that arise in manufacturing.
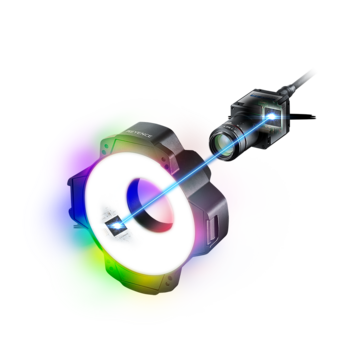
The VJ series brings the advantages of KEYENCE Vision to PC-based environments. GigE cameras, dynamic lights, and an image-processing unit combine in an easy-to-implement system that yields high contrast images for the most difficult inspections. Take advantage of KEYENCE’s unique dynamic-lighting technologies such as LumiTrax™, Multi-Spectrum and LumiTrax™ Specular Reflection. The VJ is compatible with major software such as HALCON, LabVIEW, VisionPro, OpenCV, NeuroCheck, Common Vision Blox, and Matrox Imaging Library (MIL) as well as GenICam libraries for software development.
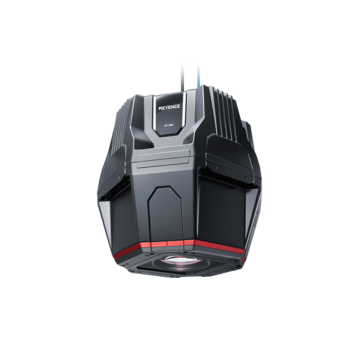
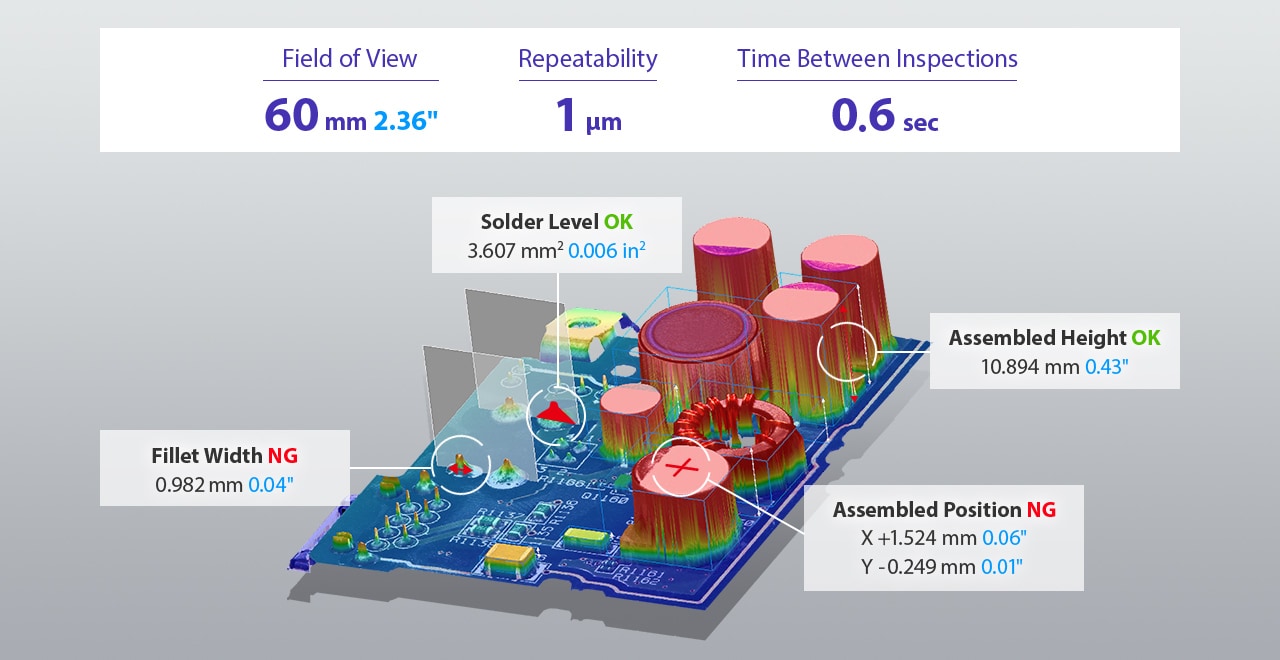
The XT series is a highly accurate 2D and 3D vision system used to perform advanced in-line inspections. The XT series includes 2 camera models with a field of view up to 60x60mm to inspect and measure parts across various manufacturing industries. With a 9+ megapixel image sensor and large diameter telecentric lens, the XT is repeatable to 0.5-1µm with +/- 10-20 µm accuracy. These high-quality images can be captured in as little as 0.6 seconds. Along with capturing accurate 3D image data, the 2D image is illuminated with RGB lighting to ensure highly accurate color imaging, which enables inspection of 2D features simultaneously.
Features
Extremely Accurate 2d & 3d Inspection and Measurement over the Entire Field of View
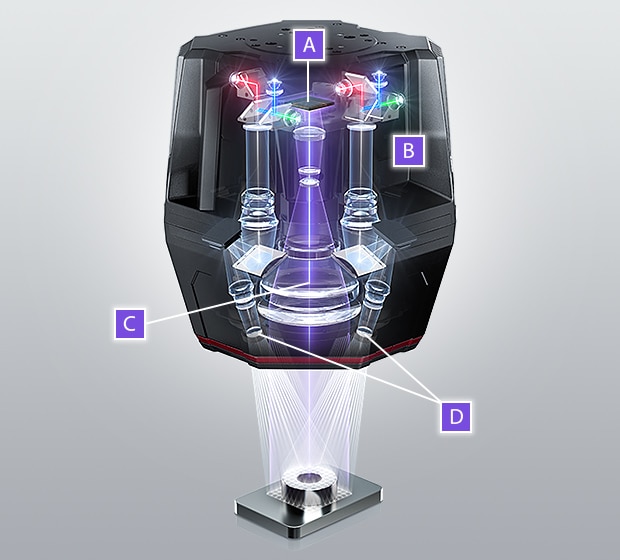
Hardware Designed for High Accuracy
[A]
9.44 megapixel CMOS image sensor for high-resolution images
[B]
In-head parallel processing that enables high-speed inline inspection
[C]
Large-diameter telecentric lens for high-accuracy full-scale inspection
[D]
4-transmitter RGB projector that imaging with no blind spots over the entire field of view
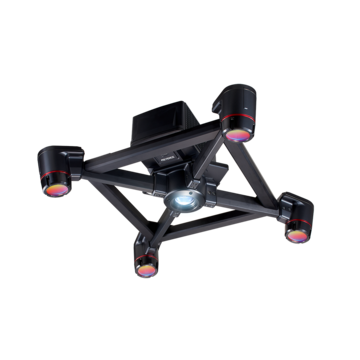
The 3D vision-guided robotics system from KEYENCE is designed for unparalleled object detection capability and ease-of-use. This system can be used in the automation of assembly, de-palletizing, and machine tending processes. To gather 3D data, the four-camera, one-projector imaging unit captures 136 total images as the high-speed projector emits multiple striped-light patterns across the target. The user follows a simple setup process, including automatic robot-camera calibration. CAD data of the part to be detected can be uploaded to further simplify the setup process. For each detected object, the Path Planning tool calculates a full path of robot motion to efficiently pick and move the part while avoiding all collisions with the bin or cell. This whole process can be simulated during the work cell design process, using the built-in Picking Simulator which allows users to test out different grippers or cell designs and simulate the picking results without installing or changing any physical hardware.
Features
Specially Designed Optical Systems and 3D Search Algorithms to Deliver High Precision and High Speed Performance
The optimum 3D image is obtained due to the 4-camera design, which can create an image free of blind spots. The newly-developed 3D search function for bin picking allows for the stable detection of targets regardless of position or orientation.
Integrated Design Comprised of Four Cameras and a Single Projector
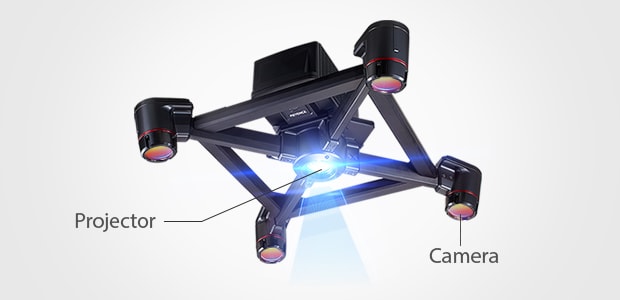
Equipped with a Newly-Developed 3D Scanning Function
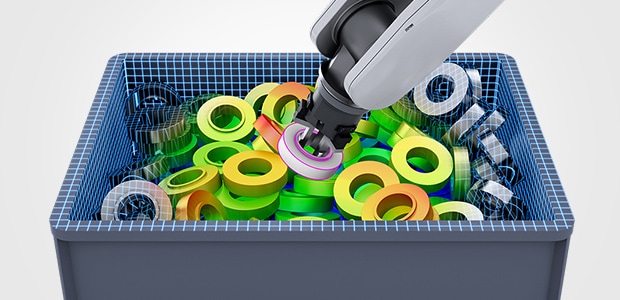
Automatically Calculate Movements for the Robot, Taking Peripheral Equipment and the Position of the Robot into Account
Path Planning Tool
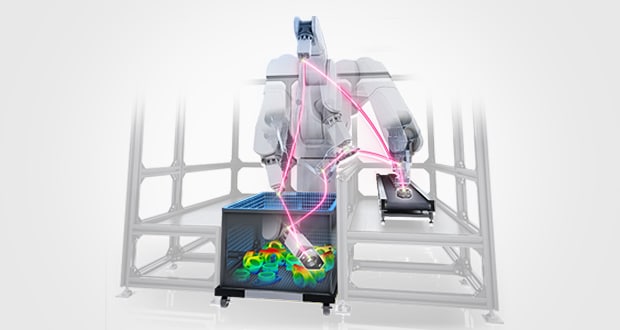
Automatic Robot Path Planning
Robot motion paths are automatically calculated to eliminate all collisions of the robot, target, and surroundings to greatly reduce robot programming time and to allow for uninterrupted bin picking operation.
Picking Simulator
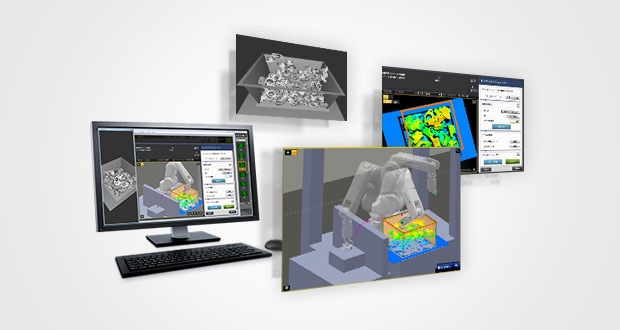
Worksite Modeling Simulation
The workcell and program can be designed in the Simulator before any physical setup is completed, which can identify potential setup problems and dramatically increase bin picking success rates.
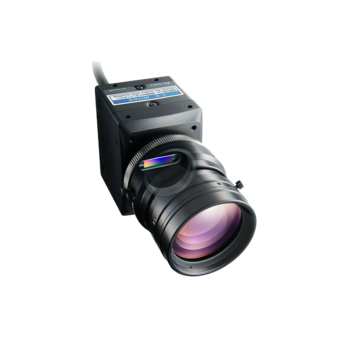
Line scan cameras are a type of camera that capture an image one line at a time, which allows high resolution imaging of large webs, sheet-type parts, and cylindrical targets with very consistent lighting. The KEYENCE Line Scan Series includes cameras with a minimum speed of 165 kHz for extremely fast captures, which allows detection of small defects such as linear scratches, dirt, and dents at high speeds. The newly developed LumiTrax™ Specular Reflection mode uses striped lighting with the line scan cameras to detect surface defects that were previously impossible with standard line scan systems or traditional machine vision cameras.
Features
Reliable Extraction of Minute Defects
Capture high-resolution images to extract defects otherwise impossible to see with a camera
IMAGES WITH DIFFERENT STRIPE PATTERNS ARE COMBINED.

AN IMAGE WITH ONLY THE DEFECTIVE AREA EXTRACTED IS CREATED.

5 Types of Images Created from Each Individual Captured Image
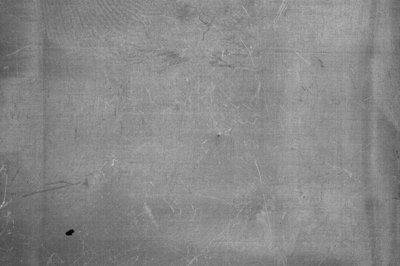
Normal image
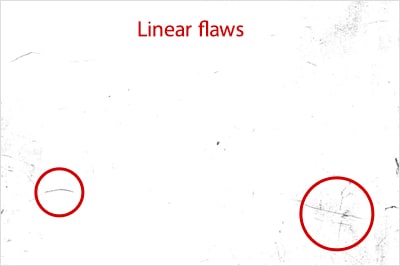
Specular reflection image
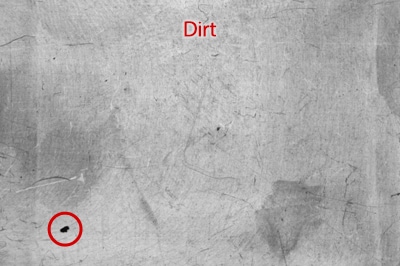
Diffuse reflection image
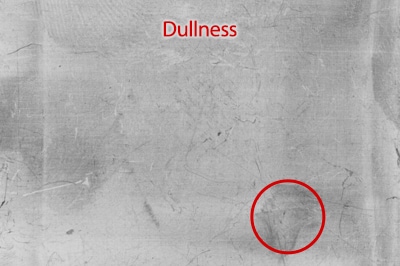
Gloss ratio image
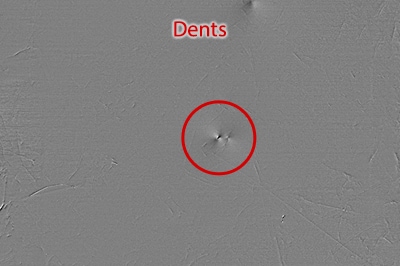
Shape image
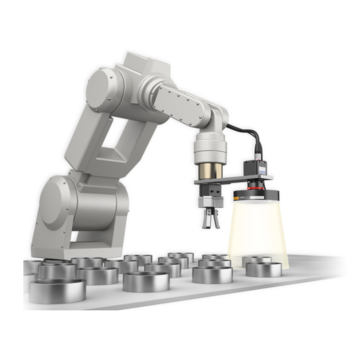
2D vision-guided robotics hardware from KEYENCE has become the global standard when equipping robots for pick & place and grip correction applications. A simplified robot vision interface paired with KEYENCE provided robot programs allows for seamless connection to all major robot manufacturers, including one-click auto-calibration. With industry leading imaging technology and highly-accurate pattern detection tools, these systems are well suited to solve any 2D guidance application.
Features
Bright, Uniform Illumination Even Over a Wide Field of View
With a wider field of view, brightness can be uneven with a noticeable difference in intensity between the center and the edges of the screen.
Advanced imaging technologies such as overdrive lighting with high intensity smart ring illumination and HDR capturing help to minimize such differences even with a wide field of view.
Before
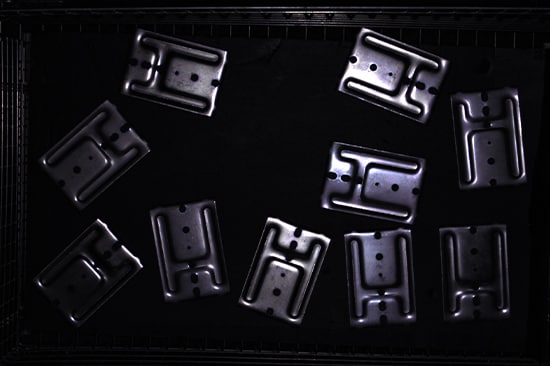
After
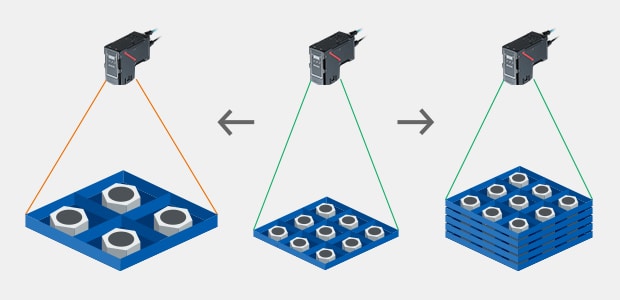
Support for Multiple Pallets and Tooling Changeover
ZoomTrax automatically changes the field of view to suit the size of the target, and automatic focusing makes it possible to handle pallets with different heights, allowing for usability in a wide variety of production environments without changing lenses.
Product Lineup : Machine Vision Accessories
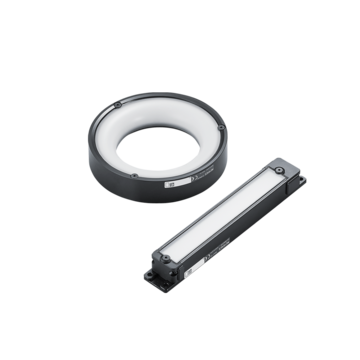
The KEYENCE LED lighting series offers a wide selection of lighting that is directly connected and controlled by KEYENCE vision systems to obtain consistent target illumination and highlight desired features. This lineup spans from traditional machine vision lighting (available in white, red, and blue) to innovative, high performance lighting techniques. The high performance lighting unlocks inspections that were previously impossible or unreliable. LumiTrax™ lighting enables surface appearance inspections with no influence from background glare and patterns. Multi-Spectrum lighting combines 8 different colors of light to differentiate subtle differences and defects. Pattern Projection lighting transforms a 2D camera into a simultaneous 2D/3D inspection system with its addition of height data.
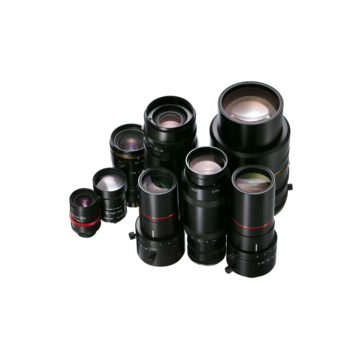
The KEYENCE lens lineup provides the flexibility to tackle all camera installation and application needs. Choose from features such as high resolution, low distortion, IP rated, telecentric, and space saving lenses to achieve desired setups and sharp images. This series also includes lens filters such as polarizing, sharp cut, and blue cut to support stable imaging by reducing ambient influences. Protective filters ensure a long service life of the lens by preventing damage from debris and maintenance.
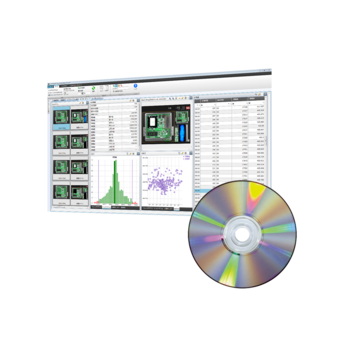
Vision Database is a dedicated software that makes it very easy for any user to analyze inspection results from KEYENCE vision systems to provide traceability and system maintenance. Conditional searching of the result data linked with actual images facilitates reporting and analysis of the vision inspection. Stored images can be retested and settings can be adjusted using the simulator software. Program modifications can be saved as back up settings and reloaded at any time on the vision controller.
A vision system combines industrial cameras, lenses, and lighting to automate visual inspections of manufactured products. KEYENCE vision systems are controller based, which enables them to be the fastest and most versatile systems on the market. Vision systems can be used in a wide range of applications, such as defect detection, assembly checks, character and code reading, and positioning for industrial robots.
Vision system principles and mechanisms
Vision systems can be customized to fit specific application needs, and each system generally consists of a camera, lights, and a controller (image processing unit). This section introduces principles of using a vision system for inspections and explains the process from the beginning of capturing an image to the end of outputting inspection results.
1. Image capturing
To capture an image, light illuminates a target, and this light is focused back through a lens onto the camera’s image sensor. The gathered image data from this capture is then transferred to the vision controller for image processing and judgement.
2. Pre-processing
Pre-processing operations remove unwanted/noisy qualities while emphasizing wanted features in the image data before analyzing the images. These operations are customized for the inspection, and examples include image filtering and color extraction.
3. Measurement processing
After an image has been pre-processed, inspections like measurement, positioning, counting, OCR/code reading, and defect detection can take place.
4. Sorting/Output
Processed image data is used to perform OK/NG judgment, record measured results, or categorize parts. Both images and data output, and communication with other devices can be established.
Diverse applications within various industries can be solved with visual inspections. Vision systems from KEYENCE provide easy to use interfaces with powerful results thanks to intuitive software and customizable hardware. Proper selection of cameras, lighting, and controllers is essential to tailor and optimize inline inspections. Additionally, inspections are customized to each application to ensure proper criteria are met.
In addition to part identification, defect detection, and verification, vision systems can be used for the growing need of vision-guided robotics. KEYENCE vision systems are designed to connect directly to all major brands of robot controllers. Provided robot programs for each manufacturer eliminates complicated robot programming for the end user. Supported brands include FANUC, Yaskawa, ABB, KUKA, Denso, Epson, Kawasaki, Mitsubishi, Staubli, Yamaha, Universal Robots, and more.
Benefits of Vision Systems
Adopting a vision system makes it possible to perform 100% inline inspection automatically for items that would otherwise need to be inspected manually. No additional costs are needed after the vision system is installed, and variation in judgment results between operators can be eliminated.
Improvements in vision system technology have enabled advanced, automated inline inspections for any level of user. It’s now possible to inspect 100% of products on high-speed manufacturing lines, so defective parts can be identified before additional processing or release. If similar inspections were done manually by operators, this process would be slower and less reliable.
Thanks to high-speed cameras and image processors, multiple images can be taken under different lighting conditions fast enough for 100% inline inspection. This makes it possible to complete multiple inspections at the same time, using variable lighting to pull out complex or low-contrast features and defects.
With conventional vision systems, hairline scratches and stains on glossy, metal surfaces may only be visible under certain lighting conditions, and these conditions often make reading characters and bar codes incredibly challenging. To combat this common issue, KEYENCE developed LumiTrax™ Specular Reflection, which uses advanced hardware to automatically combine multiple lighting conditions to extract each feature and defect with line scan imaging.
Using a vision system to act as the "eyes" of an industrial robot can significantly improve the accuracy and efficiency of advanced picking operations. The vision system detects a product’s position in the robot's coordinate system, and outputs these measurements directly to the robot controller for dynamic adjustment.
Conventional industrial robots require operators to specify coordinates manually using a teaching pendant. This manual operation can be time consuming, and accuracy may vary between operators. KEYENCE vision systems can communicate directly with many robot manufacturers, allowing for easy connection and efficient programming of the robot. This connection automates the cumbersome tasks of calibration and calculation, which stabilizes inspections and reduces the time required for integration.
Vision System Case Studies
Case studies of vision systems in the automotive industry
In the automotive industry, even a small defect can result in a serious accident. To mitigate this potential risk, strict inspection requirements ensure rigorous quality and safety standards. Vision systems allow users to meet quality specifications, increase efficiency, reduce costs, improve accuracy, and ensure traceability of component inspections. Application examples include:
- Presence detection: moisture-proofing agents on ECU's, fuse assembly checks, and
- Appearance inspections: DPF, oil seal, engine valve, piston coating, and differential gears
- Measurement/alignment checks: battery positioning, bent connector terminals, spark plug dimensions, gather positional data for robotic pick and place applications
Click the button below to learn more about specific application examples or to view more examples.
Case studies of vision systems in the food and medicine industries
In the food and medical industries, inspection standards are regularly strengthened, and traceability is required to ensure safety. A vision system makes it possible to automate inspections and easily store image/result data. Application examples include:
- Presence detection: ensure proper case count, multiple components such as straws adhered to drink cartons
- Appearance inspections: character recognition (OCR) for lot codes, proper forming and no defects in food trays, shrink wrap, blister packs, and cans
- Measurement/alignment checks: label placement, seal width and position, needle dimensions, gather positional data for robotic pick and place applications
Click the button below to learn more about specific application examples or to view more examples.
Case studies of vision systems in the electronic devices industry
As electronics such as smartphones, gaming consoles, and PC's become smaller and thinner, their semiconductors and other electronic components need to be even more compact and accurate. KEYENCE vision systems improve inspection accuracy to meet the growing needs of these precise assemblies. Additionally, 3D vision systems bring ultimate stability to these inspections to identify height changes despite low contrast in materials. Application examples include:
- Presence detection: pins, connectors, solder
- Appearance inspections: crystal oscillators, IC molds, LEDs
- Measurement/alignment checks: Connector pin co-planarity, tray orientation, PCB warpage, terminal heights
Click the button below to learn more about specific application examples or to view more examples.
Case studies of vision systems in the resin and container industries
Vision systems are used in the molding and resin industries to automate inspections and ensure defective products are not released. These inspections are necessary to detect any mishaps in processes such as injection molding, plastic forming, laminations, and product labeling. Application examples include:
- Presence detection: resin coatings, cap presence, proper labeling
- Appearance inspections: container inner surface inspection, product flash, resin scratching/chipping, foreign particles, pin holes
- Measurement/alignment checks: gasket center misalignment detection, label misalignment detection, bottle opening dimensions
Click the button below to learn more about specific application examples or to view more examples.
Vision systems rely on a combination of cameras and software to inspect objects automatically. The system would use one or more high-resolution cameras to capture the images and data of the object being inspected in real time. This image capture is also incredibly accurate, granting these systems levels of accuracy in single-digit microns.
Once the images and other data have been captured and collected, they’re relayed to a computing unit for processing by dedicated software solutions. This could potentially involve techniques like filtering, edge detection, pattern recognition, or even color analysis to identify different properties associated with an observed object and various inspection requirements. Once the image is processed, the processing software extracts relevant information, including measurement, presence or absence of different components, defects, etc. These metrics are then compared against pre-set standards or criteria, leading to subsequent decision-making based on the results of the comparison.
Decision-making could be as simple as a pass-fail outcome or as complex as the location of a specific defect. Vision Inspections systems can be further programmed to either alert the operator, trigger automated actions, or gather data for QA. What’s great about these systems is that they’re fully customizable, and they often use machine learning to adapt to new patterns for greater efficiency.
The most cutting-edge features associated with vision solutions mostly depend on the applications of such systems. Generally speaking, the integrability between vision systems and other automated machinery is perhaps the most cutting-edge feature associated with vision solutions.
The same applies to wireless connectivity implementations, especially 5G connectivity options, as these allow for quick transfers of large amounts of data, thus allowing for faster decision-making on the part of the system’s machine learning or artificial intelligence. While on the subject of AI, these particular implementations revolutionized various industries, and vision systems are no different. The improved AI implementations allow vision systems technology to better interpret the data and solve difficult applications.
These systems can be used for color and product type inspections, measurement applications, character recognition, defect detection, and more.
These systems can subsequently be used for the following:
- Connector cable color difference check
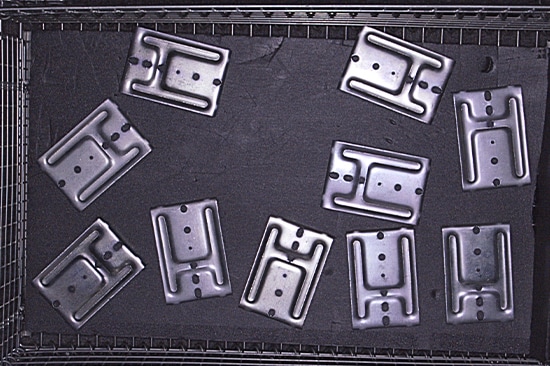
- Front/Back differentiation for pressed metal parts
- Product type differentiation of injectors
- Sealing tape presence detection
- Identifying groove detection in gear assembly processes
- Coating inspection on ECU
- Lead frame plating inspection
- Presence inspection for seasoning packets
- Screw processing presence detection
- Part mounting confirmation
- Hot melt presence detection
- Detection of remaining molded products
- Retaining ring detection
- Bottle count in cases
- Product type differentiation/2D identification of IC packages
- Chip count
- Various part inspection inside tray
- PCB solder appearance inspection
- Transmission assembly and sealant inspection
- Busbar flatness measurement
- Inspection of connector housing and pins
- Lithium-ion battery sealing plate top surface welding inspection
- Torque converter assembly inspection
- ECU PCB solder inspection
- Alignment for mounting of camera module
- Electronic PCB laser alignment
- Wafer alignment
- Battery lamination layer alignment
- ECU sealant coat inspection
- Electronic component inspection
- Appearance inspection - printed surface of batteries
- Differential gear appearance inspection
- Black rubber sheet appearance inspection
- Inspection for foreign particles in jelly after filling
- O-ring burr inspection
- Appearance inspection of battery housing
- Wound coil appearance inspection
When using a vision system, the hardware will be selected based on the application specifications and desired inspection details. This section outlines how to select the best camera, lens, lighting, controller, and any other accessories needed.
Selecting a Camera
Area cameras are categorized into four main groups: high-resolution models, high-speed models, standard models, and compact models. Each model has the ability to be color or monochrome. The correct camera is dependent on the application, which is outlined below.
(1) Determine the number of pixels necessary to meet accuracy requirements.
(2) Select the transfer speed based on the needs of the application.
(3) Select a camera size based on installation space.
(4) Select either a color or monochrome camera based on what kind of inspection is needed.
Advanced Inspections: Line scan cameras and 3D cameras
KEYENCE offers other camera solutions as well, including line scan cameras that can detect subtle or minute defects. Additionally, KEYENCE offers cameras with 3D capability that can also accomplish 2D and 3D simultaneous inspection on a single vision system.
Selecting a Lens
When choosing the right lens for the vision system, there are a variety of factors to consider. Both the field of view (FOV) and working distance (WD) of the inspection will determine the right lens focal distance for image capture. The depth of field (range of the depth of focus) and contrast are other important considerations when selecting a lens. A general selection procedure is outlined below.
(1) Determine the focal distance based on image capture size (FOV) and installation distance requirements (WD).
(2) Determine the depth of field needed based on the height and shape of the target. Targets with varying height surfaces and features will require a greater depth of field. The depth of field will increase as working distance increases, as focal length decreases, and as the aperture becomes narrower.
(3) Select a high-resolution lens or standard lens according to the necessary inspection accuracy and contrast of the target.
Selecting lighting
The lighting direction, color, and type will be determined by a combination of target characteristics, inspection needs, and the surrounding environment. Outlined below is a general lighting selection process:
(1) Decide the direction of the lighting: Depending on the material and shape of the target along with the inspection purpose, select one of the following illumination types: specular reflection, diffuse reflection, or transmission.
(2) Decide the lighting shape and size: If choosing specular reflection in Step 1, select either coaxial lighting, ring lighting, or bar lighting. If choosing diffuse reflection, select either low-angle lighting, ring lighting, or bar lighting. If choosing transmission, select either surface lighting or ring lighting.
(3) Decide the color (wavelength) of the lighting: For color camera inspections, white lighting is standard. For monochrome camera inspections, colored lighting can help enhance image contrast using complementary colors and wavelengths.
Advanced Inspections: Multi-functional, high-performance lighting units
Using new inspection algorithms with a multi-functional, high-performance lighting unit that can project light in multiple directions, multiple wavelengths, various patterns, and other ways can solve a variety of problems experienced with conventional single-function lighting. Advanced lighting can be used to meet challenging inspection requirements such as glare removal, extraction of only irregularities on a patterned background, differentiation of subtle color differences, 3D inspections, and efficient performance with multiple inspection items.
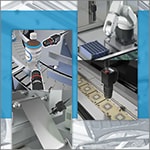
KEYENCE's Machine Vision Basics website helps create a better understanding of the hardware and software applications a vision system has in factory automation settings. There are a wide range of application examples, highlighting the vision system's capabilities, including inspection, positioning, and vision-guided robotics.
Frequently Asked Questions About Vision Systems
A color camera is generally preferred when inspecting for changes or irregularities in color. Each pixel of a color image holds RGB information, which is three times the data of a monochrome pixel. Because there is more data per pixel, extraction and differentiation is easier.
Monochrome cameras are preferred for measurement type inspections, where strong edge extraction is needed. Monochrome cameras are also commonly paired with colored lighting to aid in inspection. Examples include mitigating ambient light, causing a UV-dyed material to fluoresce, and emphasizing surface scratches.
Traditionally, colored lighting is paired with a monochrome camera, and the color (wavelength) of light will vary depending on the desired inspection. Colors which closely match a given target or are complementary to the target color can strategically manipulate and stabilize the image. To differentiate subtle differences in surface characteristics and further stabilize inspections, an intelligent lighting method called Multi-Spectrum uses eight different colors of light to gather more pixel data per pixel. Having data from multiple wavelengths creates more contrast between like-colors, and a true color image can be shown on the operation screen despite using a monochrome camera.
Yes, it is possible! KEYENCE has a 3D camera, the XT, which features a large-diameter telecentric lens for distortion-free imaging throughout the entire field of view. The 4-directional pattern projection lighting allows the XT to gather 3D data of complicated geometry without blind spots. With its large image sensor and pre-calibration and scaling, this system can maintain accuracy as low a +/- 10μm.
KEYENCE vision systems can perform appearance inspections on a variety of target surfaces. Sophisticated inspection algorithms, such as the defect tool, can detect localized changes in contrast to identify scratches and stains. Because the inspection looks for localized changes, external influences like ambient light do not disrupt the inspection. In addition to robust inspection tools, 24 image enhancement filters are available to reduce the effects of uneven lighting, rough surfaces, or variation among products. Two noteworthy filters are the scratch defect extraction, which enhances linear flaws on rough targets, and the shading correction, which emphasizes sharp changes in contrast while eliminating gradual ones.
Stable detection of burrs and chips relies on the accuracy of edge extraction. KEYENCE vision systems include profile defect tools, which precisely extract lines, circles, ovals, and free form curves to detect any sections which stray too far from the expected shape. The user can specify thresholds to control the size and severity of considered flaws.
All KEYENCE vision systems include a wide range of measurement and dimension tools, which make finding intersections, midpoints, and distances very simple. For example, simply click anywhere along an edge to auto-extract that line, or refer to line results from a tool which has already been configured. This intuitive interface allows users to easily create complex inspection settings while combining several measurements and dimensions.
Vision systems are used for a variety of applications, including quality control and inspection in manufacturing, automated guidance in robotics, and even security surveillance.
They utilize advanced vision systems technology such as image processing algorithms and artificial intelligence to accurately identify and analyze images or objects. With their high-speed capabilities and precision, vision systems have become an essential tool in many industries, providing reliable and efficient solutions for a wide range of tasks.
![[Easy 3 Step Guide] Selecting Your First Vision System](/img/asset/AS_107497_L.jpg)
This guide can help users choose from the wide selection of cameras, lenses, lighting, and controllers to find the right vision system. Discover selection tips for each device through easy-to-understand explanations with diagrams, sample images, and inspection examples.
![The Latest Vision System Applications [Transportation Industry]](/img/asset/AS_108165_L.jpg)
Browse case studies of vision systems being used in the automotive industry. This booklet introduces the best tools—from vision sensors to the latest 3D cameras—to use for a variety of targets, processes, and inspection items.
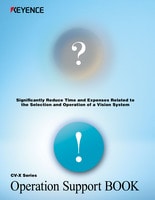
Learn how stable inspection with a vision system can help with daily system management and maintenance, including creating settings and enforcing control methods. This guide also provides an easy-to-understand overview of how to expand production lines, incorporate overseas operations, and troubleshoot problems.
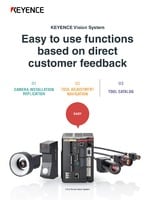
KEYENCE vision systems were designed with worker's needs in mind, offering ease of use with intuitive interface. This booklet provides examples of powerful utilities offered, like configurable operation screens and camera installation replication, as well as a vast tool catalog.
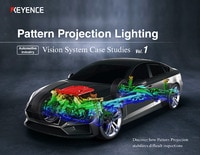
Introducing high-performance pattern projection lighting capable of advanced image inspection in both 2D and 3D simultaneously. Browse detailed examples of systems designed to meet a variety of inspection condition needs not possible with conventional methods, as well as automotive industry applications involving a wide range of products, from metal components to electronic devices.

