Multisensor Measurement System
Multisensor Measurement System vs Optical Comparator
Measurement and inspection are fundamental aspects of every industry. These two processes ensure components fit together and function correctly.
There are a range of tools available to conduct measurements. Among these, an optical comparator is one common and proven method. Optical comparators rely on optics for 2D inspections of a part’s contour in industries like aerospace, automotive, medical device, and plastics.
However, older doesn’t mean better. A new measurement system-type, called a multisensor measurement system, has entered the scene. Instead of using only optics like an optical comparator, a multisensor measurement system uses sensors like touch, optics, and lasers. These systems reveal the inflexibility in the optical comparator process and how that affects reliability.
We’ll explore how multisensor measurement systems—specifically for dimensional analysis—are outshining traditional optical comparator’s manual and 2D measurement.
What are Optical Comparators?
An optical comparator is a traditional measurement device utilizing a stage, lens, and light. Optical comparators measure 2D dimensions, one at a time, on 3D parts.
To use it, a light is cast horizontally or vertically on a part to reveal a shadow. Technicians then use a screen projection to measure the shadow and its relation to the actual part.
Optical Comparator Drawbacks
Optical comparators are a cornerstone of non-contact metrology, but have their limitations.
Firstly, an optical comparator’s 2D-only capabilities mean it takes extra time to measure each 2D side instead of measuring the whole part at once. In addition, blind features are almost impossible to measure due to issues with illumination. Optical comparators are essentially limited to projecting the profile of a part, limiting the amount of inspection it can actually do.
Optical comparators also heavily rely on manual adjustments. Although technicians are trained before use, this is a recipe for human error. This possible adjustment error is risky for strict tolerances in industries such as aerospace, automotive, and medical devices.
When a part is successfully measured, the inspection report from an optical comparator may lack complete information. Measurement by an optical comparator may solely be for comparison, meaning that dimensions are not reported. Therefore, the traceability database only lists if the part passed the inspection. The simple “passing score” doesn’t offer dimensional information that technicians could use to find patterns of defects or reverse engineer a part.
We’re here to provide you with more details.
Reach out today!

What are Multisensor Measurement Systems?
A multisensor measurement system applies at least two sensors to diversify its measurement capabilities for 3D parts. These sensors include touch probes, vision systems, and lasers.
These measurement systems are newer to the metrology world. However, leveraging multiple sensors in one machine improves accuracy, convenience, and efficiency.
Discover more about this product.
Click here to book your demo.

Difference Between Optical Comparator and Multisensor Measurement Machine
A multisensor measurement machine bases its capabilities off of the fundamental principles of an optical comparator. However instead of only relying on optics, the multisensor device includes a probe, laser, and camera for measurements.
The additional sensors in multisensor measurement systems improve accuracy because there are more sensors to obtain data from. Additionally, the sensors allow it to measure an entire form at once, instead of just the profile, like an optical comparator. Multisensor measurement systems are also automated—therefore more efficient—than an optical comparator.
Get detailed information on our products by downloading our catalog.
View Catalog

How to Select the Best Vision Measurement System
Choosing a vision measurement system—also known as an automated comparator or optical CMM-–requires you to take inventory of your technician skill, parts, and industry.
Here are some of the questions you’ll need to consider:
- What are your industry’s tolerances?
- How skilled are your technicians?
- How quickly do they pick up new tools?
- How diverse in size and shape are your parts?
This information equips you to choose an automated comparator with an appropriate lens type, illumination type, user interface, software, and precision.
Lens Type
Since vision measurement systems rely on cameras to take measurements, it’s no surprise that lens type is a consideration when purchasing. Selecting a high-resolution lens ensures you capture small details and clean lines for high-accuracy inspections.
Illumination Type
Illumination color choices and angles affect how well the lens sees the measurement location and part. For example, blue illumination reveals copper patterns better than white illumination. High-positioned light produces even illumination, and low-position can work to emphasize edges.
If you manufacture a diverse batch, choosing an optical measurement system with multiple illumination options ensures you always have compatibility with different shapes, colors, sizes, and heights.
User Interface
Purchasing a new tool requires allocating time for training. Therefore, select a measuring device that aligns with your technician’s skill levels and training time. If the automated comparator or multisensor measurement device includes software, make sure it’s intuitive and human-error-proof.
Software
Software goes hand in hand with user interface because of features like on screen tutorials and instructional animations. It also assists with efficiency and precision in inspections.
For example, KEYENCE’s visual inspection systems have an autofocus function that quickens measuring time while also preventing human positioning errors. Other software functions are 3D image display and color visualization. Both of these functions support technicians in getting the best view of the parts they’re measuring.
Precision
Lens type, illumination, user interface, and software all contribute to the precision of vision measurement systems. Still, always double-check before purchasing that a system’s repeatability and accuracy fit your industry’s standards.
Discover more about this product.
Click here to book your demo.

Implementing Vision Measurement Systems in Your Process
No matter your industry, measurement is the backbone of it all. In the past, the conventional optical comparator was good enough. But now, an automated optical comparator or multisensor measurement system is the answer for upgrading your inspection process.
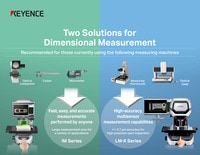
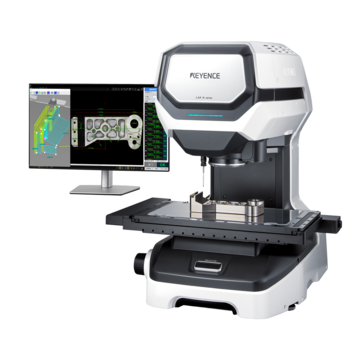
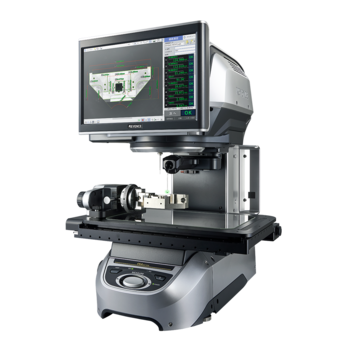
A multisensor measurement system combines touch, optics, and a laser into one efficient and precise device. If you’re still using an optical comparator and if the tool that makes the most sense for your applications is just a modern upgrade, KEYENCE’s automated optical comparator, the IM Series Instant Measurement System, is ideal. However, if more capabilities are needed, your natural switch is to KEYENCE’s optical CMM, the LM-X optical CMM. Because of the high-quality lens and illumination choices, the LM-X measures parts even with stepped angles, holes, height differences, and touch sensitivity.
Implementing the LM-X means pressing a button and measuring thousands of dimensions simultaneously instead of measuring just one part at a time. This top-tier repeatability and quick inspection process decreases your cost per inspection while keeping you in line with industry standards.
Ready to see the LM-X multisensor measurement system in action? Contact us today for a demo.
Contact us to learn more about how our advanced technology can help take your business to the next level.
Contact Us
Related Downloads

Brochure for the LM-X Series Multisensor Measurement System. Using optics, probes, and a multi-color laser to automatically measure all of your parts features.
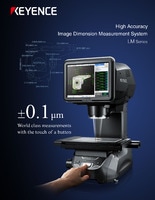
Brochure for the LM-1100 Series High Accuracy Image Dimension Measurement System. Submicron accuracy part inspection with non-contact height measurement.
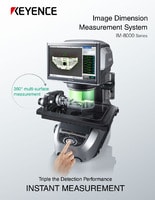
Brochure for the IM-8000 Series Image Dimension Measurement System. Accurately measure parts in seconds at the push of a button.

