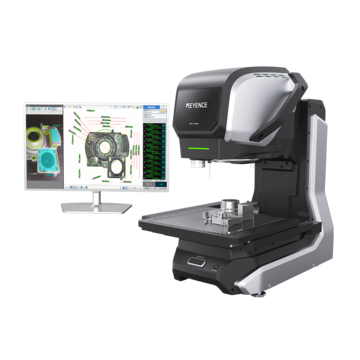
Optical Comparator (Profile Projector)
Easily Incorporate Batch Inspections on the Process Line
Inspections are a necessary part of the production process and valuable to balance efficiency, effectiveness, and cost. However, it can be difficult to avoid getting caught in a tedious and inefficient inspection cycle when manufacturing large lots. Incorporating batch inspection into your process is an effective way to ensure you are meeting industry standards and finding defects before your parts hit the market.
The batch inspection method inspects the perfect sample size to determine your threshold for error. The process is used in tight-tolerance industries like aerospace and medical devices, where identifying a defect is critical. Batch inspection prevents recalls and life-threatening defects by catching problems during your process line.
In the following, we will help you implement a batch inspection into your process line for more cost-effective and reliable inspections.
What is a Process Line?
A process line is a term for the production process, including machining, assembly, and manufacturing.
We’re here to provide you with more details.
Reach out today!

What is In-Process Line Inspection?
In-process line inspection is a part inspection that occurs during machining, assembly, or manufacturing. In-process line inspection differs from final inspection, which is a product inspection that occurs at the end of the manufacturing process, and just before a product leaves the manufacturing facility.
In-process line inspection finds defects or nonconformities along the supply chain. It spots problematic patterns, prevents recalls, and manages waste.
Contact us to learn more about how our advanced technology can help take your business to the next level.
Contact Us
What is a Batch Inspection?
Batch inspection is an in-process line inspection strategy that uses statistical sampling to determine the acceptability of an entire batch. This sampling method should not be confused with batch-by-batch inspection, which inspects every part in a lot.
Batch inspection is an efficient and effective way to keep quality assurance without inspecting every single part. There are three problems that batch inspection looks for: manufacturing, nonconformity, and storage issues.
A manufacturing problem refers to a defect caused by assembly or machining. For instance, a cracked part.
A nonconformity issue refers to a part that is unlike the rest of the batch and, therefore, defective. For example, a nonconformity issue is a part with dimensions that don’t match the rest of the batch.
A storage issue refers to a defect from inadequate storage environments. For example, a part that has formed corrosion or oxidation.
AQL Batch Inspection Process
Choosing the size of the inspection batch is not a random process, nor is it the same for every industry, plant, or business. Instead, anyone using the batch inspection process will determine the sample with the acceptable quality level (AQL) standard.
The AQL is a statistical measurement that concludes the acceptable number of defective parts in a sample for the part inspection to pass. Additionally, it uses scales to determine the level of defect: critical, major, or minor. The AQL is calculated by taking into account the lot size, inspection level, sample size, and allowable defects.
Discover more about this product.
Click here to book your demo.

What Inspection Systems help with Batch Inspections?
Batch inspections evaluate visual and dimensional aspects, so the best part inspection systems are multisensor measurement systems or optical measurement devices.
Optical inspection systems finds physical and dimensional issues by using a light and camera. These systems are compatible with standard part inspections.
On the other hand, a multisensor measurement system uses a laser, probe, and camera for part inspection. The extra sensors mean that there's a better ability to measure GD&T features, non-contact height, and complex shapes with height differences and curves.
We’re here to provide you with more details.
Reach out today!

Batch Inspections Applications & Industries
Although AQL is a standard, each industry aligns itself with it depending on regulations and tolerances. The medical device and aerospace industry, known for tight tolerances, implements AQL with strictness and intolerance for defects.
Medical Device Industry Batch Inspection
The medical device industry is highly regulated because an error may result in death. For the AQL critical, major, and minor scale, the risks are as follows:
- Critical defects are defects that are life-threatening or cause death.
- Major defects are defects that may result in an injury requiring medical intervention.
- Minor defects are defects that may result in discomfort, inconvenience, or injury that does not require medical intervention.
In the medical device industry, the threat of a defect is severe regardless of the level of defect. That being said, that does not necessarily mean these sample batches are different per se, but it does mean that the amount of acceptable defects is significantly lower. Other industries may accept one or two defects in a sample, whereas the medical device industry may throw out an entire lot because of one defect.
Aerospace Industry Batch Inspection
The aerospace industry is also a tightly regulated industry with strict rules for batch inspections because of the life-threatening issues. There are two categories of critical problems: mission-critical and safety-critical.
- Mission-critical problems cause a system to not complete its goal.
- Safety critical problems cause injury, loss of life, or environmental damage.
Defects are more than just an inconvenience in the aerospace industry. A faulty part prevents goal completion and causes damage that may be fatal. Also, aircrafts are inspected throughout their lifetime for constant monitoring and safety precautions. Because of these scrutinized and life-long inspections, the aerospace industry also uses a strict AQL part inspection process.
Discover more about this product.
Click here to book your demo.

Incorporating Batch Inspections Into Your Applications
Batch inspections are a cost-effective, efficient, and statistically sound method for process line part inspection. Implementing a batch inspection process will help to keep you aware of industry standards and your tolerance for defects.
KEYENCE supplies manufacturers with multisensor measurement systems that optimize the batch inspection process. The IM-X multisensor measurement makes it possible to inspect your whole batch sample by just pressing a button. The IM-X uses autofocus, a multi-color laser, a 20-megapixel CMOS camera lens, and a measuring probe for ultimate batch inspection.
Ready to see it in action? Contact us today for a free demo.
Get detailed information on our products by downloading our catalog.
View Catalog


