Digital Microscopes
Optimizing the Observation of Screw Defects (Dents, Scratches, Cracks, and Curvature)
Screws are used to mechanically join parts together in nearly all industrial products. High screw quality and reliability are required not only in the automotive and aerospace industries—where safety is affected by screw accuracy and durability—but also in many products from construction to electronic components.
This section reviews basic screw knowledge and includes examples of how our 4K digital microscope can improve screw defect observation and measurement for research and development and quality assurance.
Screw Basics
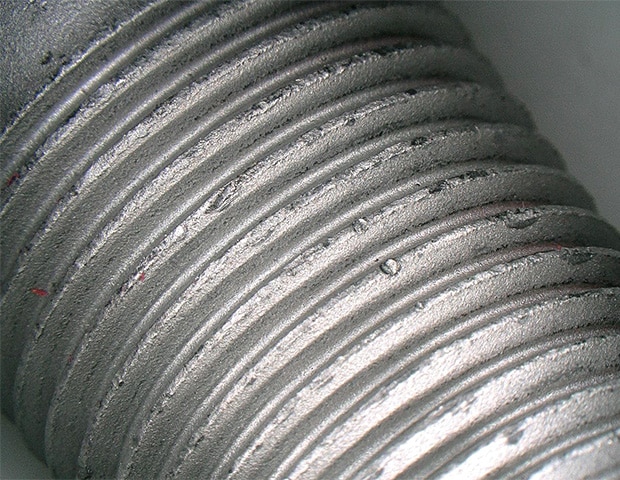
A screw is a securing part with a spiral groove along the side of its cylindrical shaft. Generally, the term screw refers to small screws used alone and the term bolt refers to screws used in combination with nuts. However, screws come in various sizes, materials, and conform to different standards. For example, wood screws have pointed tips and are used in woodworking. Basic information such as the names, dimensions, and standards for general screws is described below.
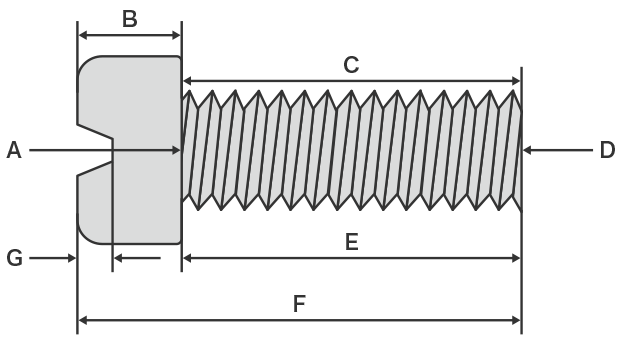
A: Neck (seating surface), B: Head, C: Threads, D: Tip, E: Length under head, F: Total length, G: Drive depth
Names and dimensions of screw parts
The names of the typical parts of a (male) screw are shown in the following figure.
Generally, the length of a male screw is called its nominal length and refers to (E in the figure above) the length under the head (B in the figure above). However, this definition varies depending on the screw type and the shape of the head. For example, the total length (F in the figure) is the nominal length in the case of countersunk screws, whose heads are flush with the material when fully screwed in.
If there is a non-threaded part adjacent to the head, this part is referred to as the shank. The shank includes the part of the thread having incomplete peaks and valleys that form during processing.
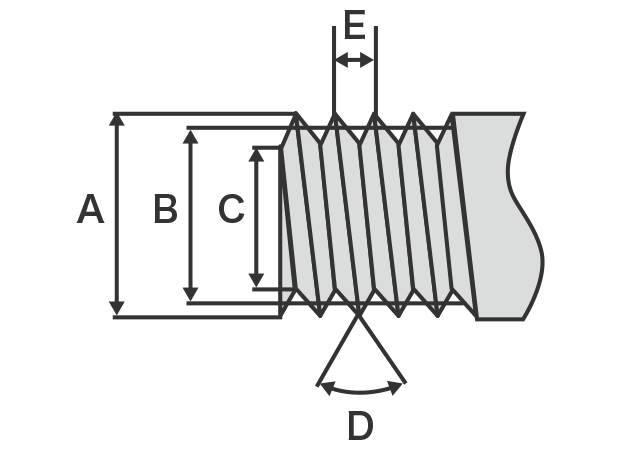
Next, typical thread dimensions (for male and female screws) are shown in the following figures and are explained.
Male screw
Female screw
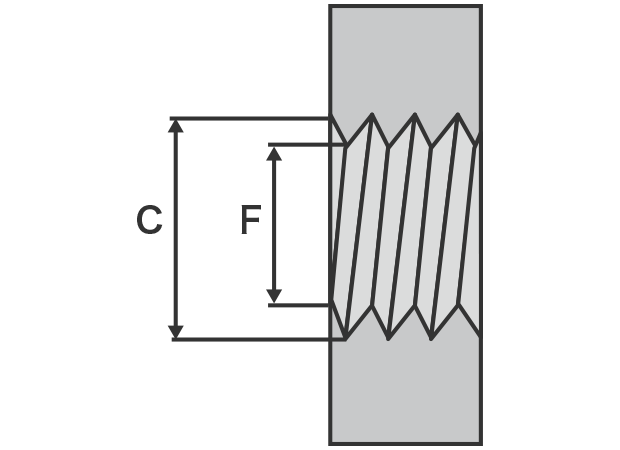
A:Crest diameter: Diameter between threads of a male screw. This is the nominal diameter that indicates the thickness of the screw.
B:Effective diameter: Diameter of the circle that makes the thread width and the groove width the same.
C:Root diameter: Diameter from the base of one valley to the base of the next valley for a male/female screw.
D:Thread angle: Angle that opens from the peak of the thread to its surrounding valleys.
E:Pitch: Distance between neighboring thread peaks.
F:Crest diameter: Diameter between threads of a female screw.
Screw standards
There are many standards used with screws, leading to differences in dimensions, definitions, and terminology.
- Metric threads
Refers to screws having a thread angle of 60° and whose nominal dimensions and thread pitch are expressed in millimeters. These screws are classified into coarse pitch threads and fine pitch threads according to the different thread pitches.
They are expressed as “the screw’s nominal diameter × its pitch.” The maximum thread diameter (in millimeters) is listed behind the letter M. For example, M10 indicates the screw has a nominal diameter of 10 mm (0.39"). Coarse pitch threads are standard. If a screw has fine pitch threads, with small spacing between threads, it is expressed as “MXX × the pitch.” - Unified threads
Refers to screws having a thread angle of 60°, the same as metric threads, but whose nominal dimensions are expressed in inches. The thread pitch indicates the number of threads within one inch. The unified threads standard is sometimes referred to as inch threads or American threads and is used in, for example, the aerospace industry. Unified threads are available with coarse pitch (UNC), which is the normal size, and with fine pitch (UNF).
“Screw crest diameter (screw number) - number of threads per inch, screw type (UNC or UNF)” is the notation used. For example, “1/4-20UNC” indicates a unified thread screw with coarse pitch having a crest diameter of 1/4 inch and 20 threads per inch.
Screw materials and characteristics
Just as there are diverse shapes and standards for heads and threads depending on the screw application, the materials used also vary. The types and characteristics of typical screw materials are explained below.
Steel
The main steel materials used in screws are listed below.
- Carbon steel: This is the most common iron/steel material used in screws. S45C (which has a carbon content of approximately 0.45%) is a hard and strong carbon iron/steel material for mechanical structures and is often used in screws.
- Alloy steel: Formed by adding molybdenum (Mo) or chromium (Cr), this material is used in bolts and other products where strength is required.
- Stainless steel: Generally having excellent corrosion resistance and mechanical properties, this material is classified according to its structures that change under heat treatment such as Cr (Cr martensitic/18Cr ferritic) and Cr-Ni (18-8 austenitic). Austenitic stainless steel is commonly used in screws.
Copper/copper alloy
Although this material has lower mechanical strength than other metal materials, it is easy to mold and has excellent electrical and thermal conductivity, ductility, and corrosion resistance. It is commonly used for the securing screws of terminals. Pure copper is classified according to how much oxygen it contains (according to the purity of the copper) into tough pitch copper (with a purity of 99.5%), deoxidized copper (tough pitch copper that has undergone hydrogen embrittlement), and oxygen-free copper (with a high purity of 99.995%). Due to cost, tough pitch copper is most often used as the material for screws.
Aluminum/aluminum alloy
Aluminum screws can be made to be approximately 1/3 lighter than steel ones. Aluminum also has excellent corrosion resistance and thermal conductivity and is relatively easy to recycle, which gives it the advantage of being environmentally friendly. On the other hand, the problem with aluminum is that it is relatively weak compared to steel. Aluminum screws can be subjected to heat treatment to strengthen their surfaces and to improve the strength of this material, which makes it possible to obtain the characteristic advantages of aluminum while overcoming its disadvantages.
Titanium/titanium alloy
Titanium screws are approximately 60% lighter than steel ones while having excellent resistance against corrosion and heat and approximately the same strength as carbon steel. On the other hand, titanium is difficult to process and is very expensive. Titanium (pure titanium) and titanium alloy have different properties. Their main applications are listed below.
- Titanium: Has high corrosion resistance and is not toxic to the human body. Its excellent biocompatibility leads it to be used in medical bolts and similar applications.
- Titanium alloy: Having a high strength to weight ratio, this material is used in the aerospace industry. Because it is difficult to process, the unit price of titanium alloy screws is high.
Magnesium/magnesium alloy
The weight of magnesium is approximately 1/4 that of steel and approximately 2/3 that of aluminum, which makes it extremely lightweight as a metal material used in screws. In addition to being lightweight, magnesium alloy has a high specific strength; excellent electromagnetic shielding, heat dissipation, and vibration absorption; and provides the additional advantage of electrolytic corrosion not occurring when fastened to a case made of the same material. Consequently, it is used in a wide range of fields including automobiles, aircraft, and electrical products. On the other hand, some of its poor properties include low corrosion resistance and the fact that it is difficult to process, so consideration must be given to the usage environment and to surface processing that can compensate for this material’s disadvantages.
Plastic
Although it has low strength, plastic is lightweight and easy to mold. Different types of plastic also provide various properties such as corrosion resistance and chemical resistance. Screws can be made out of diverse types of plastic to match the application. For example, PP (polypropylene) has low specific gravity and is resistant to hydrolytic degradation and POM (polyacetal) has well-balanced mechanical properties and excellent chemical resistance.
Get detailed information on our products by downloading our catalog.
View Catalog

Examples of Improving Screw Defect Observation and Measurement
Most screws, bolts, nuts, and washers are three-dimensional metal objects. Therefore, in most cases, it's difficult to get the entire part in focus and determine optimal lighting conditions due to the glossiness of the target or low contrast with the background. Also, with conventional systems, it is very difficult to measure three-dimensional shapes with high accuracy and repeatability between operators.
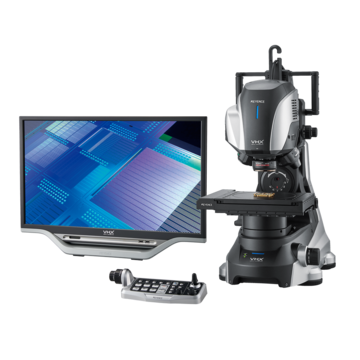
KEYENCE’s VHX Series digital microscope solves these issues and improves image quality while capturing accurate and repeatable measurements. By combining a high-resolution lens, 4K CMOS image sensor, and easy-to-use interface, even novice users are able to quickly capture fully-focused 4K images and accurate 2D and 3D measurements.
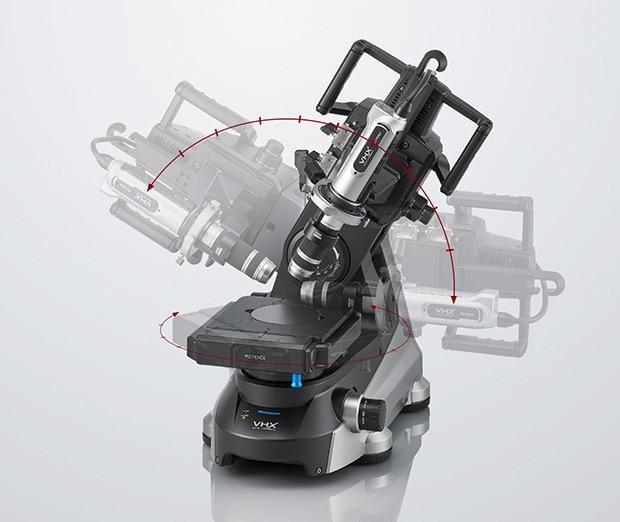
Tilted observation of threads
The free-angle observation system of the VHX Series digital microscope can be used to clearly observe microscopic dents and scratches from any angle without changing the position of the screw at low and high magnifications. The depth of field is approximately 20 times larger than that of a conventional microscope, which allows for quick defect observation with images showing the entire target in focus, eliminating the hassle of focus adjustment even for three-dimensional targets.
Tilted observation of dents on threads with the VHX Series 4K digital microscope
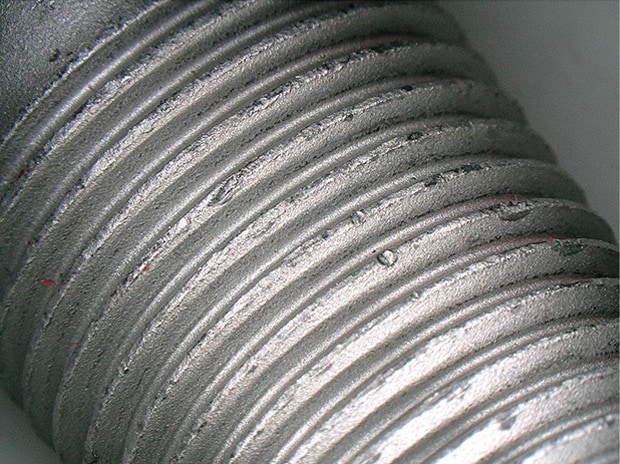
Low magnification and ring illumination (20x)
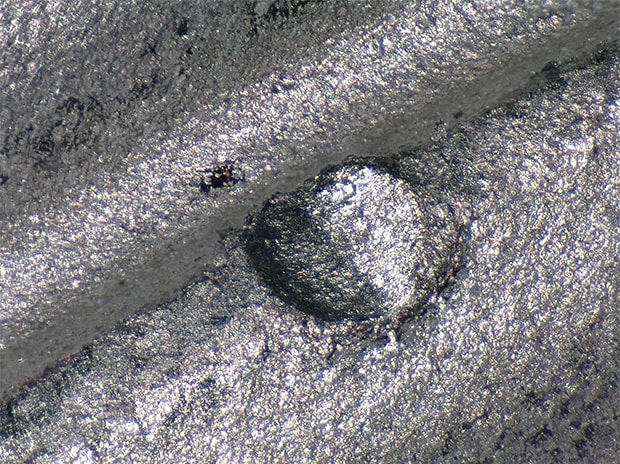
High magnification and ring illumination (200x)
Easily Observe depth and height information
With Optical Shadow Effect Mode, the VHX Series digital microscope easily acquires high-contrast images that rival a scanning electron microscope (SEM) while eliminating the hassle of requiring a vacuum. It is now possible to observe subtle surface irregularities on metal, which normally were difficult to observe due to their low contrast.
The target’s color information can be overlaid on the image taken using Optical Shadow Effect Mode, enabling simultaneous representation of the uneven surface and color information to easily visualize depth and height.
With the VHX Series, 2D and 3D measurements can be made directly from high-resolution 4K images. The profile information of the desired location can also be acquired during 3D measurement. All images and data can be automatically output into a report.
Visualizing nut curvature with the VHX Series 4K digital microscope
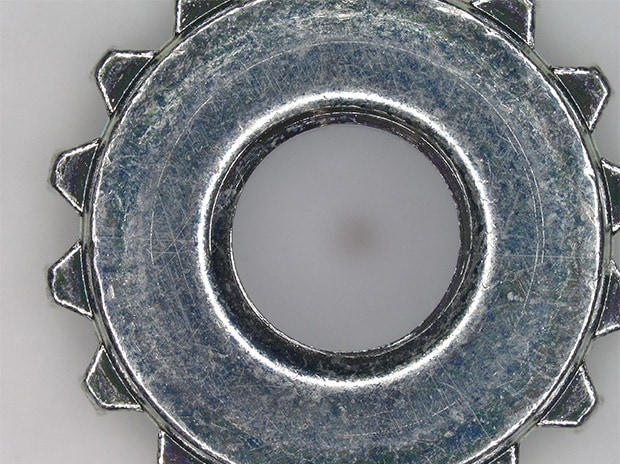
Ring illumination (20x)
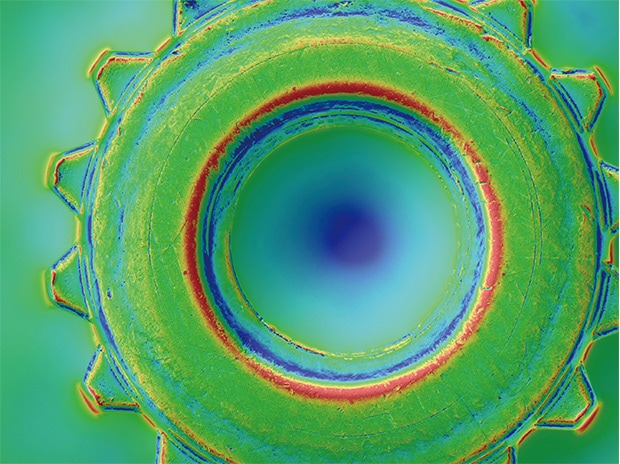
Ring illumination + Optical Shadow Effect Mode color map image (20x)
We’re here to provide you with more details.
Reach out today!

The Microscope Revolutionizing Screw Observation and Analysis
The VHX Series digital microscope not only captures high-resolution images, but also revolutionizes observation and analysis through advanced features and functions.
The free-angle observation system allows for easy field-of-view alignment, rotation, and oblique axis motion. Eucentric design ensures that the target stays centered in the field of view, even if the lens is tilted or rotated. Smooth tilted observation of three-dimensional and microscopic targets such as screw defects is now possible.
Conventionally difficult tasks, such as the observation and visualization of subtle scratches and microscopic surface irregularities, can now be performed quickly and easily by using Optical Shadow Effect Mode.
The VHX Series not only captures 4K images and accurate data for research and development and quality assurance but also reduces inspection time and eliminates overspecialization by making operations easier. For additional product info or inquiries, click the buttons below.
Get detailed information on our products by downloading our catalog.
View Catalog