Digital Microscopes
Glass Defect Analysis and Fractography
Glass is used in various industries for a wide range of applications; including windows, smartphones, optical lenses, PCBs, fibers, and other components that are invisible to most people in their daily lives.
Glass has low elasticity and fractures easily, so quality inspections of glass products are performed frequently and with great care. However, the observation of small scratches on highly glossy surfaces requires highly talented inspectors and advanced inspection devices.
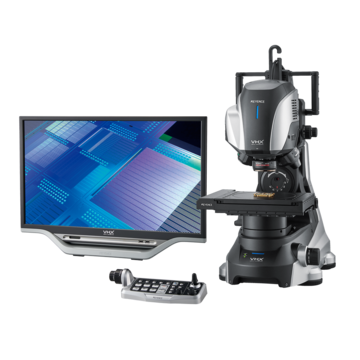
This section introduces the basic knowledge of glass fractography and examples of using the VHX Series, KEYENCE's latest 4K Digital Microscope, to solve the problems in defect analysis.
Glass Fractography
Compared to materials such as steel and aluminum, glass breaks without deforming under the application of tensile force greater than or equal to its mechanical strength. This phenomenon occurs because glass is a brittle material with poor toughness and elasticity. It does not deform under the application of force; nearly all of the applied force is used in fracturing the glass.
The same can be said for scratches caused by collisions. Glass does not dent or deform, so it scratches easily, and such scratches can quickly lead to the glass fracturing. Even for glass that has not been subjected to collisions or friction and appears free of scratches, magnified observation can reveal countless subtle scratches (Griffith cracks), which are said to reduce the physical strength of glass to approximately 1/100 of its theoretical strength.
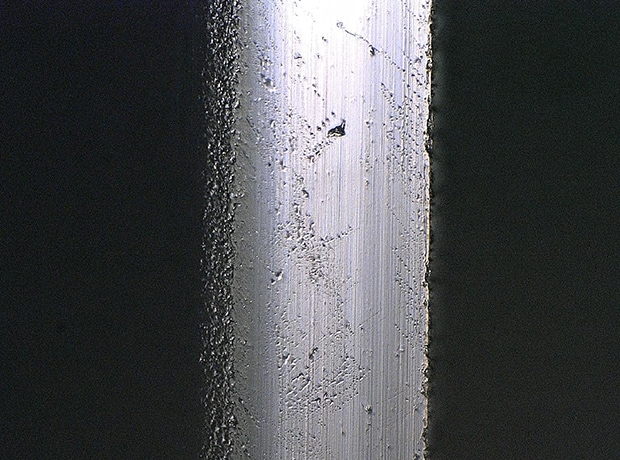
On the other hand, because glass fractures with almost no deformation, the cause of the fracture remains viewable on the surface. The strength, speed, and direction of the collision are expressed by mirror, mist, and hackle patterns. The shape of the patterns, known as rib marks, expresses the speed and direction with which the fracture progressed.
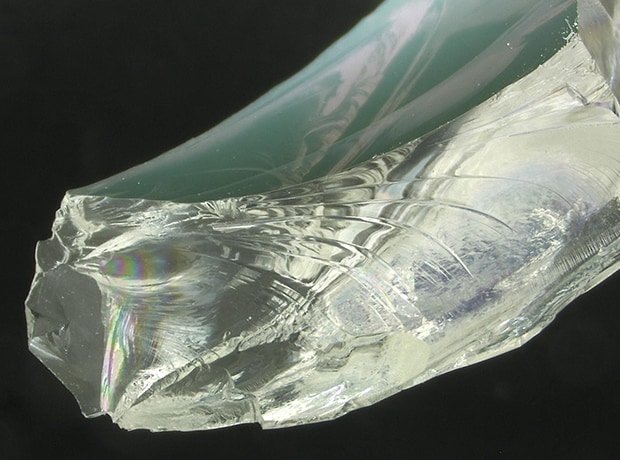
Glass fracture surface (20x)
Glass fractography relies on accurately capturing the status of the fracture surface and observing the orientation, size, and number of patterns listed above in order to investigate the fracture situation. Herein lies the reason why the observation of fracture surfaces using a highly accurate optical or digital microscope is vital to the defect analysis of glass products.
Get detailed information on our products by downloading our catalog.
View Catalog

Examples of Defect Analysis of Glass Products Using a 4K Digital Microscope
Glass is used in a wide variety of products and components. This section uses glass fracture surface, scratch, and end face polishing status observation examples to introduce defect analysis of glass products. It also introduces examples of defect analysis using a 4K digital microscope for glass products that most people do not see during everyday life. Examples of such products include glass PCBs (for which patterns and marks are observed) and glass fibers.
Glass fractography
With normal microscopes, there were cases where clear images could not be obtained due to insufficient resolution.
The HR lens (which enables a deep depth of field and high-resolution observation), the 4K CMOS, and the real-time depth composition of the VHX Series 4K Digital Microscope make it possible to instantaneously obtain high-definition 4K images in which the entire target is fully focused.
Such images enable high-definition observation and analysis of the microscopic information seen in fracture surfaces.

Glass fracture surface (20x)
Real-time depth composition with the VHX Series 4K Digital Microscope
Analysis of minerals inside glass
Observing minerals inside glass requires three-dimensional focusing. In this situation, general-purpose microscopes can only focus on a portion of the image at a time, and the focus must be adjusted to observe other areas. This work requires a lot of time and effort as well as careful operations.
The deep depth of field and the real-time depth composition of KEYENCE's 4K digital microscope make it possible to obtain clear 4K images in which the entirety of the minerals inside the glass are fully focused, even at high magnifications.
Real-time depth composition using the VHX Series 4K Digital Microscope
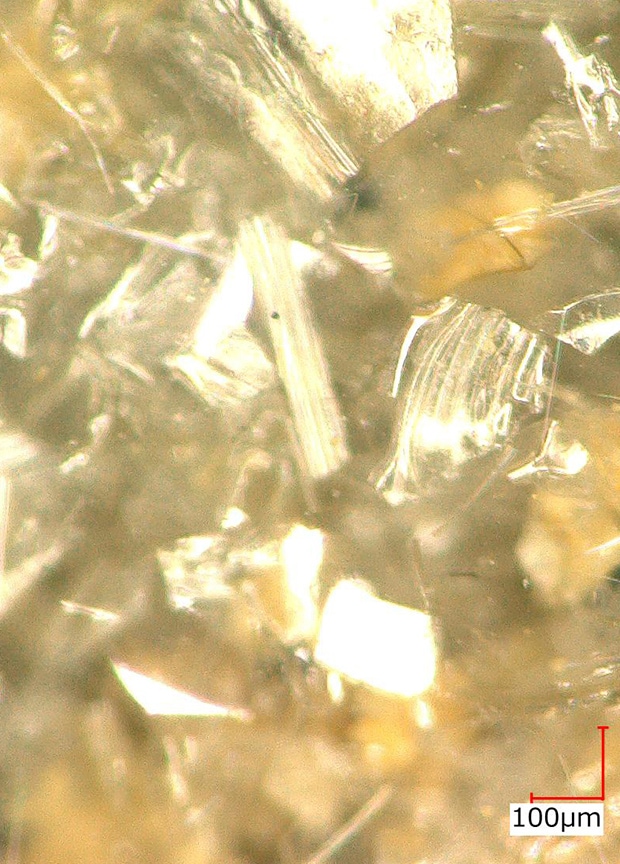
Normal (200x)
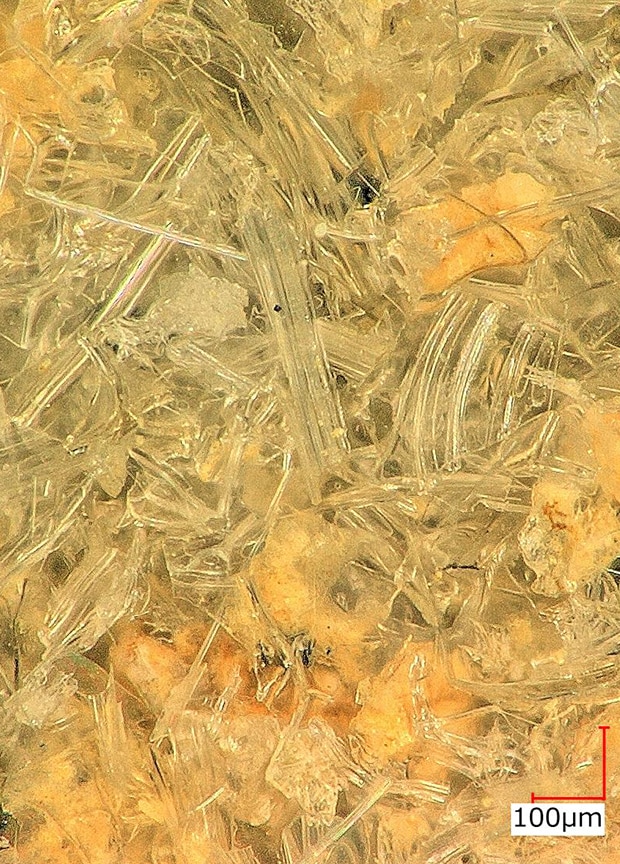
Real-time depth composition (200x)
Glass bottle scratch analysis
The glossy, smooth surface of a glass bottle is obtained through multiple polishing steps. However, this glossy surface is one of the causes of difficulty in defect analysis.
The strong, reflected light coming off of the surface of a glass bottle hinders the observation and analysis performed with conventional microscopes. Of special note is strong, ring-shaped reflected light, which makes observation and analysis impossible.
However, with the VHX Series, KEYENCE's latest 4K Digital Microscope, the ring-reflection removal function can be used to eliminate this reflected light. This function makes it possible to accurately observe even minute scratches on glass bottles with highly-polished surfaces.
Ring-reflection removal function of the VHX Series 4K Digital Microscope
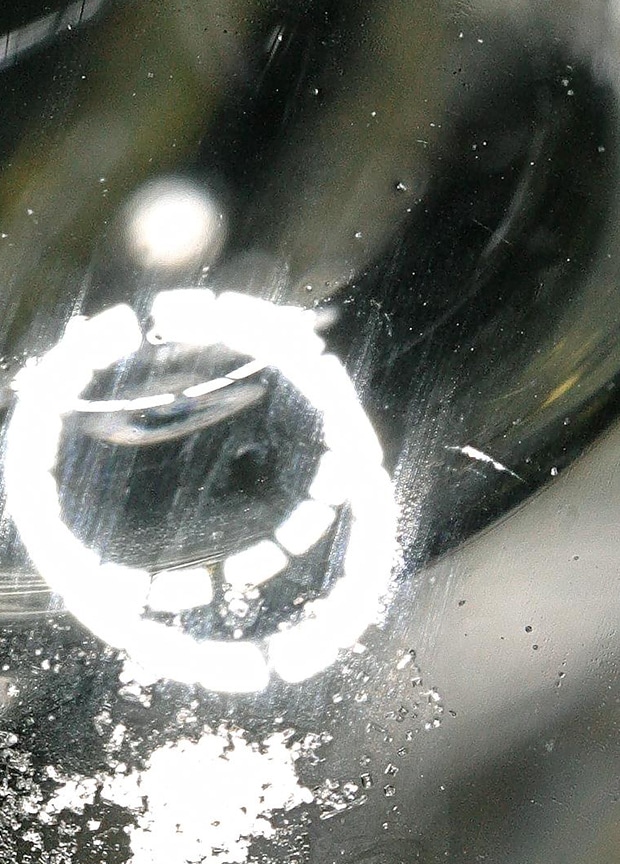
Normal (50x)
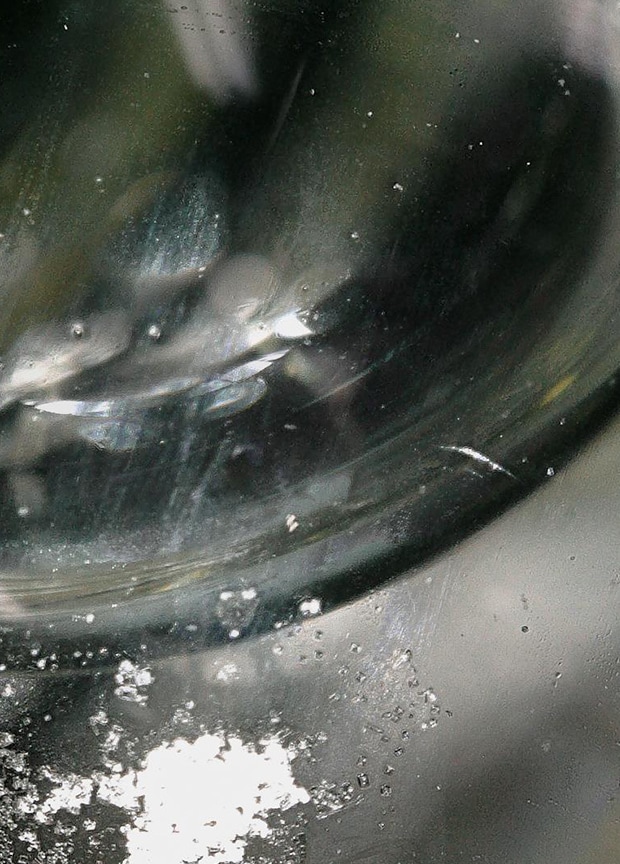
Ring-reflection removal (50x)
Quartz glass microcrack analysis
In high-magnification observation using conventional microscopes, there are cases where clear images cannot be obtained due to insufficient resolution.
The VHX Series 4K Digital Microscope is equipped with a high-resolution HR lens and a 4K CMOS to enable high-resolution imaging. Even glass microcracks and other such extremely small targets can be observed with high-definition images.
Microcrack analysis using the VHX Series 4K Digital Microscope

Conventional microscope (200x)
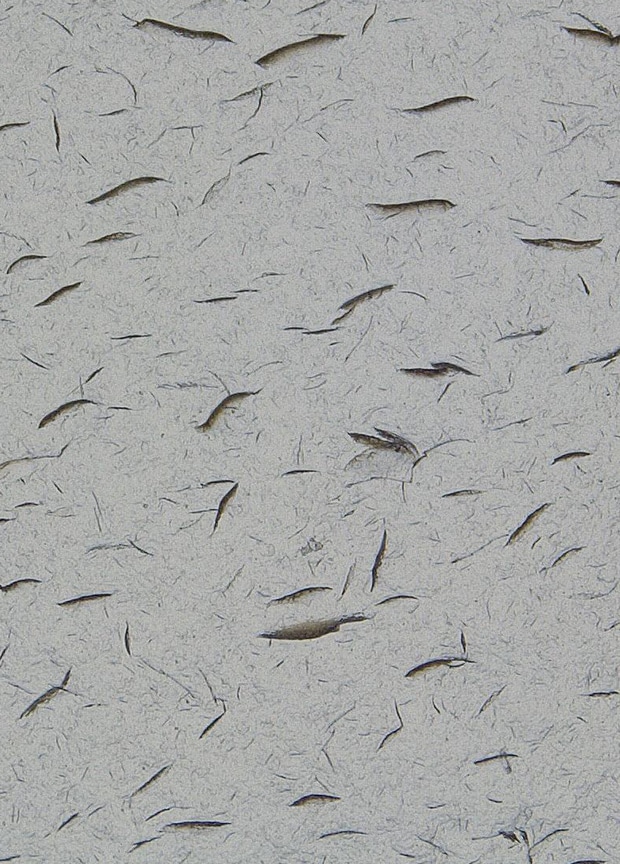
High-definition imaging with the VHX Series (200x)
Glass end face polishing scratch analysis
The VHX Series 4K Digital Microscope can use diverse functions to clearly capture microscopic flaws and thereby enables accurate and fast observation, analysis, and evaluation.
The multi-lighting function obtains multiple images with omnidirectional lighting at the push of a button. After capturing the image, the user can manipulate the lighting direction to observe scratches and defects that are only visible when the surface is illuminated from a particular direction. Only one image needs to be captured, eliminating time spent manually adjusting the glass surface and lighting direction.
Glass end face polishing scratch analysis using the VHX Series 4K Digital Microscope
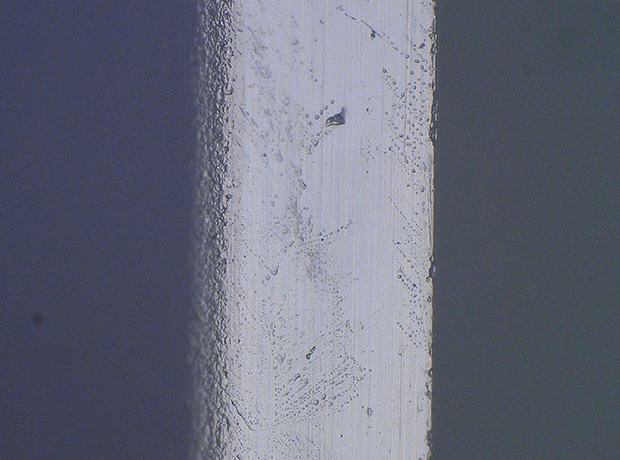
Conventional microscope
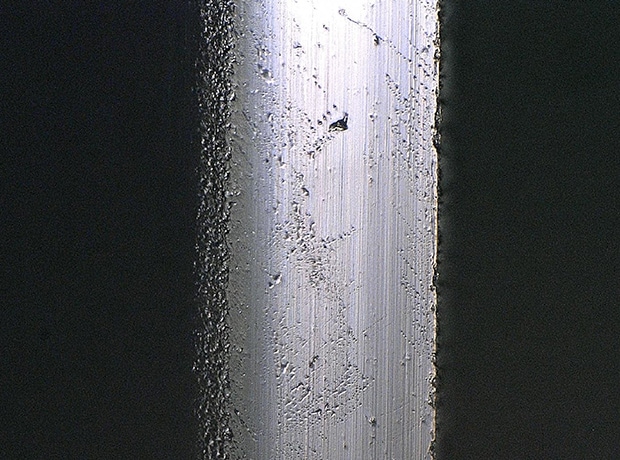
Multi-lighting imaging with the VHX Series
Glass PCB pattern mark observation
The VHX Series 4K Digital Microscope can automatically count the number of targets and measure their areas.
Binary processing is performed on the basis of the image's brightness and colors. From the binary processed image data, parameters such as the area, maximum diameter, and minimum diameter can be automatically calculated. Targets that are not required can be excluded and overlapping targets can be separated. The image is automatically saved as a template, making repeat inspection fast and easy.
Furthermore, measured values can be output to tables and histograms, which makes it possible to quantitatively determine the particle size distribution characteristics.
Glass pattern mark analysis using the VHX Series 4K Digital Microscope
Equipped with a high-resolution HR lens and a 4K CMOS, the VHX Series enables high-resolution imaging even in situations where the resolution is insufficient with traditional microscopes. Even glass fibers and other such extremely small targets can be observed with high-definition images.

Observation screen

Counting screen
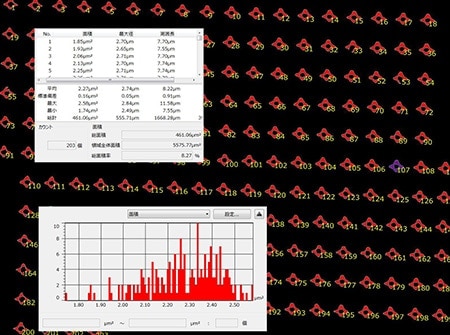
Particle size analysis and histogram display using image binary processing
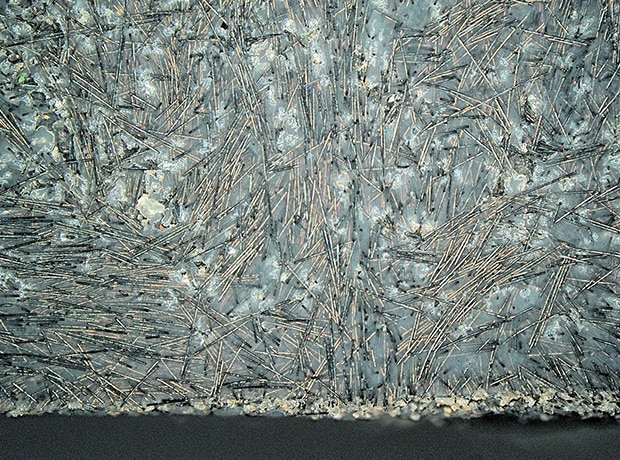
High-definition imaging with the VHX Series
Glass fiber analysis using the VHX Series 4K Digital Microscope
We’re here to provide you with more details.
Reach out today!

One Microscope Supports Everything From Observation and Analysis to Report Generation
The VHX Series high-definition 4K Digital Microscope offers excellent efficiency compared to conventional optical and digital microscopes and makes it possible to eliminate human errors and ensure accurate glass defect analysis.
The high-definition 4K images generated by the cutting-edge optical image processing and automation techniques allow for automatic area measurement and counting on glass products with simple operation, contributing to producing quick, sophisticated analysis results.
The captured or measured data can be easily output as a report with a fixed format using the report function. This can be useful for not only quality assurance, but also for identifying any problem that may arise and subsequent process improvements.
Equipped with many other advanced functions, the VHX Series can be a powerful partner for defect analysis of glass products. For additional product info or inquiries, click the buttons below.
Get detailed information on our products by downloading our catalog.
View Catalog