Optical Comparator (Profile Projector)
Optical CMMs (VMMs)
An optical CMM, otherwise referred to as a VMM or video measuring machine, is similar to devices like optical comparators and measuring microscopes, as it is a non-contact instrument that uses images to perform measurements. However VMMs utilize software to make inspection automatic.
Optical CMMs are also known as CNC image measuring machines, where "CNC" is an abbreviation of Computer Numerical Control. As the name suggests, these machines use image processing technology to perform automatic measurements that are both fast and highly accurate. As factory automation at manufacturing sites has steadily progressed, so has the rapid development of these optical measuring instruments.
Optical CMMs are highly valued not only for their highly accurate measurement capabilities for quality control, but also for pre-production in research and development and other areas in the manufacturing process. Recent optical CMM models use highly accurate CCD cameras to enable the observation of color images. Meanwhile, the evolution of the associated optical measurement system software has made it possible to perform varied edge detections and to support complicated calculations.
How to Use an Optical CMM
-
1Place the measurement target in the metrology lab for at least 5 hours before measurement to allow the target to adjust to room temperature (generally 68°F). This will prevent errors due to thermal expansion.
-
2Place the target on the optical CMM stage, and scan it to capture an image that will be used by the optical CMM for detecting the edges.
-
3Some optical CMM models can also perform auxiliary measurements using laser light or a touch probe.
-
4The measured values can then be output as various types of CAD data.
Discover more about this product.
Click here to book your demo.

What Optical CMM Does KEYENCE Have?
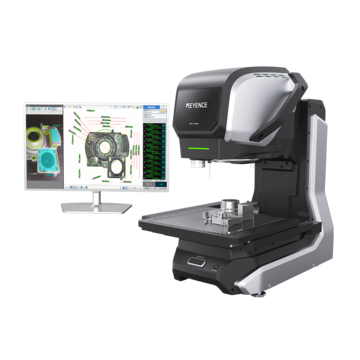
KEYENCE’s version of an optical CMM is called the LM Series High Accuracy Image Dimension Measurement System.
The LM Series offered by KEYENCE uses optical elements like cameras and sensors, alongside advanced software technology, in order to precisely inspect parts.
Get detailed information on our products by downloading our catalog.
View Catalog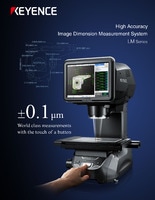

Key Features of KEYENCE’s Optical CMM Solution
Telecentric Lens
The LM optical CMM uses a telecentric lens for highly accurate and magnified measuring. The telecentric lens uses magnification that allows you to see edges that are hard to see with the naked eye, and ensures a stable and consistent image of the part without warping or distortion over the field of view. Because of the high definition, the machine is able to achieve sub-micron level accuracy.
CMOS Sensor
The 20-megapixel monochrome CMOS strengthens the lens’ resolution performance. Because of the CMOS sensor, the LM optical CMM has a 3x greater resolution than conventional imaging sensors. In turn, you can expect faster and more accurate optical CMM inspection.
Illumination
The LM optical CMM includes multiple illumination functions to eliminate the need for repositioning a separate overhead light. These illuminations are called backlight, coaxial, four-division multi-angle above, four-division multi-angle below, and slit ring.
Z Focus Positioning
Since the LM has a telecentric lens with high magnification, it can use Z-focus positioning for height or depth measurement. Because of the magnification, measurement system can measure the height of areas as small as 20 x 20 μm.
Tilt Correction
The tilt correction function sets a reference plane for tilted targets so that the LM can still take accurate measurements even with a tilt.
Flatness Measurement
The LM uses the height measurement function to measure flatness and display a color map to show height differences on planes.
We’re here to provide you with more details.
Reach out today!

Benefits of Precise Optical CMMs
Streamline Inspection and Measuring
Using a precise, reliable, and self-checking system like KEYENCE’s optical CMM, the LM Series prevents bottlenecks in your inspection and measuring. Some streamlining benefits include:
- Multiple technicians can inspect the same parts and ensure the same results regardless of their measuring style. The LM optical CMM can do this because measurement is fully autonomous, all the operators have to do is place the part on the stage and press the button.
- Measuring or inspection can take place over a period of time while still keeping the data intact because the optical measurement machine stores data. This allows for easy access to records of stats and analysis.
- Any technician can use the optical CMM even if they aren’t expertly trained in metrology. The user-friendly system combined with precision ensures that even a beginner will produce accurate results.
- Burrs and chips left on parts are detected by the least squares method, so they do not affect inspection or measurement.
Simultaneous Measuring
When a part is placed on the optical CMM stage, the instrument immediately recognizes it and finds the measurement point. Because the machine understands each part precisely, it’s possible to measure up to 1,000 dimensions on up to 600 parts simultaneously.
Highly Accurate
The collaboration of the telecentric lens, CMOS sensor, illumination methods, and trade-secret sub-pixel software produces a highly accurate measurement with +/- 0.7 μm accuracy in high-precision camera mode.
Discover more about this product.
Click here to book your demo.

FAQs About Optical CMMs (VMMs)
What is an optical comparator?
An optical comparator, or shadowgraph, is a conventional tool used to measure dimensions off of a part’s silhouette. It uses lights and mirrors to cast the shadow of a part onto a grid that is then used to take measurements. This process is pretty manual, and subjective to the user. The IM and LM Series Automated Optical Comparators turn this manual process into an automated one, allowing for fast, accurate and easy measurement.
What are the limitations of an optical comparator and how does the IM and LM overcome those challenges?
Optical comparators are manual, subjective, and limited in capability. The IM and LM Series are not manual or subjective because they are both automated systems. The programs made on the system ensure repeatable measurements regardless of user. The IM is also accurate to 2um, an accuracy of which no optical comparator can compare to.
How to choose the right optical measurement device?
Depending on the size of your parts, and the measurements needed to be measured, such as hidden features like blind holes, height measurements, rotational measurements, etc., the IM Series has the right model for you. It's best to discuss with your product specialist to decide which model of the IM Series or LM Series would be the right choice for your needs.
What is advantageous about non-contact part inspection?
Non-contact measurement can be both more accurate, more customizable (selecting exactly where to take the measurement), and less intrusive. There are plenty of delicate parts that cannot be measured through contact methods due to possible damage or warpage of the part.
How many parts can I measure at one time?
On the KEYENCE IM Series Automated Optical Comparator, you can measure up to 100 parts at a time with 300 dimensions per part, while the LM Series (geared towards smaller parts) can handle over 5x the number of parts the IM can.
We’re here to provide you with more details.
Reach out today!

Related Downloads

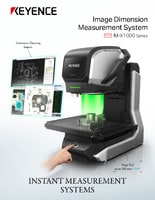
Brochure for the LM-1100 Series High Accuracy Image Dimension Measurement System. Submicron accuracy part inspection with non-contact height measurement.
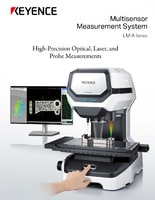
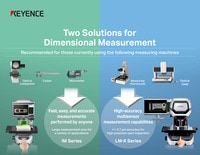
Brochure for the LM-X Series Multisensor Measurement System. Using optics, probes, and a multi-color laser to automatically measure all of your parts features.

