Optical Comparator (Profile Projector)
How to Measure Round or Turned Parts
Key Takeaways
- Round parts are hard to measure manually; micrometers risk chord errors and inefficiency.
- Optical systems measure pitch, runout, total runout, and roundness automatically and fast.
- Rotary units with telecentric optics enable distortion‑free 360° measurements of turned parts.
- Use optical/multisensor devices for GD&T capture to ensure tolerance conformance and speed.
- Optical inspection reduces setup time, recall risk, and is suited for automotive, aerospace, medical.
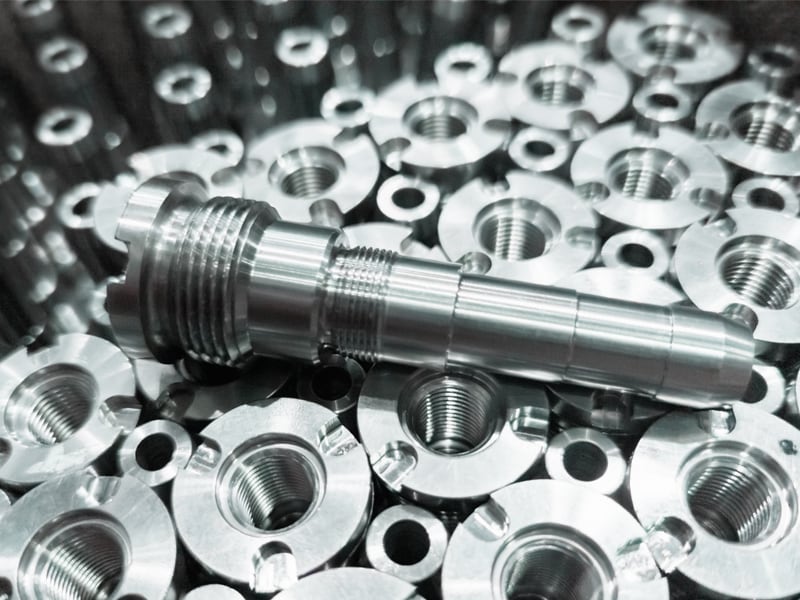
Measuring round parts can be a challenge. Round and turned parts include screws, gears,axles and shafts. These parts can’t easily be measured with a micrometer or a caliper since it’s almost impossible to know if you’re measuring across the full diameter, or only a chord.
Round and turned parts are foundational parts for larger assemblies, and without them, systems could fail. Because of the importance, ensuring you’re measuring round and turned parts accurately is necessary. Choosing automated systems like optical measurement devices is a solution for anyone struggling with round or turned part measurement.
In the following, we’ll look at the critical aspects of turned part measurement, including measuring roundness, pitch, runout, and total runout. You’ll learn why micrometers are falling behind in efficiency and why optical measurement devices are the best turned-part measurement solution.
What are Turned Parts?
Turned parts are cylindrical or spherical parts manufactured with a rotating lathe, mill, or boring machine.
These parts are often made of metal and are used in automotive, aerospace, manufacturing, and medical device industries as bearings, screw threads, crankshafts, engine parts, and hydraulics.
We’re here to provide you with more details.
Reach out today!

Measuring Pitch, Runout, and Total Runout on Turned Parts
Pitch, runout, and total runout are all crucial measurements for turned parts. These features play a part in the function of a component.
Measuring Pitch on Turned Parts
Pitch is the distance between two adjacent threads. It's the dimensional measurement of the thread at 180 degrees. Measuring pitch can be achieved with a micrometer screw gauge, optical inspection device, or standard micrometer.
- Micrometer Screw Gauge for Turned Part Measurement
-
A micrometer screw gauge is a specialized micrometer for measuring pitch. It’s a manual method that puts the threaded part in between the micrometer spindle and turns the ratchet until the turned part is squeezed between. The micrometer screw gauge is specialized because the spindle has a point that fits into the thread.
- Standard Micrometer for Turned Part Measurement
-
Measuring pitch with a standard micrometer is also a manual method, and it uses the three-wire method. Three wires are used as placeholders so the micrometer spindle can squeeze the threaded part and measure the pitch.
- Optical Measurement Device for Turned Part Measurement
-
Optical measurement devices are simpler and more efficient than micrometers. These devices use light and a camera to automatically capture an image of the threads. These devices then utilize specialized software which can determine the pitch, pitch diameter, and angle.
Measuring Runout for Turned Parts
Run out is the amount of deviation a turned part has from its datum when it rotates. In more simple terms, run out refers to how much a turned part wobbles side to side instead of spinning uniformly along its central axis.
To measure the runout, determine the datum and acceptable tolerance. For runout, the tolerance is how much the rotation can deviate perpendicularly from the datum axis line. Then, use a rotary unit or dial indicator to rotate the part 360 degrees.
Measuring Total Runout for Turned Parts
Total runout refers to measuring the runout on an axial scale and radial scale. The process is similar to the runout process, the difference being that information is collected for all geometric deviations.
Runout calculations in general can only be done efficiently with optical inspection devices with a rotary attachment. This system can obtain a runout/total runout callout in a couple seconds, in comparison to tediously measuring runout with a dial gage.
Discover more about this product.
Click here to book your demo.

Measuring Roundness with Optical Inspection Devices
Measuring roundness with an optical inspection device helps determine how much a part deviates from being a perfect circle. Perfect roundness is the indicator of a symmetrically shaped turned part. An asymmetrical part has additional bulges, known as lobes, that are out of the tolerance.
Measuring roundness deviations is crucial for precise engineering, where even slight deviations can impact functionality. It is possible to measure roundness with tools like micrometers, but optical inspection devices are more efficient and reliable.
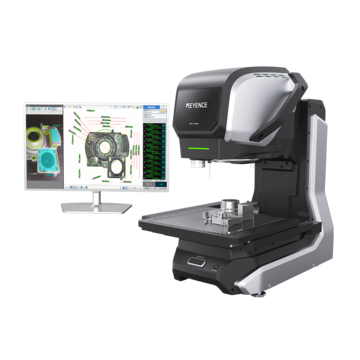
KEYENCE’s optical measurement devices use light projection, a high precision lens, and proprietary software to determine dimensions and GD&T such as roundness in just a few seconds. The light and camera find circular errors, like runout and calculate the deviation. These devices report whether the deviations are within tolerance or not.
Measuring Turned Parts with Optical Inspection Devices
Measuring turned parts includes measuring features like diameter, thickness, length, and runout. KEYENCE’s optical inspection devices achieve this with a rotary unit, telecentric lens, and proprietary software.
The rotary unit that KEYENCE offers is an accessory to the IM-X and LM-X optical measurement device. The system holds turned parts in place and automatically rotates them for easy measurement. The rotary unit elevates the part, so there’s no rolling around or manual repositioning. As the rotary unit turns, the telecentric camera collects distortionless measurement information at any specified angle of rotation.
Get detailed information on our products by downloading our catalog.
View Catalog

Applications Across Industries
Round and turned parts are frequently used in the automotive industry, as well as in manufacturing, aerospace, and medical device industries. These parts are usually a backbone or supporting role for a larger component. Because of their role, turned and round parts must be inspected so they don’t cause damage.
Integrating Optical Inspection into Measuring Round or Turned Parts
Measuring and inspecting turned parts is a vital procedure before assembly. Without proper inspection and measurement, you might assemble a component with a defective part. Choosing efficient and accurate inspection systems saves you money from fewer recalls and improves the longevity of your products.
Optical inspection devices are your answer to optimized measurements. Instead of tediously setting up micrometers and gauges, switch to KEYENCE’s IM-X Series. This optical inspection device only needs to steps: place and press. No manual labor, training, or positioning is required for measurement.
Contact us to learn more about how our advanced technology can help take your business to the next level.
Contact Us
Related Downloads
