Measurement Sensors
Dimension Measurement
Displacement Measurement
Step Height Measurement
When looking for the best way to measure height or step height, there are a number of important factors to consider, including the shape of the target, the type of measurement system, and the installation environment. Selecting equipment that doesn't adequately meet your needs can lead to insufficient precision and increased man-hours during production, so choosing the right height-measuring equipment is important. This site is designed to help you discover the best way to perform this measurement with confidence.
Choose Case of Step Height Measurement
Single-point Height Measurement
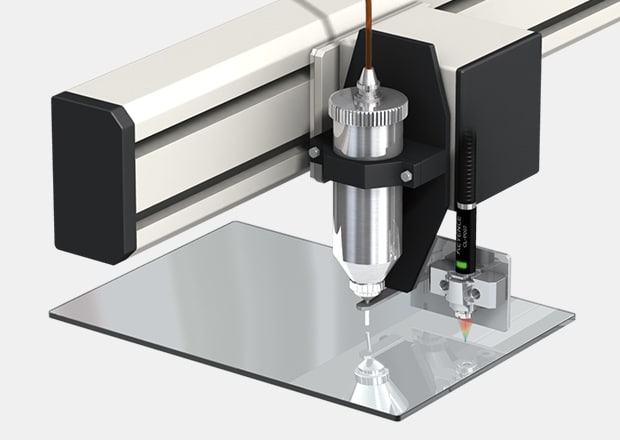
A 1D laser displacement sensor is a reflective type sensor, which means it emits light to the surface of the measured object. That light is then reflected back to the light receiver in the sensor. Based on the changes in distance between the object and the sensor, the sensor can determine the step height measurement. High-accuracy displacement sensors are grouped into two basic categories: confocal and laser triangulation.
The laser triangulation method uses a laser diode to project a spot onto an object, which is then reflected and picked up by a light-receiving element. Distance between the object and sensor is calculated by the angle of the laser and the position of the reflected light that enters the light receiver's view. Confocal laser sensors, on the other hand, are used to obtain high-precision measurement and sometimes used to make 3D reconstruction of objects with nanometer resolution. By taking measurements of the different depths, a confocal sensor can derive the surface topography of a part and thus determine the step height measurement between different focal planes.
To efficiently measure the height of a single point, use a reflective laser displacement sensor. You can measure height at multiple locations by communicating across multiple sensors or by scanning over the target with one sensor.
Height/Step Height Measurement from Above Using Two Measurement Locations Near Each Other
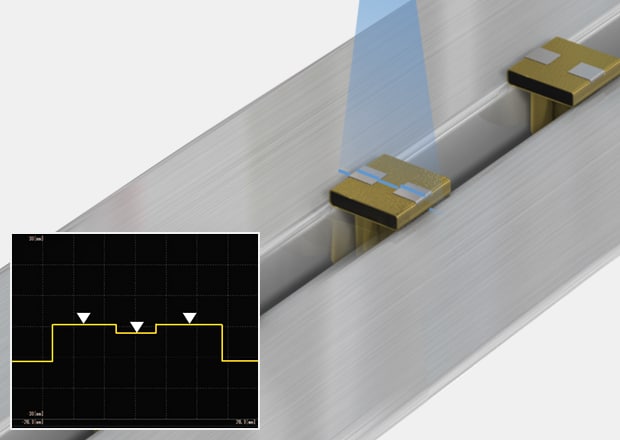
Unlike 1D laser displacement sensors (which emit and pick up a single point of light), 2D laser displacement sensors project a laser line that is reflected and captured by an internal CMOS sensor. As a result, multiple data points can be measured at once. This is useful when multiple step heights are located close together.
2D laser displacement sensors use reflected light displacement to calculate distances between the sensor and the surface of the part. Similar to 1D laser displacement, 2D relies on the laser triangulation methods to quantify step measurements.
A profile of the surface is obtained where the laser line hits, making it possible to acquire relative measurements such as step height. Even if the target is tilted, step can be measured accurately because the sensor head features an alignment adjustment function.
Height/Step Height Measurement From the Side Using Two Measurement Locations Near Each Other
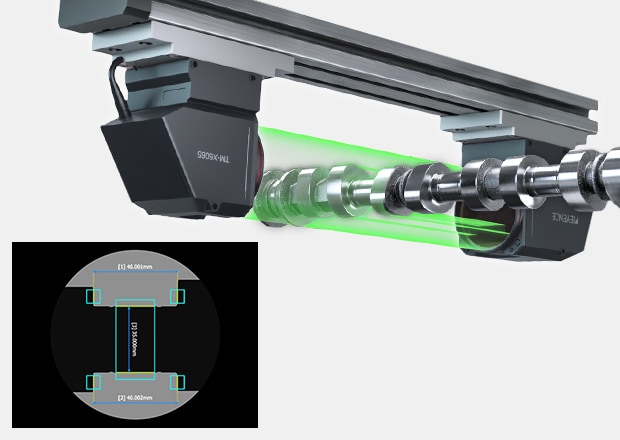
2D optical micrometers are typically comprised of a light emitter and light receiver, with the system employing high-intensity LEDs and telecentric lenses to focus the beam of light onto a high-speed CMOS sensor and capture images in the full field of view. When an object whose step height we're measuring obstructs the light beam, it casts a shadow or a silhouette onto the CMOS sensor, which picks it up and converts it into data that is processed by the measurement devices' internal systems and associated software.
The silhouette of the target is projected, and the step height between two specified features is calculated. Even if the shaft is tilted, step can be measured accurately when the alignment adjustment feature is utilized. Measurements are not affected by the color of the target surface.
Height/Step Height Measurement Using Two Measurement Locations Far Away from Each Other
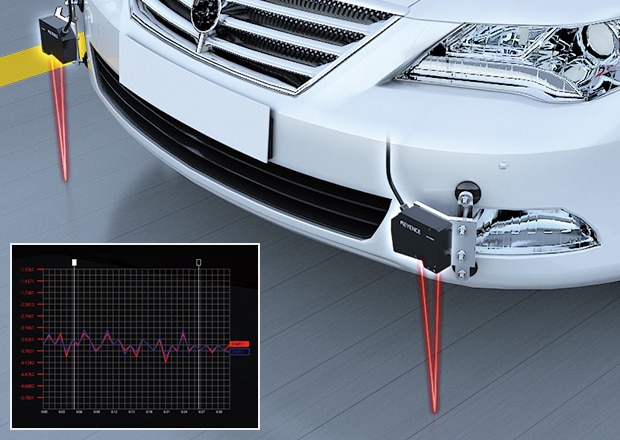
Depending on your system of choice, you can connect one, two, or more laser displacement sensors to a single controller and have them take measurements in sync. This will provide you with an option to collect more comprehensive step height measurement data. It's worth noting that some systems support up to four laser displacement sensors, which is great for measuring step height on larger objects, such as a vehicle.
To efficiently measure the height of a single point, use a reflective laser displacement sensor. You can measure height at multiple locations by communicating across multiple sensors or by scanning over the target with one sensor.
We’re here to provide you with more details.
Reach out today!

Laser Snapshot Technology for Accurate 3D Step Height Measurements
Laser snapshot technology for step height measurements like KEYENCE’s LJ-S8000 Series is designed to capture 3D surface profiles with extreme precision. One key feature that sets the LJ-S8000 Series apart is its motor-driven scanning method. This allows for high-speed imaging at 0.2 seconds per image, providing real-time feedback for process control. The built-in laser light source also eliminates the need for external lighting equipment, making it easier to integrate into existing production lines.
Here’s how it works:
- Laser snapshot sensors emit a laser beam, which it sweeps over the part to collect precise height information to generate a 3D image of the object.
- Unlike traditional methods, laser snapshot technology for height measurement is fast, highly detailed, and accurate in height measurements for static and dynamic conditions.
- Laser sensors can detect the very small changes in height and can be detected and measured with exceptional clarity.
Benefits of Using Laser Snapshot Sensors for Non-Contact Height Measurement
Using snapshot technology for height measurement has a lot of advantages.
- You get a non-contact technology, which, by its nature, helps eliminate the risk of damaging delicate surfaces.
- The data acquisition process for laser snapshot sensors gives you high-resolution imaging, allowing for real-time monitoring and adjustment in manufacturing processes.
- These sensors can be applied across various industries and can measure various surfaces or materials without being affected by factors such as color, texture, or reflectivity.
Discover more about this product.
Click here to book your demo.

Precautions During Height Measurement
The Effect of the Tilt of the Sensor Head
If the optical axis is not perpendicular to the target, a measurement error caused by angle θ occurs in the height value, as shown in figure 1.
If θ is greater than 0.8°, the measurement error is approximately 0.01%, so correct the tilt in advance if you are concerned about its effect.
You can easily correct the tilt by preparing one master workpiece and using the scaling settings.
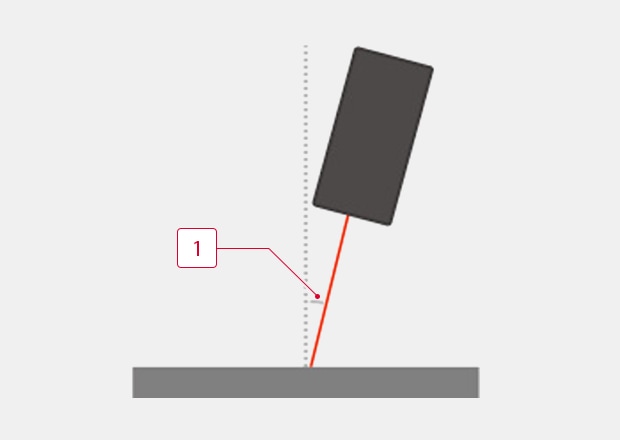
[Figure 1]
-
1Optical-axis tilt θ
Transparent Objects and Objects with Mirror-Finished Surfaces
If the target is a transparent object or an object with a mirror-finished surface, you have to install the sensor head tilted at an angle that is half the angle of the projected and received light, α, in relation to the target, as shown in figure 2. (When using the triangulation method.)
Also, if the target is a transparent object, a key point for stable measurement is to have the transparent object be at least as thick as a certain value. If the object is thin, the value measured for the front surface height may be lower than it should be due to the effect of the light reflected from the back surface of the transparent object.
The minimum thickness limits that ensure stable measurement vary depending on the sensor head type, the transparency of the target, and the reflectivity of the back surface.
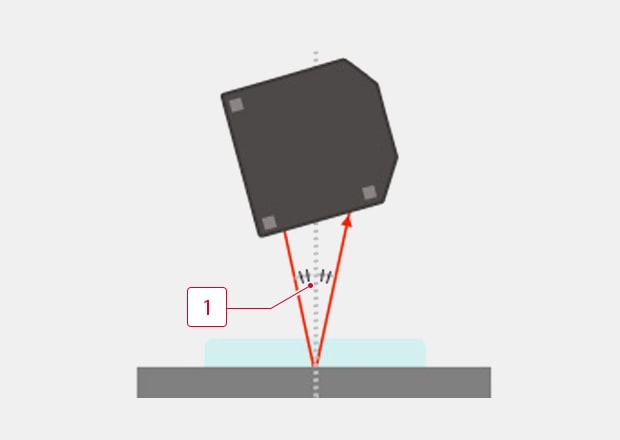
[Figure 2]
-
1α/2
We’re here to provide you with more details.
Reach out today!

Precautions During Step Measurement
The Effect of the Tilt of the Sensor Head
If the optical axis of the 2D laser displacement sensor is not perpendicular to the target, a measurement error caused by angle θ occurs in the step value, as shown in figure 3. The larger the distance (X) between the two points being measured for the step, the greater the measurement error.
For example, even if the tilt θ is only 0.1°, the measurement error becomes approximately 50 µm if X = 30 mm. Therefore, the tilt correction function is generally used when performing step measurements.
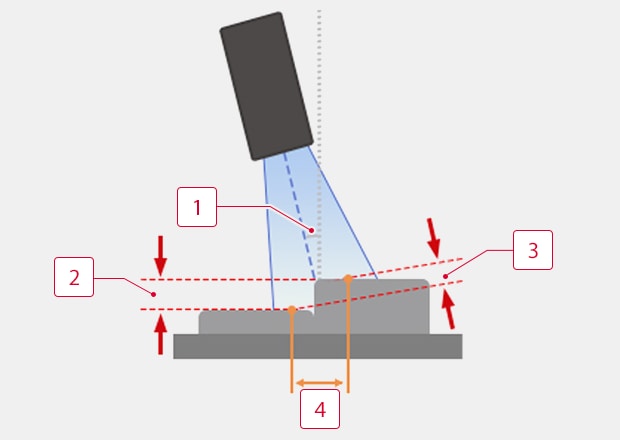
[Figure 3]
-
1Optical-axis tilt θ
-
2True step
-
3Measured value
-
4Distance between two points (X)
Transparent Objects and Objects with Mirror-finished Surfaces
If at least one of the surfaces being measured in the step measurement is a transparent object or an object with a mirror-finished surface, install the sensor head tilted at an angle that is half the angle of the projected and received light, α, in relation to the target, as shown in figure 4.
It is also necessary to prepare a head that is dedicated for use with transparent objects and objects with mirror-finished surfaces. Furthermore, if the target is a transparent object, it must be at least as thick as a certain value in order for the surface height to be measured accurately.
If the object is thin, the value measured for the front surface height may be lower than it should be due to the effect of the light reflected from the back surface of the transparent object. The minimum thickness limits that ensure stable measurement vary depending on the sensor head type, the transparency of the target, and the reflectivity of the back surface.
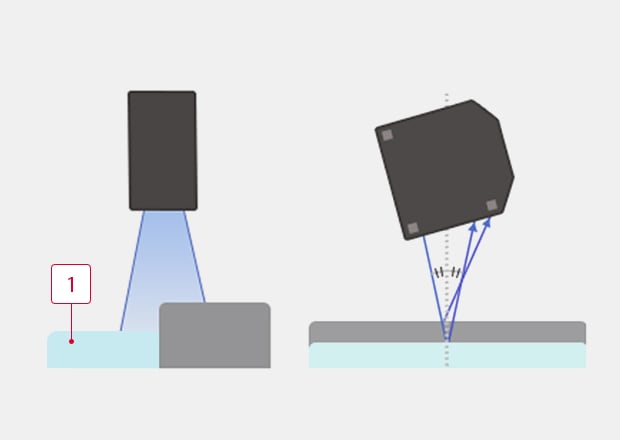
[Figure 4]
Left: Front / Right: Side
-
1Transparent / mirror finished surface
We’re here to provide you with more details.
Reach out today!

Which Method Is Better? Contact VS Non-contact
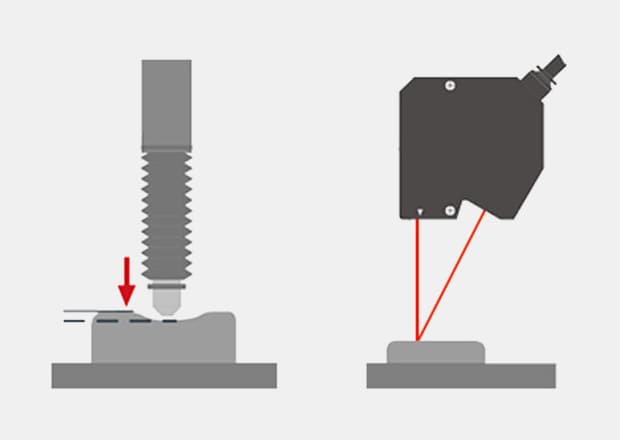
Measuring Soft Targets
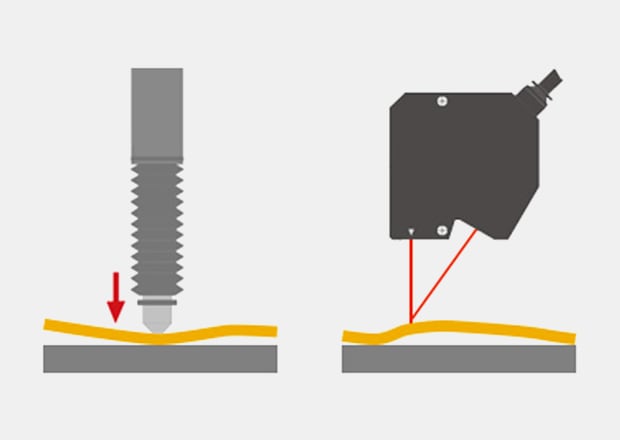
When the probe comes into contact with a soft target, the target can be compressed, which leads to a corresponding measurement error. Additionally, objects that are particularly soft or even fragile could suffer surface damage, which will impede step measurement.
With non-contact measurement, it is possible to measure targets that deform, such as soft targets and liquid surfaces.
Measuring Light Targets
For targets that are thin and light, it is necessary to hold down the target to ensure that it does not float on an air gap in order to accurately measure the surface height.
With contact measurement, the probe presses down on the target surface, which eliminates errors caused by the target floating in the air. For this reason, the contact method is better suited to this type of measurement than the non-contact method.
Measuring Indentations
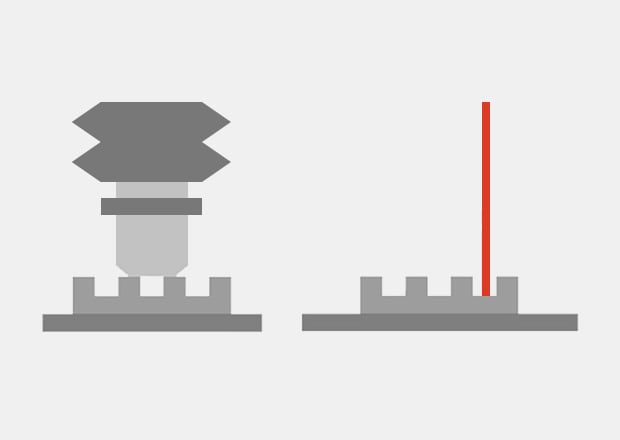
Contact measurement methods and associated tools are often quite hefty, which poses a challenge when measuring step height in the micron and nanometer range. With a non-contact laser displacement sensor, the measurement spot (which ranges from a few micron to hundreds of microns in size) is generally smaller than the probes used in contact measurement. This makes it possible to accurately measure the base height of more narrow indentations with the non-contact method.
Enhancing Step Height Measurement with Laser Snapshot Sensors
KEYENCE snapshot technology for height measurement offers superior accuracy and efficiency in controlling step height. Our innovative sensors can be seamlessly integrated into production lines, delivering reliable and repeatable measurements. This capability enables manufacturers to maintain strict tolerances and enhance product quality.
Contact KEYENCE today to learn more about our laser snapshot sensors and how they can improve your step height measurement and overall inspection process.
Contact us to learn more about how our advanced technology can help take your business to the next level.
Contact Us
Related Downloads
Applications
Dimension Measurement
- Thickness and Width Measurement
- Step Height Measurement
- Inner and Outer Diameter Measurement
- Measuring Angles
- Meandering/Edge Measurement
Displacement Measurement
- Positioning and Stroke Length Measurement
- Vibration and Runout Measurement
- Deflection Measurement
- Measuring Eccentricity

