Fluorescence Microscopes
Fluorescence microscopes are made up of a variety of components, and it can take a lot of time to understand each component's function. Even without a detailed knowledge of fluorescence microscope mechanisms, accurate experiment data can still be acquired. This section summarizes important points for capturing images effectively in a short time, using the examples of typical failures in fluorescence imaging.
Fluorescence imaging
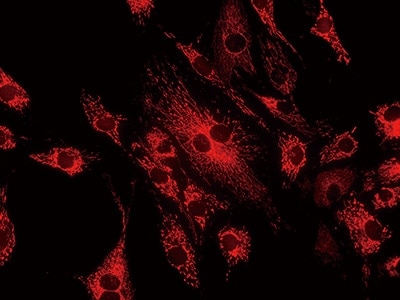
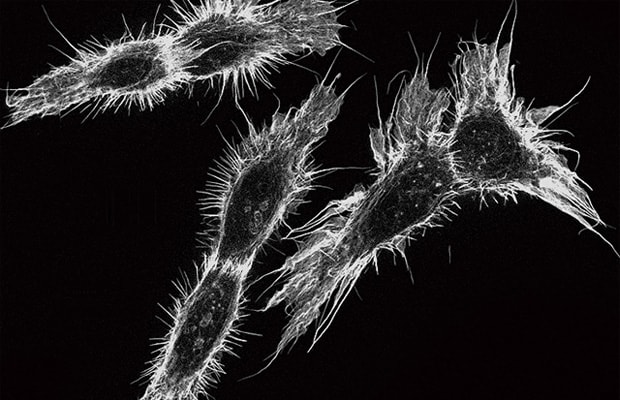
Fluorescence imaging visualizes colorless transparent cell organs and certain proteins that cannot be observed without prior treatment, by labeling them using a fluorescent labeling reagent or fluorescent antibody. This technique allows for observation and analysis of the shape, structure, and behavior of cells and proteins.
Fluorescent reagents and fluorescent antibodies have a property whereby they glow when irradiated with a specific wavelength light (excitation light), which is observed using a fluorescence microscope or laser confocal microscope.
Fluorescence imaging can observe live cells in real time, so various experiments at the molecular level and cell level can be carried out. At the same time, the quality of analysis and evaluation of these experiment results are affected by the camera, lens, and light source selected for fluorescence microscopes.
Get detailed information on our products by downloading our catalog.
View Catalog

Common failure in fluorescence imaging 1: The image is not in focus.
Focus is the most basic and most important factor when it comes to microscopes. Capturing images that are in focus makes it possible to perform accurate evaluations of experiments, and the quality of figures affects the acceptance of papers. This section starts with an explanation of important points for capturing focused and clear images.
Point 1: Check whether the lens being used is appropriate.
For microscope observation, you need to know if the lens characteristics match the observation purpose. The numerical aperture (NA) is important especially for fluorescent observation. A larger NA provides a brighter figure at higher resolution. Generally, a larger NA provides images at higher resolution with greater details. At the same time, the depth of field (DOF) becomes shallower, narrowing the range in which the target is in focus. In addition to the NA and DOF, the lens’s brightness and observation distance also need to be considered. These characteristics have the correlations shown in the following table.
General lens characteristics
| Resolution | NA | Observation distance | DOF | Brightness |
|---|---|---|---|---|
|
Resolution
High
|
NA
Large
|
Observation distance
Short
|
DOF
Shallow
|
Brightness
Bright
|
|
Resolution
Low
|
NA
Small
|
Observation distance
Long
|
DOF
Deep
|
Brightness
Dark
|
Lenses have their respective characteristics*3. In addition to those above, some lenses require cover glass correction*1 or correction ring adjustment*2 and others have an optical system designed only for a specific observation method. It is important to use an appropriate lens that matches your observation method.
*1 Cover glass correction:
Cover glass correction lenses are set with a cover glass correction value. The cover glass is normally 0.17 mm (0.007") thick, but use a lens that is 1.2 mm (0.047") thick for plastic dishes and one that is 0 mm thick when using no cover glass.
*2 Correction ring adjustment:
Some high-magnification lenses have a correction ring (something that looks like a dial) on their cases. Resolution multiplies when this ring is adjusted according to the cover glass thickness. Make sure to check the correction ring status.
*3 Lens characteristics:
Depending on the type of observation, it may be necessary to use a specific lens with an optical system specially designed for a given method. There are various other characteristics such as phase contrast, differential interference contrast (DIC), polarization, fluorescence, and oil immersion. Check the lens type.
Point 2: Adjust the lens from low magnification to high magnification.
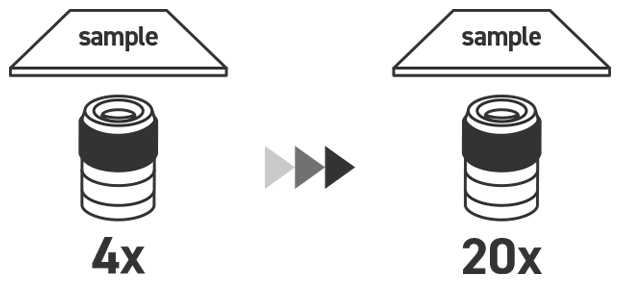
To search for targets efficiently, be sure to first search using a low-magnification lens with a wide field-of-view and then increase the magnification after you have narrowed down the search area to a certain degree. This can feel like extra work, but it is important.
Point 3: To focus the image, position the lens close to the sample, and then move it away from the sample.

For microscopes that do not have a collision prevention function, it is possible for the lens to strike the sample. Therefore, first position the lens close to the sample, and then gradually move it away from the sample to adjust the focus.

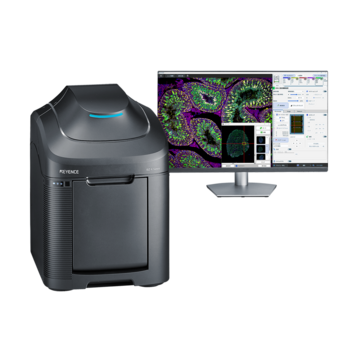
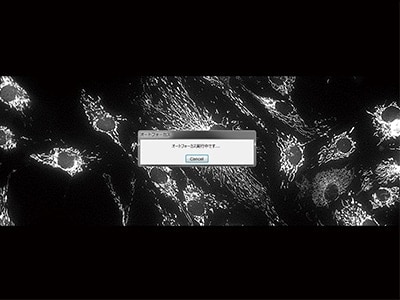
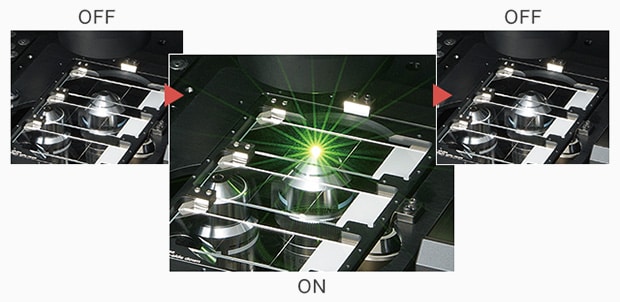
With KEYENCE’s fluorescence microscopes Focusing is no longer necessary - Ultra-high-speed auto focus
With KEYENCE’s All-in-One Fluorescence Microscope BZ-X, a single click switches the screen to high-sensitivity partial scan mode* in which a high-speed Z-axis scan is performed. Bright field, phase contrast, and even fluorescence images with weak light intensities can be focused instantaneously regardless of the magnification, which allows even beginners to obtain clear images easily.
Auto focus with a single click
High-speed processing with high-sensitivity partial scan
Accurate focusing
* High-sensitivity partial scan mode:
This mode provides even higher sensitivity for the BZ-X high-sensitivity cooled CCD monochrome camera, by combining binning processing and CCD partial reading. Weak fluorescence images ordinarily require long exposure times, but this mode can perform high-speed reading which allows for high speed and accurate sensing. In addition, a dedicated focus control motor allows for high-precision control in the Z axis. This allows operators not familiar with microscopes to easily focus.
Common failure in fluorescence imaging 2: The fluorescence signal is dark or the contrast is poor.
In fluorescence imaging, it is important to acquire images that exhibit clear signals of the target fluorescent molecules or fluorescent proteins. To acquire these images, a combination with various units, such as a camera, filter, and light source, is important. Inappropriate combinations make the fluorescence signal dark or the contrast poor, resulting in images that are difficult to observe. This section explains points to check in order to acquire clear images.
Point 1: Use a camera suitable for the observations.
There are many types of cameras, but here we will discuss the characteristics of CCD cameras, which are most commonly used with fluorescence microscopes.
In fluorescence observation, it is important to have a high S/N ratio (signal to noise ratio). The following table shows that a cooled CCD monochrome camera is most suitable.
| Color | Monochrome | |
|---|---|---|
|
|
|
|
|
|
|
|
*1 Visible light:
Generally speaking, this refers to light with wavelengths in the approximate range of 400 nm to 700 nm. Color cameras express images in the same way as the human eye, so wavelengths of 700 nm and higher are cut off. Therefore, it is not possible to observe light with these wavelengths.
*2 Dark current and cooling:
Even when a CCD camera is not exposed to any light, dark current signals are generated and create unwanted noise in images. A CCD gets warmer over longer exposure times, increasing noise. This noise can be reduced by cooling the camera.
Point 2: Use the brightness adjustment function.
There are various brightness adjustment functions, but the key items in the general camera settings are the three shown below. It is important to understand their characteristics in order to use these different settings effectively depending on the situation.
Exposure time
This is the time that the shutter is open. The longer that you set this time, the brighter the image becomes because signals are stored during exposure, however this also increases the amount of noise caused by dark current that is stored.
Gain
This function electrically amplifies the electric signal applied to the CCD element. However, as the input signal is amplified, the noise is also amplified. The gain value does not affect the resolution.
Binning
This function virtually views neighboring pixels as a single pixel to increase the received signal quantity per unit pixel. The image resolution decreases because the number of pixels virtually decreases, but the noise does not increase.
* It is not always necessary to cover the reagent’s peak.
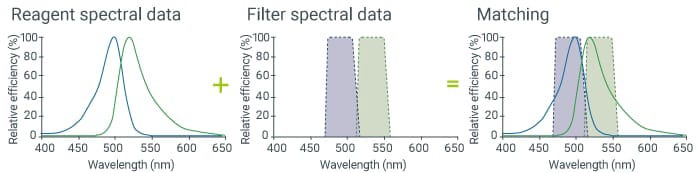
Point 3: Match the fluorescence filter and reagent.
Even bright fluorescence signals will not be observed if the filter has a low transmission ratio. It is important to use a filter that has as high a transmissibility as possible.
The fluorescence filter is composed of three components: an excitation filter, an absorption filter, and a dichroic mirror. Check whether the excitation spectra of the excitation filter and reagent overlap and whether the fluorescence spectra of the absorption filter and reagent overlap. For example, if 470/40 is written on a filter, it means that the 470 nm ±20 nm band is covered. If it is difficult to understand the matching just with numeric values, view the spectral data of the reagent and filters to check whether they match. You can view the spectral data of reagents and filters from their manufacturers’ websites or similar sources.
Point 4: Select the lens.
As discussed earlier, if the fluorescence signal is weak or the contrast is poor, it is possible to perform bright observation by switching to a lens with high NA. A larger NA provides a brighter fluorescence signal in observation. The NA tends to increase with a higher magnification lens. If the S/N ratio does not increase as you would like, this problem can be solved by increasing the lens magnification.
Point 5: Select the light source.
Depending on your light source, you may not be generating the wavelength that you want to observe. It is important to use a light source suitable for the observation. Check the light source you are using and determine its characteristics.
Mercury lamps and metal halide lamps each cover a wide range of wavelengths from short to long. On the other hand, laser and LED light sources each generate only specific wavelengths, and thus are used in combination with other light sources. If the signal does not shine well, check the spectral data of the wavelengths of the reagent and the light source.
With KEYENCE’s fluorescence microscopes Any specimen can be captured clearly - All-in-one design with no compromises
No compromises have been made in the design of any of the parts in KEYENCE’s All-in-One Fluorescence Microscope BZ-X.
The high-sensitivity cooled monochrome camera cools its CCD to 25°C (45°F) below the ambient temperature using a Peltier device, enabling high-sensitivity imaging with little noise.
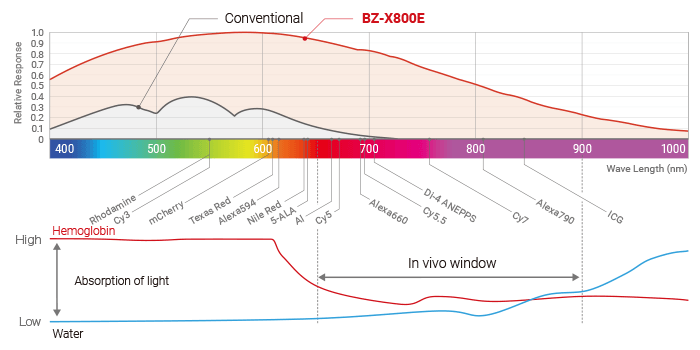
The fluorescence light source incorporates a metal halide lamp, making it possible to perform observation over a wide range of wavelengths, from short wavelengths lower than 350 nm to long wavelengths higher than 700 nm. Additionally, the fluorescence filter is a hard coating type, which has a high transmission ratio. When combined with lenses that have a large NA, this filter allows for surprisingly bright and clear observation even in near-infrared ranges (in vivo window), which are most suitable for live cell imaging, such as ICG and Cy7 that are too dark in ordinary observation.
High-definition monochrome image with low noise
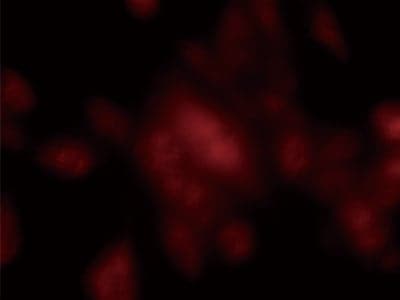
Common failure in fluorescence imaging 3: Photobleaching occurs and cells are weakened.
The most common causes of photobleaching and cell weakening are damage caused by the excitation light. Photobleaching accelerates when cells are exposed to a powerful excitation light for even a moment, causing the cells to weaken due to phototoxicity. To prevent this, the first important step is to reduce the intensity of the excitation light. Even if the intensity is low, prolonged exposure to excitation light continues to attenuate the fluorescence signal, causing photobleaching, and gradually damages cells, so they lose their activity. In addition to reducing the intensity, shortening the time that cells are exposed to excitation light is important.
Point 1: Reduce the intensity of the excitation light.
Reducing the intensity of the excitation light makes the fluorescent signal intensity darker, so you have to increase the camera’s gain or lengthen the exposure time. If you do either of these, a corresponding amount of noise will be generated, which may lead to the S/N ratio becoming lower.
To capture images with a high S/N ratio while also reducing photobleaching and damage, it is important to use a camera with as high a sensitivity as possible.
Point 2: Reduce the exposure time of the excitation light.
In order to reduce the exposure time of the excitation light, you simply have to reduce the operation time. It is important to try to reduce the operation time across all of the required steps, such as the time spent focusing images, the time spent searching for signals, and the time spent setting the exposure time.
When you use a microscope that requires you to open and close the excitation light shutter manually, you may forget to close the shutter, leaving the specimen continually exposed to the excitation light, resulting in photobleaching. It is also important to close the shutter frequently when you finish capturing or pause observation.
With KEYENCE’s fluorescence microscopes Dramatically reduced photobleaching - Low photobleach mode
Automatically turns on for an instant when required, such as when focusing the image and when moving the field-of-view.
With the low photobleach mode of KEYENCE’s All-in-One Fluorescence Microscope BZ-X, the excitation light is only exposed as a flash for the instant that it is required, so the exposure time is reduced to some tenths of conventional observation methods. This drastically reduces photobleaching and damage.
Conventional observation method
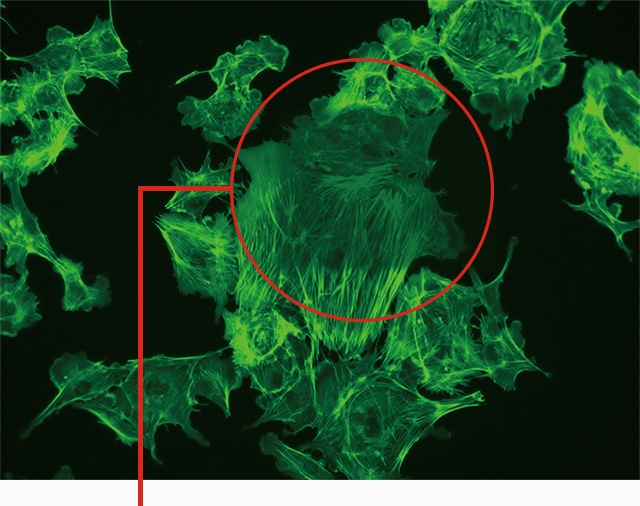
Due to photobleaching caused during observation at high magnification, part of the image is dark and the brightness is uneven.
Low photobleach mode
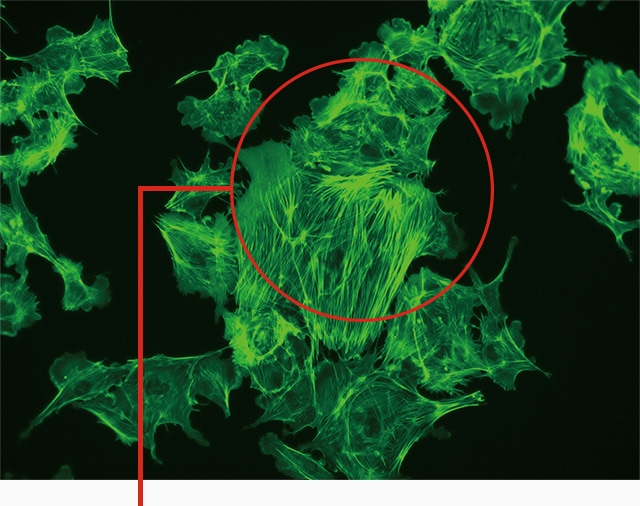
Image with less photobleaching and even brightness