Fluorescence Microscopes

FUCCI cell cycle checkpoints (courtesy of Assistant Professor Atsushi Kaida, Oral Radiation Oncology, Tokyo Medical and Dental University)
The number of researchers performing live cell imaging (also called time-lapse imaging) has increased in recent years. The advantage of this imaging is that it enables observation without fixing target cells in place so that changes in the structure of the cells themselves can be observed. On the other hand, many researchers tell that quite a few observations have resulted in failures due to this imaging having difficulty in targeting live cells and requiring more time than normal observation.
This section introduces the three most common failures along with suggested countermeasures to help improve success rates of live cell imaging.
Get detailed information on our products by downloading our catalog.
View Catalog

Common live cell imaging failure example 1: The cell is damaged.
In the course of or after a live cell imaging experiment, you may find that the cells are immobile, dead, or otherwise damaged. There are several causes of these problems:
Cause 1: Cells are damaged by phototoxicity.
During fluorescence observations, the shorter the wavelength of the excitation light and the more intense the light, the greater the cells are damaged. This is called phototoxicity*1, which may not only weaken or kill cells but may also affect them in unexpected ways.
Countermeasures
- Use a camera with as high a sensitivity as possible.
- Use gain*2 together with binning*3 and other functions to configure the settings such that even weak fluorescence can be detected.
- Reduce the intensity of the excitation light as much as possible.
- When setting the image capturing, subject the cell to as little excitation light as possible.
- Capture as few images as possible.
- Turn off the excitation light when not capturing images.
*1 Phototoxicity: This normally refers to the damage caused by the exposure to light, but it also refers to the phenomenon in which a cell subjected to fluorescence generates reactive oxygen, which in turn damages the surrounding cells.
*2 Gain: This is a function that electrically amplifies the signal received by the camera. The higher the degree of amplification (the higher the gain), the brighter the display. There is no change to the number of pixels, but noise occurs.
*3 Binning: This is a function that virtually joins together the surrounding pixels to amplify the received light signal per unit pixel. Less noise occurs compared to when the gain is increased, but the number of pixels is decreased.
Cause 2: The appropriate environment is not maintained.
The majority of cells prefer an environment that mimics standard physiological conditions. Human cells, for example, often require that a temperature of 37°C, a carbon dioxide concentration of 5%, and a humidity of 95% or higher be maintained by the chamber or incubator used for their cultivation. If this environment is not supplied in a stable manner, the cell will weaken and it will be difficult to obtain accurate data.
Countermeasures
- Use a chamber or incubator that can stably supply an appropriate environment (temperature, carbon dioxide concentration, and humidity).
- During seasons when the room temperature fluctuates greatly, use air conditioners and other devices to stabilize the room temperature.
- Ensure that the air blown by the air conditioners and other devices does not strike the sample directly.
- When using the edge of a multi-well plate, select a well-plate that prevents water evaporation.
Cause 3: Contamination within the sample
Some cells may be affected by germs and contamination affixed to the container. Also, mycoplasma contamination*4 and cross-culture contamination*5 can be caused by the pipette and other equipment that is used.
Countermeasures
- When performing the experiment, ensure that there are no germs transferred from the used container to the used pipette or other peripheral equipment.
- Move the cell as little as possible.
*4 Mycoplasma contamination: This refers to contamination by mycoplasma. It is one of the most common phenomena that cause cell strain contamination.
*5 Cross-culture contamination: This refers to the erroneous mixing of other cells into the cell being observed. Most commonly, the other cells are transferred by the equipment.

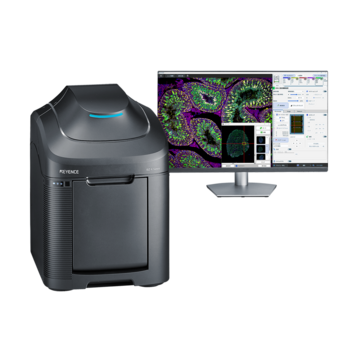
Benefits of KEYENCE’s fluorescence microscopes High-sensitivity cooled monochrome camera
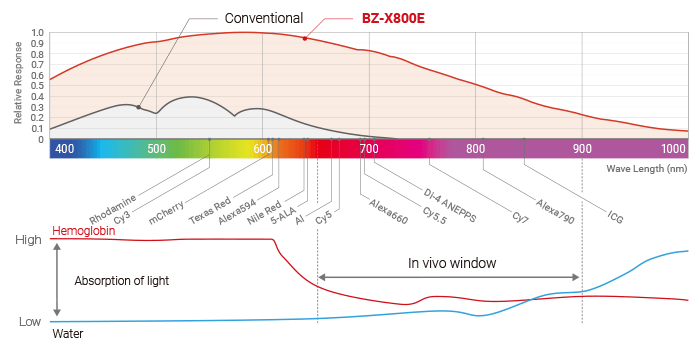
KEYENCE’s All-in-One Fluorescence Microscope BZ-X is equipped with a high-sensitivity cooled monochrome camera that is optimal for live cell imaging. It is also possible to perform observations in the wavelength range known as the in vivo window,*6 with a high S/N ratio. At the same time, the BZ-X makes it possible to observe cells as they are with minimal cell damage and fluorescence photobleaching. The evaluation of live iPS cells is one of the most common applications for which the BZ-X is used.
*6 In vivo window: The wavelength range of 650 nm to 900 nm is referred to as the in vivo window. This range is considered suitable for in vivo imaging because it is less likely to be absorbed by water or hemoglobin and has excellent tissue transmissibility.
Common live cell imaging failure example 2: The cell drifts out of focus.
Another common failure is discovering that the specimen went out of focus partway through the experiment. This could happen for a couple of reasons:
Cause 1: Temperature drift*7 causes the cell to move or the settings to change.
If you configure the image capture settings immediately after turning on the device, the focus may be shifted while you configure the settings. This is because, for some length of time after the power is turned on, the culture fluid within the container is circulated by convection, which moves the cells. Another reason for the image going out-of-focus is that the observation equipment slightly expands due to changes in the temperature. During observation of either suspended cells or adherent cells, pay attention to the temperature drift from the time when settings are configured to the time when images are actually captured.
Countermeasures
- Perform warm-up with an empty container for 30 minutes before placing the sample in the equipment.
- After placing the sample in the equipment, wait an additional 30 to 60 minutes before setting your focal plane.
*7 Temperature drift: A phenomenon in which temperature fluctuations cause the suspended cell to move or in which the expansion of the equipment itself displaces the in-focus position.
Cause 2: Changes in cell morphology
Live cells move up and down (in the Z direction) especially during cell division. As a result, an image will go out of focus if you are performing one-shot image capturing at high magnification at the instant of cell division.
Countermeasures
- Use a low-magnification lens with a large depth of field.*8
- For high magnifications, use the auto focus function or the Z-stack function.
With live cell imaging, you can accurately prevent failures caused by the image going out of focus by using the prevention methods shown above. In this situation, the trick is to only set the auto focus and Z-stack setting range*9 to a range as large as necessary to minimize the length of time that the target is subjected to the excitation light.
*8 Depth of field: This indicates the area within the image that is in focus. Generally speaking, the larger the NA, the shallower the depth of field.
*9 Z-stack setting range: Z-stack is a function for capturing multiple images of the data at different Z-positions. You can obtain more information by capturing images over a wide area and with high detail, but this also damages the cell by a matching amount, so it is best to set the number of images captured to as few as possible.
Benefits of KEYENCE’s fluorescence microscopes Focus tracking function
With KEYENCE’s All-in-One Fluorescence Microscope BZ-X, the best focused image is extracted from the data captured with the Z-stack. In the subsequent capture, the Z-stack is readjusted on the basis of this image, so consecutive in-focus images can be captured.
There is no need to capture a very large Z-stack in anticipation of conventional problems such as the image going out of focus and the influence of temperature drift, so the number of images captured per capture operation can be greatly reduced. The length of time that the specimen is exposed to the excitation light can be reduced, thereby reducing photobleaching and the decrease in activity caused by phototoxicity.
Conventional: Sets a larger imaging range than necessary to allow for possible movement and morphology changes

Conventional problems:
- Requires a longer capture interval due to prolonged capture time per unit of time
- Increases the risk of photobleaching and damage due to prolonged exposure to excitation light
BZ-X: Extracts the point with the best focus on the basis of previously captured images

Solution with the BZ-X:
- Reduces the number of captured images, allowing for more efficient review and analysis
- Minimizes the sample’s exposure to excitation light and reduces damage and photobleaching effects
Common live cell imaging failure example 3: The cell leaves the field of view.
Sometimes when you view the data after an experiment, you see that the cell left the field of view partway through the experiment. If the cell moves out of the field of view before the target phenomenon is complete, the entire experiment must be repeated.
Cause: The cell moves.
The longer the shutter is kept open, the greater the chance that the cell will move out of the field of view. So long as the cell is alive, this cell movement cannot be avoided. In a variety of papers, you may have seen data that shows the detailed conditions of cells. In many cases, such data is obtained by repeated image capturing performed at high magnifications, which requires a lot of time and effort.
To reliably prevent failures, the ideal method is to capture images of multiple locations at the same time or to track the moving cell while capturing its image.
Countermeasures
- Capture wide images of the field of view with a low magnification lens.
- Capture images of multiple locations at the same time.
You can accurately capture the cells without missing any of them by observing a wide field of view with a low magnification. However, it is difficult to observe the details of a cell with a low magnification. What’s more, note that the longer the exposure time becomes, the greater the chance of the image becoming blurry due to the target moving during image capturing.*10
*10 Exposure time and image blurring: When you reduce the intensity of the excitation light, the exposure time becomes longer. If the cell moves while the shutter is open, the image will be blurry. The effective way to prevent this problem is to use a camera with a high sensitivity.
Benefits of KEYENCE’s fluorescence microscopes XYZ position adjustment function
With KEYENCE’s All-in-One Fluorescence Microscope BZ-X, the capture position can be adjusted (in the X, Y, and Z directions) during live cell imaging. This ensures that the cell remains within the field of view throughout the duration of the experiment. This function is performed using previously captured images, so cell images can be captured accurately no matter how high the observation magnification. Also, there is no need to worry about problems such as photobleaching and decreased activity caused by exposure to the excitation light.
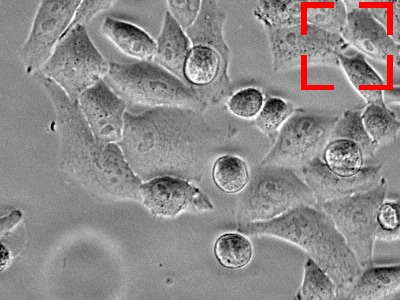
The target is about to move out of the field of view.
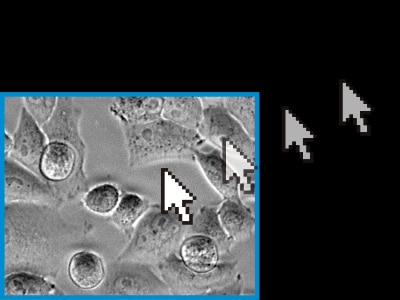
Readjust the X, Y, and Z positions on the basis of previously captured images.
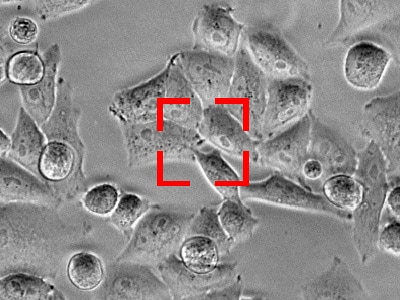
Image capture is resumed using the updated position.
Significantly improve the live cell imaging experiment efficiency
Conventionally, to achieve better research results, it has been necessary to repeat experiments to obtain more information. However, with live cell imaging, even a single experiment takes a lot of time, so repeating experiments requires a huge time investment. Ideally, a single experiment should provide more information.
KEYENCE's All-in-One Fluorescence Microscope streamlines live cell experiments by obtaining the maximum amount of data. It is possible to capture data at up to 999 locations, with each location having different capture settings, including changing the magnification. The BZ-X is easy to use, and even novice users can quickly set up large experiments.
Benefits of KEYENCE’s fluorescence microscopes Coordinate-specific conditions settings
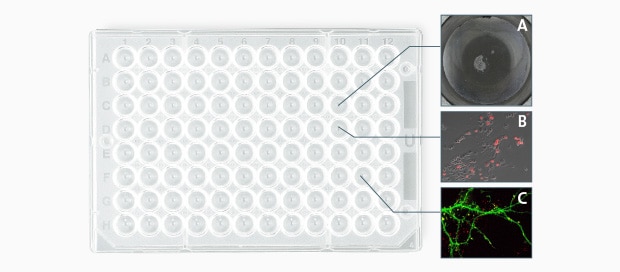
With KEYENCE’s All-in-One Fluorescence Microscope BZ-X, capture conditions including focal position, exposure time, lens magnification, the used filter, and Z-stack settings (such as width and pitch) can be set individually for each coordinate position set with the Multi-point function. This function allows for multiple specimens requiring different viewing conditions to be captured during the same live cell imaging, improving the efficiency of your experiment.
Specimen A: For counting colonies
- Lens: Phase contrast 10x
- Observation mode: Phase contrast image
- Image stitching: 7 × 9 images
- Z-stack: N/A
- Exposure time: 1/70 s
Specimen B: For transfection evaluation
- Lens: Phase contrast 20x
- Observation mode: Phase contrast + fluorescence overlay
- Z-stack: 1.5 μm pitch, 8 images
- Exposure time: Phase contrast = 1/50 s, fluorescence = 1/5 s
Specimen C: For cultured nerve cells
- Lens: Oil immersion 60x
- Observation mode: Fluorescence 2CH overlay
- Z-stack: 0.5 μm pitch, 10 images
- Exposure time: CH1 = 1/6 s, CH2 = 1/12 s