Optical Comparator (Profile Projector)
What is CMM Programming?
Key Takeaways
- CMM programming defines probe paths and measurement points to produce reliable coordinate data.
- CMM types: bridge/gantry for large fixed parts, arm for flexible use, handheld for shop‑floor speed.
- Programmers translate drawings into automated routines, ensuring measurement consistency and QA.
- Modern CMM software speeds inspection: CAD import, statistical reports, run‑mode reuse of programs.
- Advanced features (AR overlays, temperature compensation) improve traceability and measurement accuracy.
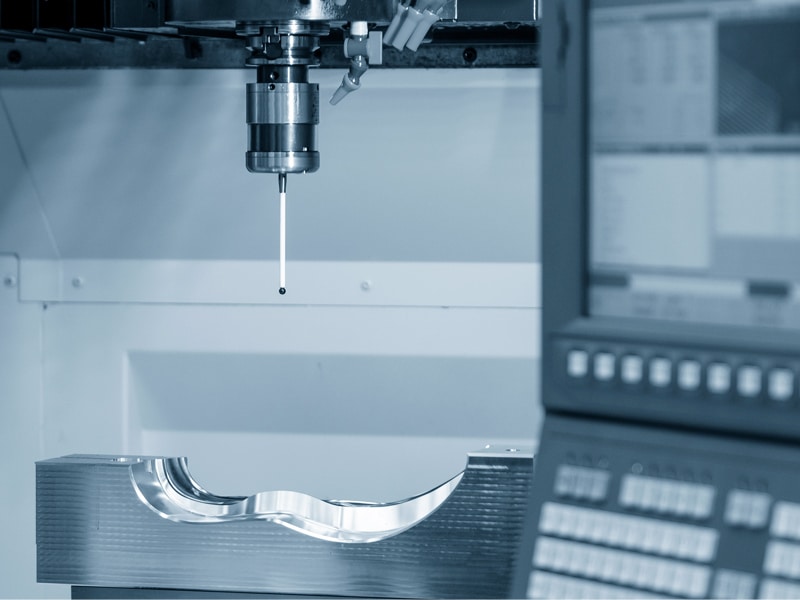
In the world of manufacturing, a CMM programmer plays a vital role in driving quality control. In the following, we’ll take a look at the significance of CMM programming in manufacturing processes and how cutting-edge CMM programming software plays a role.
What is a CMM?
CMM stands for coordinate measuring machine – a tool for measuring and inspecting parts throughout manufacturing processes. CMMs measure 2D and 3D dimensions as well as GD&T features by touching a probe tip to a part, and creating coordinate points to build dimensions with. CMM programming performed by a CMM programmer is what’s in charge of taking the points, and where.
Within the CMM realm, there are many types to fit the needs of different sizes and shapes of parts; however, regardless of the type, all of these CMMs work by collecting measurement data and following the probe coordinate process.
We’re here to provide you with more details.
Reach out today!

What Are the Types Of CMMs?
Bridge/Gantry
A bridge/gantry CMM has four legs and a bridge middle piece that supports the probe. The bridget is the movement support for the probe as it slides horizontally across the bridge. This type of CMM is often floor mounted because of its large size. Bridge/gantry CMMs usually are large in size and require a designated programmer.
Arm
Arm CMMs are long “arms” with joints that allow movement from their base. The probe is located at the end of the arm, and encoders located at the joints determine the probe’s position in order to take coordinates. Arm CMMs are flexible and are portable or attached to a stage. They often require a designated user to be able to take measurements and understand the software.
Handheld
Handheld CMMs are CMMs without any extended arm, just the probe. These are unique to KEYENCE as they have been able to perfect the science of using vision to track the probe location. These CMMs involve a camera head that may be attached to a stage, but could also be used on a mount or tripod on the shop floor. The software involved with these vision based CMMs is designed for anyone to be able to use, so no designated CMM programmer is needed.
Discover more about this product.
Click here to book your demo.

What is a CMM Programmer?
Each type of CMM requires calculating the displacement to the coordinate, and it doesn’t happen magically. The technician that sets up the programming inside of CMMs is called a CMM programmer. CMM programmers are the master behind CMMs; they create the designs and CMM programming inside the software and interpret blueprints, manuals, and work instructions.
The CMM programmer actively participates in the measurement process on some shop floors, meaning they conduct calculations and control the CMM. Other shop floors that use highly programmed CMMs don’t require the CMM programmer to be there because they set up CMM programming software.
What Role Do CMM Programmers Play in Manufacturing?
CMM programmers are metrology experts, and in manufacturing, metrology is king. Metrology is the study of measurement – analyzing what it means, what it says about a part, and how it should be measured. It’s how quality control stays uniform because manufacturers use the same systems and methods to produce and reproduce measurements. The most precise metrology gives products long life cycles because there is less wiggle room for wear and tear and other defects.
For each part to pass quality assurance, it must be measured and inspected uniformly to determine what parts pass and what parts fail inspection. The CMM programmer ensures that the CMM is programmed for precision and accuracy in order to accurately measure these parts.
We’re here to provide you with more details.
Reach out today!

What is CMM Programming Software and Why Use it?
CMM programming software exists within the measurement machine, usually on a separate monitor but sometimes on the actual device.
It’s not news to say that using programming instead of manually calculating makes processes go faster. But why is it so crucial with CMMs?
Measurement is held to high standards – requiring accuracy and precision beyond what a human can sometimes comprehend. In industries with tight tolerances, minuscule measurement differences make a world of difference in the product.
Using CMM programming software expedites the calculation process and protects from errors. Programming is also reliable because it’s not susceptible to human error. With that said however, it is important that CMM programmers are well versed on their CMM software so that the correct measurement points are taken each time.
What CMMs Does KEYENCE Offer?
KEYENCE has two CMMs, the XM Series and the WM Series, with intelligent CMM programming software. The programming software in this case is easy to understand and allows for any user to pick up the handheld probe and inspect a part. Unlike traditional CMM programming, the XM and WM allow you to select the element you want to measure, and then place the probe on that element to select data points along it. Once you’ve taken enough points, you can move on to the next element. It’s as simple as that.
Handheld Probe CMM XM Series
The XM Series is a portable and handheld CMM for parts up to 6ft. It can be attached to a stage, mount, or tripod, in order to be flexible enough to meet any inspection requirements, whether in a QC lab, on the shop floor, or even in the milling machine.
Wide-Area CMM WM Series
The WM Series is also a handheld probe that can be mounted or added to a tripod. It covers a wide measurement range, so it tackles large components up to 82ft. It's ideal for large components or parts and machine alignment.
We’re here to provide you with more details.
Reach out today!

How Does KEYENCE’s CMM Programming Work?
The XM and WM both have CMM programming that is easily accessible and reaches many measurement needs. They can measure all 2D and 3D elements as well as GD&T features with the touch of a button. They also have the capability to import and export CAD models.
CMM Programming Measurement Process
When inspecting a part for the first time, the operator will begin by opening up “program mode”. They can then select what elements are required for measurement. For example, let’s say a programmer wants to measure a plane. They would select the “plane” tool, then place the probe against the desired plane to be measured. They would then press the “measure” button on the probe and a coordinate point would be taken. The operator would then repeat this point taking process until they measure at least three points and up to 200 points for the plane. Then they would save this measurement and move on to the next element.
Once all elements have been measured, they would save the program. The next time they have to measure that part, they could then open up that program in “run mode” which essentially has the operator connect the dots to complete the measurements. This unique and user-friendly software for CMM programming makes the KEYENCE CMMs ideal for companies looking for easy and accurate measurements.
CMM Programming Prototype Measurements
If the CMM is used to measure prototype comparisons, then the software can use 3D CAD data as an overlay. The 3D CAD data uses comparison measurement with a color map display, meaning it color codes the similarities and differences between the two parts.
CMM Programming Post-Measurement Process
After the part is measured, the software conducts statistical analysis, including trend graphs, histograms, and verifications of statistical values. Since the software automatically records and calculates data, it expedites the measurement analysis process.
Discover more about this product.
Click here to book your demo.

KEYENCE’s CMM Programming Additional Special Features
The XM and WM perform almost the exact same functions, with the main difference being their measurement size capability. While the XM can measure parts from 1 inch to 6ft, the WM is ideal for those parts greater than 6ft and up to 82ft. The XM is great for smaller parts that require greater accuracy, while the WM is great for larger parts with less restrictive accuracy requirements, that often need more than one inspector at a time, since it can be operated by just one person.
One of the most unique features that KEYENCE CMMs possess is augmented reality software. Once you take measurements on a part, you can use the camera on the probe to take an image of the part. The augmented reality software then overlays the virtual measurement directly on top of the image of the part. This allows the person programming on the XM or WM to see exactly what was measured and have photographic evidence of their inspection.
In addition to that unique feature, both CMMs have temperature compensation functions, so the CMM and the part can account for fluctuations in temperature.
Ready to Try a CMM?
At KEYENCE, our CMM programming is built for anyone, making all your measurement and inspection needs as simple as possible. From measurement with the touch of a button to measurement overlay on images of the part using our augmented reality software, these CMMs work for everyone. If you want to learn more about which CMM is right for you, find out here about how to make the perfect choice for your processing needs.
We’re here to provide you with more details.
Reach out today!

Related Downloads
Brochure for the XM-5000 Series Handheld CMM. Portable CMM to easily and accurately measure 3D and GD&T features anywhere including the shop floor and in the machine tool.
See common optical comparator application examples measured on the IM Series Instant Measurement System. Application examples include: turned parts, machined parts, springs, stampings, fasteners, gaskets, etc.

