Measurement Sensors
Dimension Measurement
Displacement Measurement
Preventing False Rejections: Balancing Sensitivity and Accuracy in Inspection Systems

In modern manufacturing, speed and precision go hand in hand, but neither means much if a system misjudges quality. False rejections in inspection systems can drain production efficiency, damage yield rates, and trigger unnecessary waste. And while some level of caution is necessary to avoid passing defective parts, excess sensitivity can backfire. Quality control is a careful balancing act between identifying fundamental defects and preserving good parts.
Why False Rejects Occur with Inspection Systems
False rejects happen when a product is mistakenly flagged as defective despite meeting all required specifications. These errors often stem from the configuration of the inspection system itself. Most inspection processes rely on pre-established thresholds and classification logic to differentiate between acceptable variation and actual flaws. However, if the system is too rigid, products that technically fall within specifications can still be rejected.
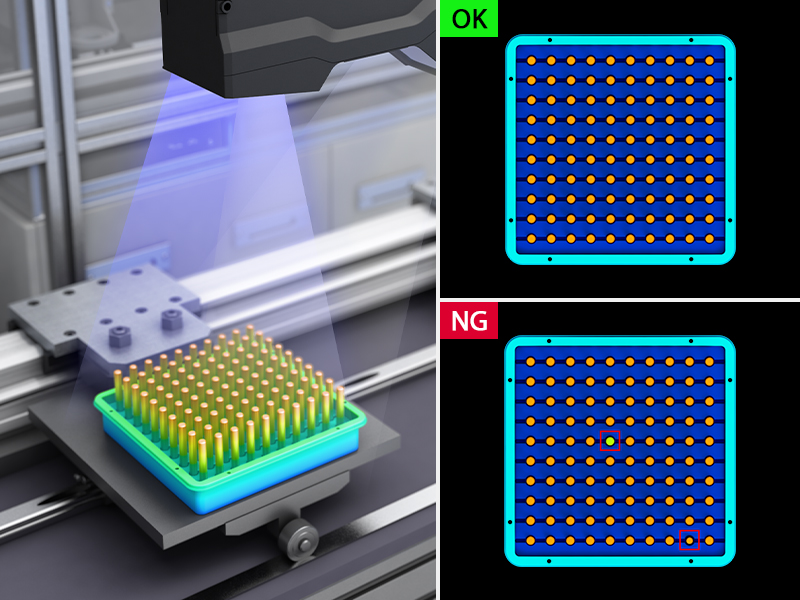
This issue can originate from several factors. Variability in lighting, sensor resolution limits, or software misclassifications due to overlapping data distributions between "good" and "bad" parts all contribute. In high-throughput environments where part inspection in manufacturing moves at hundreds of units per minute, even a 1–2% false reject rate (or 1–2 out of 100 units) can cause significant material loss.
Type I errors, also called false positives or false rejects, are the most common symptom of overly aggressive inspection systems. While tightening parameters seems logical to improve quality, doing so without statistical validation increases the risk of eliminating acceptable parts. Surface flaw detection, gauging routines, and vision-based metrology systems are especially prone to this if the system lacks adequate calibration or adaptive classification logic.
The Importance of Balancing Sensitivity and Accuracy
Contrary to popular belief, sensitivity and accuracy are not interchangeable. Sensitivity refers to a system’s ability to detect defects, whereas accuracy describes how well it can distinguish between good and bad parts. A system can be highly sensitive yet inaccurate, which results in excessive false rejects. Conversely, a system tuned for maximum accuracy may miss subtle defects.
A reliable inspection system finds the sweet spot between the two. Instead of simply tightening defect thresholds, teams must validate whether the system can repeatably and correctly classify each part.
Manufacturers can fine-tune their accuracy systems by using advanced image analysis algorithms, combining multiple sensing modes, or introducing machine learning models capable of contextual decision-making. The tradeoff isn’t between quality and speed, it’s between statistical precision and operational risk. When done well, the outcome is fewer errors, higher yield, and tighter process control.
We’re here to provide you with more details.
Reach out today!

How to Reduce False Rejects in Inspection Processes
Minimizing false rejects starts with understanding where and why they occur. Initial audits should examine the type of inspection in use—dimensional, visual, presence/absence, or surface analysis—and determine how each contributes to over-sensitivity. For example, systems that rely on high magnification or tight geometric tolerances may require adaptive filters to prevent misclassification due to surface texture, glare, or optical noise.
Reducing false rejects also means identifying overlapping data distributions. In machine vision systems, false failures often result from a lack of clear separation between measurement results for good and bad parts. Teams can combat this by using statistical models and validation datasets to evaluate the distributions and tune classification logic accordingly.
Environmental factors, like vibrations or inconsistent lighting, can introduce variabilities that lead to false positives. Implementing enclosures, stable lighting conditions, and auto-calibration features reduces this risk. Additionally, modern vision systems are equipped with multi-sensor configurations that can distinguish between cosmetic inconsistencies and functional defects with greater precision.
Best Practices for Optimizing Accuracy Systems
To maintain accuracy, manufacturers must first understand what data is being captured and how that data is interpreted. That means selecting the proper measurement devices for the task, whether the process involves detecting subtle cosmetic flaws, checking seal integrity, or measuring dimensions within microns.
Setting tolerance thresholds requires a balance between engineering specs and real-world variability. Gauging systems should be validated using Gage R&R studies, which reveal how much variation comes from the measurement system versus the part itself. This is especially important in multi-stage assemblies where surface interactions introduce complexities that can’t be managed by static rules alone.
Another best practice involves using defect libraries or training datasets. Vision systems enhanced with AI can compare new inspection results against a database of known good and bad parts, improving defect classification over time. This reduces the subjectivity that leads to false rejects, especially in processes with natural variation.
Accuracy systems should be periodically revalidated, especially when there are production changes, tools wear down, there are shifts in part geometry, or even there are minor material changes- all of which can affect inspection performance. Adaptive calibration and alerting features built into the inspection system can flag when baseline accuracy drifts, allowing teams to intervene before the reject rate climbs.
Discover more about this product.
Click here to book your demo.

The Role of Automation in Improving Inspection Efficiency
Automation stabilizes inspection processes and eliminates operator variability. Manual inspection is prone to fatigue, inconsistent lighting, and subjective interpretation, all of which raise the risk of false rejects and false accepts. By contrast, automated inspection systems apply the same criteria every time and at a speed that manual methods can’t match.
High-speed cameras, lighting control systems, and programmable classifiers all streamline decision-making. Some of the most advanced systems even support 3D inspection, capturing full surface geometry to identify subtle deformations that traditional 2D vision might miss; automated systems also incorporate error-proofing logic. For example, if a product fails inspection multiple times in succession, the system can escalate the issue or trigger maintenance requests.
Classifiers built on machine learning can adjust sensitivity rather than relying on fixed thresholds. These systems factor in lighting changes, part orientation, and patterns from past inspection data to fine-tune their judgments in real time. By responding to context without relaxing inspection standards, they significantly cut down on false rejects while preserving detection performance.
Choosing the Right Inspection System for Your Industry
Every industry presents different challenges for inspection, and choosing the right inspection system requires evaluating defect risks and production dynamics. In pharmaceuticals, false rejects can waste sterile containers or dosage units. In electronics, a misclassified solder joint might mean scrapping an entire board.
Accuracy systems with high-speed, high-resolution sensors are key for industries with high throughput and strict tolerances. Surface inspections may benefit from systems designed with telecentric optics to prevent distortion, as applications involving reflective or translucent surfaces often require specialized lighting to mitigate glare.
In sectors where traceability is a regulatory requirement, inspection systems must include automated data logging, audit trails, and user control tiers to prevent tampering. Advanced platforms also offer cross-line calibration, allowing manufacturers to maintain consistency across multiple machines or production facilities.
When selecting a solution, consider the sensor type and the full system: software intelligence, integration options, and real-time control. Many inspection systems are modular and can scale with production demands. They also maintain relevance for manufacturers growing their footprint or evolving product lines.
Conclusion
Every acceptable part that gets scrapped drains time, material, and trust. In fast-moving, high-stakes environments, manufacturers can’t afford to let outdated inspection systems make those decisions.
That’s where smarter inspection comes in, with systems that balance sensitivity with real-world variability. Platforms that learn from the line, adapt in real time, and flag defects without punishing your yield. With the right inspection system, you don’t have to choose between speed and precision or quality and throughput.
Don’t let good parts go to waste. Whether you're evaluating types of sensors or upgrading existing systems, the goal is the same: accuracy without compromise.
Contact KEYENCE to explore inspection solutions tailored to your environment!
Contact us to learn more about how our advanced technology can help take your business to the next level.
Contact Us
Related Products
Applications
Dimension Measurement
- Thickness and Width Measurement
- Step Height Measurement
- Inner and Outer Diameter Measurement
- Measuring Angles
- Meandering/Edge Measurement
Displacement Measurement
- Positioning and Stroke Length Measurement
- Vibration and Runout Measurement
- Deflection Measurement
- Measuring Eccentricity


