Optical Comparator (Profile Projector)
Springing Forward
Key Takeaways
- IM Series eliminates inter-operator variability, delivering consistent measurements across operators.
- Inspection cycle reduced from ~1 hour to ~10 minutes, significantly increasing QA throughput.
- Advanced algorithms measure diameters, radii, coil pitch and geometric intersections automatically.
- System enabled quoting and production of tighter‑tolerance parts, increasing sales opportunities.
Midwestern spring manufacturer increases sales after installing an Instant Measurement System from KEYENCE.

Jumping on a trampoline, mowing the lawn, washing a load of laundry—none of these activities would be possible without springs. Luckily for us, Patrick Manufacturing Inc., Elgin, Illinois makes millions of them. Anything from torsion springs that keep agricultural equipment operational to extension springs used to keep the screen door shut on a summer day, this thirty year old family-owned company produces springs for almost any application imaginable.
Despite the wide variety of products made here, there was work that even this experienced spring manufacturer had to turn down. “We know our machines can hold tight tolerances, but some parts we would not quote because it would be a problem inspecting them,” says quality manager Patrick Lang. “When you're making a spring the size of your fingernail, you can have five people check it using traditional inspection methods and get five different measurements. The KEYENCE system has solved all of that—anyone in our shop can go up to the machine, set the part down, and get the same measurement as the next person, no matter what.”

Lang is talking about the IM Series “Instant Measurement” image dimension measuring system, which Patrick Manufacturing purchased after a visit to the biennial Chicago Association of Spring Manufacturers (CASMI) trade show in Chicago. “I've been there three times now,” says Lang. “There's always new equipment to look at but nothing really jumped out at me until we saw the Instant Measurement system at KEYENCE's booth.
We had looked at other equipment over the years and it was either too big for what we needed, or had some sort of quirk like only being able to display in metric. The simplicity of the KEYENCE system really blew us away—it takes out any chance of user error, and is very quick to set up. It was the first time we actually were wowed at CASMI in the last 10 years!”
After the show, a direct KEYENCE specialist came onsite with a demo unit to show Lang and his team how the system would work in their environment. Compared to how they were measuring parts previously—a combination of micrometers, calipers, and an “oldie but goodie” optical comparator—Lang knew immediately the Instant Measurement would be a huge time saver, especially on the smaller parts that were typically being checked on the comparator. He recommended to management that they proceed with the purchase, and the new machine arrived not long after.
“The training was scheduled a few days after the delivery of the system, but it was user-friendly enough that I was able to set it up and figure out how to begin using it before the same specialist who demoed the system arrived to train us,” he says. “That allowed us to dig into some of the more technical details while they were here so we were able to really hit the ground running. The KEYENCE people have been great to work with—even eight months after the sale, if I have a problem part, they're willing to come out and give me pointers. They're very helpful and professional.”
Since that time, the Instant Measurement has become a pillar of the quality lab. Lang uses the system to inspection a wide variety of part features, including inside and outside diameters, overall length, form radii, distance between holes, and even coil pitch. The system is equipped with built-in software algorithms to automatically detect the position of the workpiece, and can calculate the intersection of lines and circles, midpoints and bisectors, tangency…the list goes on.
“There are endless things you can pinpoint on the IM,” he says.
“I do all of our quality management here and it saves me a ton of time: what used to take me an hour now only takes 10 minutes or so. The shop floor people come into the quality room to use the Instant Measurement as well; it's been very well received.”
Perhaps the biggest benefit of the new system is the ability to quote on work that was previously passed over. “The KEYENCE IM really opens the doors to tighter tolerance work, stuff that we weren't comfortable measuring. Now we know that everyone can do the same job as the next person. My only wish is that KEYENCE's Instant Measurement system had four-foot field of view…that way we could measure everything on it!”
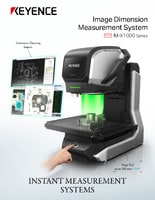
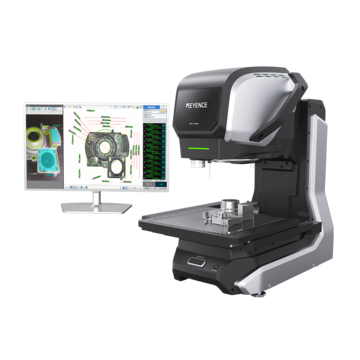
KEYENCE recently launched the IM-X1000 Series, the latest generation of the Instant Measurement System lineup, as a modular system designed to meet your inspection needs. Now measure up to 5,000 dimensions now in as little as 1 second with the push of a button. The IM-X features a new ultra-wide large stage, multisensor measurement capabilities, and a world-first function to automate challenging and time-consuming part programming.


