CMM (Coordinate Measuring Machine)
3 Benefits & Challenges of On-Machine Measurement
Key Takeaways
- On‑machine measurement removes part transfer and locates defects immediately on the line.
- It reduces operator skill needs and can shorten feedback loops for corrective action.
- Harsh shop conditions (temp, fluids, swarf) make on‑machine measurement error‑prone.
- Implementing on‑machine probes and controls raises cost and may slow cycle time.
- Portable CMMs (XM/WM) offer in‑process accuracy and temperature compensation as an alternative.

Measurement is a necessary part of every manufacturing process. It’s how businesses ensure quality control, consistency in parts, and consumer safety. Without measurement, products deteriorate more quickly, do not work correctly, or could even have dangerous results.
Nonetheless, measurement is known for being tedious and requiring highly trained technicians with experience in metrology. Even with these technicians, the measurement process is slow. Still, manufacturers are finding new and efficient ways to optimize the measurement process to combat this.
One of these solutions is on-machine measurement. Although there are high hopes for on-machine measurement’s success, the method has benefits and challenges preventing it from fully entering the manufacturing world as the go-to measurement method.
In this, we discuss why and how on-machine measurement is used and why some manufacturers choose to steer clear of it.
What is On-Machine Measurement?
On-machine measurement is the process of a machine measuring a part during the machining process. It’s an attempt to cover the manufacturing and measuring processes in one task.
On-machine measurement works by using a tooling change. The part moves down the assembly line, is processed, and then the machine changes the tool from the spindle into a measuring probe. The measuring probe touches the axes and collects and stores the coordinates. If the measurement is defective, the machine will provide an alert.
We’re here to provide you with more details.
Reach out today!

Benefits of On-Machine Measurement
On-machine measurement is a controversial method with debatable benefits and challenges. Some argue that the benefits outweigh the challenges, while others see the benefits as not any different than any other measuring tool.
1. Removes Bottlenecks
Those in favor of on-machine measurement advocate for the fact that it requires no part changing on the production line, so bottlenecks are avoided. Other measurement systems, like coordinate measurement machines (CMM), usually require the part to be taken off the line and transported into another manufacturing room. With on-machine measurement, there’s no transportation or part-changing downtime.
As a result, time and money are saved, which is critical for all manufacturing processes.
2. Locates Defects Immediately
Since on-machine measurement measures the flow of the line, it can pinpoint the exact spot in the line where there’s a defective part. Being that it can locate the defect immediately, it makes it easier for technicians to find other defective parts by examining other parts close to the production line instead of sorting through disorganized parts.
This detection ensures that the products are produced with high quality control standards and saves technicians time during production.
3. Easier to Use
Measuring is a notably tedious task requiring highly trained operators. Using on-machine measurement makes the process significantly easier because there’s less training involved since the machine does it all. As a result, costs can be reduced from both a labor and time perspective.
Contact us to learn more about how our advanced technology can help take your business to the next level.
Contact Us
Challenges of On-Machine Measurement
1. Error Prone
The most popular critique of on-machine measurement is that it’s an error-prone process. This fact is the main reason why on-machine measurement is controversial.
Machining environments are unpredictable and have exposure to factors like humidity, fluctuating temperatures, fluids, and swarf that affect measurement accuracy. This exposure is why measuring often takes place in a different contained area.
Another reason on-machine measurement is error-prone is that it puts all trust in a machine to regulate itself when the machine is causing defects. If a machine is defective, it’ll produce defective results and won’t be caught. Many argue that having a separate measuring device unrelated to the machine creating the defects is better.
The effects of an inaccurate measurement could be catastrophic for high-stakes industries like medical devices, aerospace, and automotive. For many, the convenience of on-machine measurement isn’t worth the risk.
2. Costly
The process is costly because of the error risk with on-machine measurement. Not only is it not cost-effective to have measurement quality errors frequently, but trying to control these factors is also costly. With the exposure to contaminants, there’s an extra budget put into climate and particle control. The extra cost put into this doesn’t even out when comparing on-machine measurement to a different and more accurate tool.
3. Slows Production
While some argue that on-machine measurement speeds up production because there’s no stopping and starting, others refute that with the opposite claim. Adding measurement to machinery makes the machine run slower, so it doesn’t make a difference if there’s a starting and stopping for a different measuring device.
Discover more about this product.
Click here to book your demo.

CMM Solutions for Measurement
The frequent pushback in the debate on-machine measurement is whether using a CMM shop floor measuring machine is more efficient and accurate.
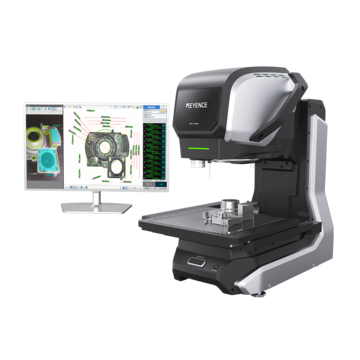
CMMs are shop floor measurement devices that measure and inspect 3D GD&T features like parallelism and perpendicularity. They’re known for accuracy and come in four types: gantry, bridge, cantilever, and portable. Since most of these types are stationary, that’s a huge driver for why people advocate for on-machine measurement instead.
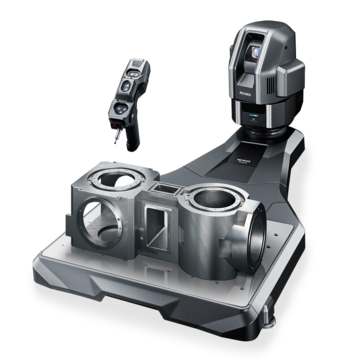
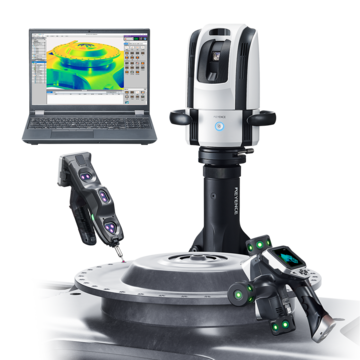
However, at KEYENCE, our CMMs are built differently; they’re handheld, portable, and only require three steps. KEYENCE offers two CMMs: the XM Series and the WM Series. These CMMs can be used by anyone, even without official metrology training. The XM and WM work by a tracking camera capturing near-infrared light emitted by seven markers to collect the coordinates. These shop floor measurement devices have an intuitive user interface that only requires selecting the tool, touching the part with the probe, and press measuring.
XM Series
The XM Series is a competitor for on-machine measurement challenges. Since the XM is portable, it can measure in-process, so you get the efficiency benefits of on-machine measurement but the accuracy of a CMM. The XM Series includes a temperature compensation function for the unpredictable machining floors.
This CMM is more versatile than typical on-machine measurement; it measures 2m wide, 40 degrees to the left/right, and 25 degrees up and down. It can even conduct data analysis and CAD comparison.
WM Series
The WM Series is similar to the XM but reaches a wider distance for larger components. This series is also portable and can be mounted by a tripod, extension pole, or cart. Additionally, the WM also has a temperature compensation function for unpredictable environments. It reaches 25 m in length and 12.5 m in height with an angle range of +/- 120 degrees to the left/right and +/- 30 degrees up/down.
The WM Series outperforms standard on-machine measurement with measurement range and temperature compensation functions.
Get detailed information on our products by downloading our catalog.
View Catalog

To Use On-Machine Measurement or Not?
With the necessity of metrology for quality control and consistency, manufacturers are looking for the most efficient and accurate measurement solution. The discourse over using on-machine measurement will continue, especially as machining technology advances.
It’s up to you to decide whether on-machine measurement is worth it for your industry and application. If tight accuracy tolerances are not the biggest concern, then on-machine measurement may be acceptable. But if you’re in an industry with tight tolerances, it’s beneficial to consider CMMs as an alternative.
If you’re in need of an efficient and accurate shop floor measuring machine that doesn’t cause bottlenecks, contact us today for a free demo of our CMMs. Our knowledgeable team is here to answer any questions and help you with your specific applications.
We’re here to provide you with more details.
Reach out today!

Related Downloads
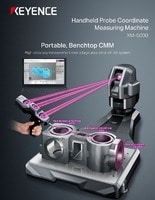
Brochure for the XM-5000 Series Handheld CMM. Portable CMM to easily and accurately measure 3D and GD&T features anywhere including the shop floor and in the machine tool.

Brochure for the WM-6000 series Wide-Area CMM. A portable setup with a wireless handheld probe that enables users measure large parts and equipment.

![WM-6000 series Measurement / Application Examples [System Versatility Examples]](/img/asset/AS_116820_L.jpg)
![WM-6000 series Measurement / Application Examples [In-Machine Measurement Examples]](/img/asset/AS_116821_L.jpg)
