CMM (Coordinate Measuring Machine)
What Is the Difference Between CMM Measurements and 3D Scanning?
Inspection and quality assurance are important processes in manufacturing. Two systems, Coordinate Measurement Machines (CMMs) and 3D scanners, have been in the quality control (QC) space for quite some time now. Although they are both fantastic tools for inspection, they each have their own place in the QC world. Understanding the fundamental differences between these systems helps determine what is best to optimize different inspection processes.
In the following, we’ll look into the distinctions between each, so you are better equipped to choose the right tool.
Understanding CMMs and 3D Scanners
Although both technologies are built to handle a variety of measurements, they have varying features and capabilities that set them apart. Your specific applications will determine what system works best for you, or you can look into systems that offer both capabilities.
Coordinate measuring machines take data points one at a time, making the data capture range a bit more limited over an entire surface, while 3D scanners collect a point cloud of up to millions of data points during their scan. The limited data points that a CMM takes allows for more accurate measurements and faster results on basic dimensions since the part is finished being inspected as soon as the last point is taken. On the other-hand, 3D scanners take millions of data points, so there is a waiting period for the software to turn the scan into the mesh for you to work on to obtain your measurements, making a scan take more time than general probing.
Get detailed information on our products by downloading our catalog.
View Catalog

Key Considerations for Selecting Between a CMM and 3D Scanner
It may seem like CMMs and 3D scanners take different routes to accomplish the same goal, but their limitations actually define where they should and shouldn’t be used to maximize the efficiency of your inspection process. Each tool can perform some of the same tasks. However, it is crucial to understand what sets them apart. Below, you can find brief lists, including notable features, that help break down the topic of CMM vs 3D scanners.
CMM Measurement
- Uses a touch probe to take individual points and build geometries
- Contact-based measurement
- Outputs 3D and 2D CAD files such as STP, IGES, or DXF
- Mainly for dimensional analysis
- Higher accuracy
3D Scanner
- Captures millions of data points to build a mesh
- Non-contact operation
- Outputs 3D CAD files as STL and STP
- Mainly for reverse engineering
- Lower accuracy
Specific Measurement Requirements and Tolerances
Regarding measurement capabilities, 3D scanners and CMMs can both measure basic and 3D geometries as well as GD&T features. However, 3D scanners are creating a “mesh” 3D file for virtual measurement and reverse engineering capabilities, and CMMs focus on physical measurements with less emphasis on reverse engineering.
CMMs currently boast greater accuracy than 3D scanners, though as 3D scanning technology continues to evolve, the equipment will be meeting tighter tolerances with every passing year.
For applications with tight tolerances focused on dimensions, a CMM will be the better pick of inspection equipment since a CMM’s main focus is on measuring dimensions, and they can meet tighter tolerances. For applications requiring NDT or reverse engineering a part, a 3D scanner would be the more appropriate tool to choose. Along the lines of reverse engineering, surface complexity is a big focal point of 3D scanners. 3D scanning can capture every surface point simultaneously, regardless of its complexity. Whether it is smooth, porous, or rigid, 3D scanners can provide more robust data for the entire surface, while CMMs would miss some pores and ridges as they are more limited in their data collection.
Cost Constraints
Although higher costs are commonly associated with newer technologies, that isn’t an issue when choosing between a 3D scanner and a CMM. In reality, CMM technology comes at almost an equal price point to that of 3D scanners, so the focus on which to purchase is more on the necessary capability rather than affordability.
Operator Skill Level and Training Requirements
Because of its design, using a traditional coordinate measuring machine often demands a higher level of technical expertise from operators, but portable CMMs can be used by anyone due to their intuitive operation and software. On the other hand, 3D scanning devices require only a modest amount of technical know-how to run the system but requires more expertise on the back end when cleaning up and analyzing the scan.
Using a CMM might take a bit more know-how, but once the coordinate points have been taken, all measurements are created automatically by intuitive software along with reports.
3D scanners might be a bit easier to use on the front end, but depending on the software they run, their data collection can be tough to navigate. Once the scan is complete, the 3D file must then be exported to a different program where the point cloud is cleaned up of extraneous points. Once that is complete, the clean scan is then imported into software that allows you to select elements for measurement. This is a time-consuming process, and it can take up to a day for this processing before you receive your measurement results. This is okay for one-off items or reverse engineering, but it becomes a time-consuming effort if you are using 3D scanners to measure every part. However, for the Keyence 3D Scanners, the software allows you to bypass this clean-up step, allowing for the creation of a finished mesh in just a few minutes following the completion of the scan.
Integration With Existing Workflows
From an all-encompassing standpoint, the integration of 3D scanners or coordinate measuring devices in existing workflows can look a little different. Daily operations in manufacturing and quality control consider many factors. Some of these pertain to final inspection capabilities, data compatibility, efficiency, and more.
CMM Measurements
- Easily handles simple geometric features and dimensions
- Requires more manual and mechanical training
- All measurements are complete once the last point is taken
3D Scanning
- Generates 3D point cloud data
- Requires training in 3D scanning, data analysis, and software expertise
- Measurements must be defined after the scan has been completed
Although 3D scanning might seem like exciting new tech that can replace everything else, a deeper understanding of your basic needs will ultimately help you decide what system is going to be best for you. Are you needing NDT testing or looking for a simple solution to reverse engineer/document surface complexity? If yes, a 3D scanner is the correct choice for you. Do you need to meet tight tolerances and/or measure basic 2D/3D dimensions in a timely manner? If yes, then a CMM will be the optimal choice for your inspection process.
KEYENCE—A Leader in CMMs and 3D Scanning
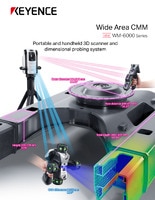
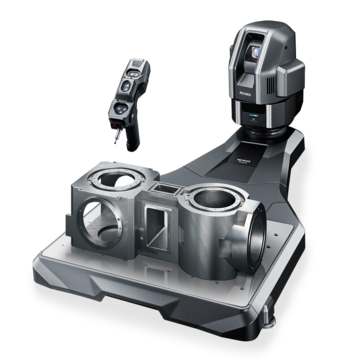
The manufacturing industry will always welcome innovations in quality control, and KEYENCE will continue to offer the latest. The newest release of the Wide-Area CMM, the WM-6000, now offers not only a touch probe for CMM measurements, but also a handheld 3D laser scanner, because KEYENCE recognizes that, sometimes, one option is not enough.
Whether you need to take quick and accurate dimensions with the touch probe, create a 3D scan of an entire part, or a little bit of both, the WM-6000 can do it all. With the ability to take CMM measurements and scan data within the same program while utilizing revolutionary software that creates a mesh of millions of points in just minutes, the WM-6000 is the solution for all 3D part inspection needs. If you are looking to improve your quality control processes, contact us to learn more about how KEYENCE can help.
Contact us to learn more about how our advanced technology can help take your business to the next level.
Contact Us
Related Downloads

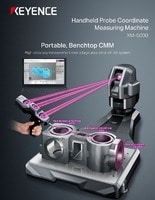
Brochure for the XM-5000 Series Handheld CMM. Portable CMM to easily and accurately measure 3D and GD&T features anywhere including the shop floor and in the machine tool.

Brochure for the WM-6000 series Wide-Area CMM. A portable setup with a wireless handheld probe that enables users measure large parts and equipment.

![WM-6000 series Measurement / Application Examples [System Versatility Examples]](/img/asset/AS_116820_L.jpg)

