CMM (Coordinate Measuring Machine)
Advantages of Using CMM for True Position Measurement
For manufacturers, it can be tough to guarantee that mating parts are manufactured perfectly for seamless alignment. Luckily, technology has advanced to bring us machines that can determine if holes and bends are located exactly where they need to be for perfect fit-up. This is called “true position” and is a part of the GD&T measurement family.
Calculating the true position of critical features allows you to avoid misalignments and other costly mistakes. Some technicians use manual equations for calculating true position, but the most efficient technicians reach for a coordinate measuring machine.
In the following, we’ll discuss how to measure true position on a CMM and how its software integration, precision, and shape versatility make CMMs the best true position measurement tool.
What is True Position Measurement?
True position measurement is the process of finding how far off—in the X and Y and Z axes—a hole, slot, or bore deviates from its given blueprint position. Setting a tolerance for true position measurements will determine the range that this feature can exist in and still be successful in assembly.
Depending on the feature, the true position tolerance zone may be square or circular.
We’re here to provide you with more details.
Reach out today!

How to Measure True Position Manually
For measuring true position manually, you need your part’s blueprint, a fixture, and a dial indicator.
First, secure your part into the fixture to avoid movement that will affect the measurement’s accuracy. When the part is secured, add the dial indicator. The dial indicator includes a needle for collecting measurements, and the dial displays the measurement or deviation from a reference point.
Once you identify your ideal spot and establish two or three datums for reference, then zero the dial indicator. Next, move the dial indicator from your ideal spot to the location of your actual feature. The dial indicator will then provide the measurement and precise reading based on the reference point.
Then, use this information to calculate the deviation and compare it to the tolerance on your blueprint. If the deviation is less than or equal to the true position tolerance calculated on the blueprint, then the part is acceptable. This is a tedious measurement that can take a long time to capture.
We’re here to provide you with more details.
Reach out today!

How to Measure True Position with CMM
There are fewer steps for learning how to measure true position on CMM machines. If you’re using a portable CMM, bring the CMM to the part or the part to the CMM, whatever works best for you. Create your datums and then measure the feature you are looking to determine true position of. Next, input the design values into the software based off of the blueprint. That’s all, now the CMM will automatically calculate the true position of that feature. You can input the design tolerance based off of the blueprint, and the overall measurement result (good or no good) will display on the screen.
We’re here to provide you with more details.
Reach out today!

Advantages of True Position Measurement with CMM
Measuring true position on a CMM is superior compared to using manual methods. CMMs have better accuracy and precision, integrated software that calculates true position for you, and flexibility for complex shapes.
More Accurate and Precise True Position
Using a CMM elevates the accuracy of a true position measurement with its programming capabilities and human error prevention.
CMMs can measure quickly with micrometer-level precision. This precision is especially valuable for tight-toleranced industries like medical devices, aerospace, and automotive. Switching to a CMM from manual true position measurement adds a layer of safety, longevity, and precision to parts in these industries.
Because a CMM relies on automation and little human involvement, the risk of human error is mitigated. It’s always valuable to decrease this risk as the industry continues to face skilled labor challenges. The good news is that KEYENCE CMMs can be implemented quickly and without the need for formal training or these hard-to-find skill sets.
CMM GD&T Software Integration
Software in a CMM enhances your efficiency and cost-effectiveness in measuring true position.
The software automates true position measurement and requires hardly any manual positioning or calculations. This automation speeds up the true position measurement process by eliminating tedious tasks and repetitive re-measuring.
Beyond the basic software that all CMMs have, there are also other software features that CMMs are featuring nowadays. For instance, a CMM may include CAD integration for automated comparisons between the physical part and a digital CAD model. This CAD integration means the CMM will automatically compare the deviation to a digital blueprint for a streamlined true position calculation.
Some CMMs also include data analysis features like graphing, feedback loops, and statistical analysis. These features assist with true position measurement traceability and quality assurance.
True Position Measurement Shape Versatility
In industries like medical devices, where complex shapes are the norm and tight tolerances are crucial, CMMs are advantageous for true position measurements. These machines, especially portable or handheld forms, are ideal for finding the true position with complex shapes because of their maneuvering flexibility. CMMs navigate hard-to-reach crevices while following the tight true position tolerance needed.
Measuring True Position with a CMM can be Expensive
If you don’t already own a CMM, purchasing a CMM for true position measurement is a significant expenditure, but it will pay off in the long run. These machines will not have a good ROI if used for a small project or one-time use.
Before buying a CMM, you must have adequate time researching how to choose a CMM and the various types—bridge, gantry, arm, horizontal, and portable fixed CMMs.
We’re here to provide you with more details.
Reach out today!

Your CMM for True Position Measurement
True position measurement is needed to ensure easy assembly for mating parts. However, calculating the true position manually is tedious and has the potential for mistakes. Switching to a CMM for measuring true position expedites the process while simultaneously improving precision. The micrometer-level precision, integrated software, and flexibility allow a CMM to measure true position quickly and accurately on any part.
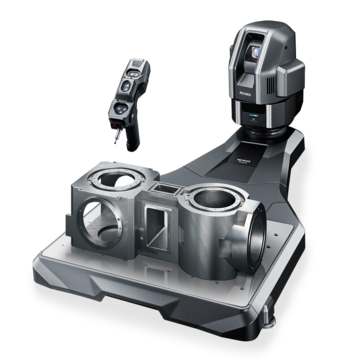
If you’re considering a CMM, we’re here to help. KEYENCE’s CMMs work similarly to arm-type CMMs, but with enhanced capabilities. KEYENCE’s portable CMMs require no training because of the intuitive, user-friendly interface. The software is strapped with 3D CAD comparison and data analysis for a streamlined true position measurement process.
Measuring true position doesn’t have to be tedious or complicated—request a demo today.
Discover more about this product.
Click here to book your demo.

Related Downloads

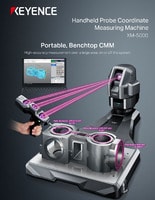
Brochure for the XM-5000 Series Handheld CMM. Portable CMM to easily and accurately measure 3D and GD&T features anywhere including the shop floor and in the machine tool.

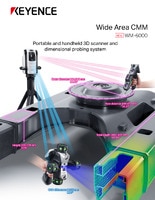
Brochure for the WM-6000 series Wide-Area CMM. A portable setup with a wireless handheld probe that enables users measure large parts and equipment.

![WM-6000 series Measurement / Application Examples [System Versatility Examples]](/img/asset/AS_116820_L.jpg)

