CMM (Coordinate Measuring Machine)
What is Machine Alignment, and Why is it Necessary?
Key Takeaways
- Machine alignment aligns rotating shafts (offset and angular) to prevent misalignment damage.
- Misalignment causes heat, wear, oil leaks, energy loss, shortened service life, and downtime.
- Detection methods: laser alignment, vibration analysis, thermography, and oil analysis.
- Proactive alignment prevents failures; reactive methods only detect issues after damage occurs.
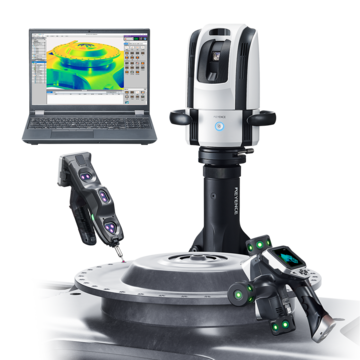
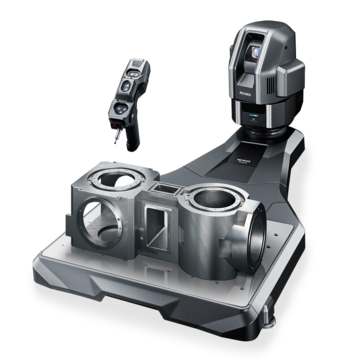
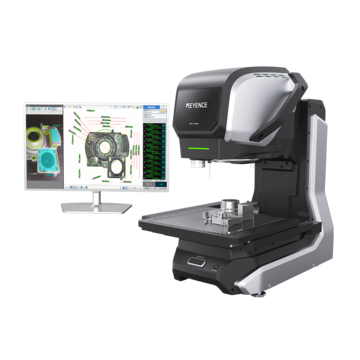
- Portable CMMs (KEYENCE XM/WM) measure coordinates, parallelism and squareness for fast, accurate alignment.
Dating back to the 1700s, humans invented machines to boost the speed at which products are made, assembled, and shipped. Moving at impeccable paces with no need for breaks, machines have conquered processing times that are physically impossible for humans. When it comes down to it, machines are the backbone of society—creating most of the products we have ever purchased or used.
With such a strong hold on our culture, imagine the havoc that would ensue if machines stopped working as designed. Of course, that would not happen because of the built-up safeguards operators have created throughout history, one of these being machine alignment.
Machine alignment is the foundational method for keeping machines up and running; technicians report that most machine failures come from incorrectly aligned machines. But what does machine alignment mean, what parts need to be aligned, and how?
Read on to learn more about the methods for machine alignment and how to be a proactive machine operator.
What is Machine Alignment
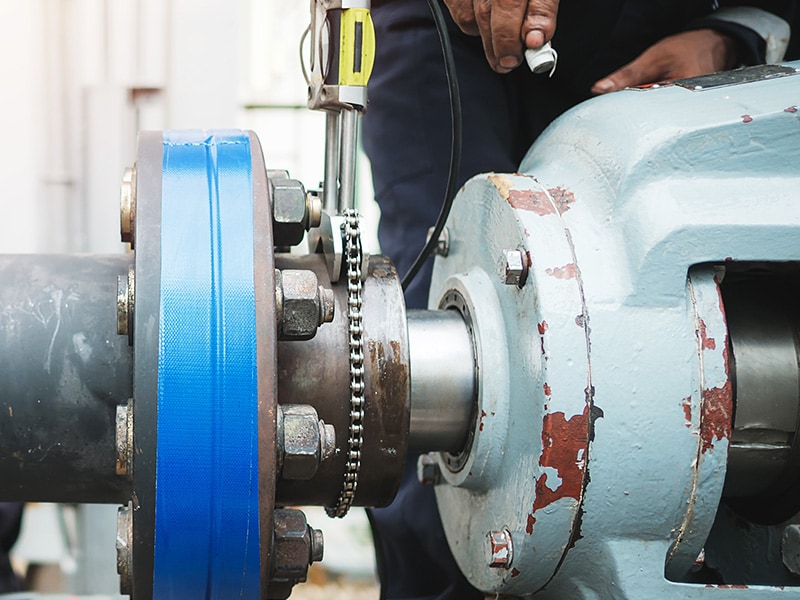
Machine alignment is the process of aligning rotating shafts on horizontal and vertical planes; if these shafts are not aligned correctly, it causes a machine misalignment.
There are two types of machine misalignments: unparalleled shafts and angular misalignments. These misalignments can happen separately or simultaneously. Both types of misalignments are problems with a machine’s shaft.
Unparalleled shafts are offset vertically (vertical offset misalignment) or horizontally (horizontal offset misalignment). Angular misalignments are shafts at the wrong angle on the horizontal plane (horizontal angle misalignment) or the wrong angle on the vertical plane (vertical angle misalignment).
Solving horizontal misalignment requires repositioning center lines by moving the machine side to side; vertical misalignment requires adding or removing shims from the feet.
A number of reasons, such as human error, pipe strain, thermal expansion, and shaft deformation, cause these misalignments.
We’re here to provide you with more details.
Reach out today!

Why Machine Alignment Matters in Industrial Settings
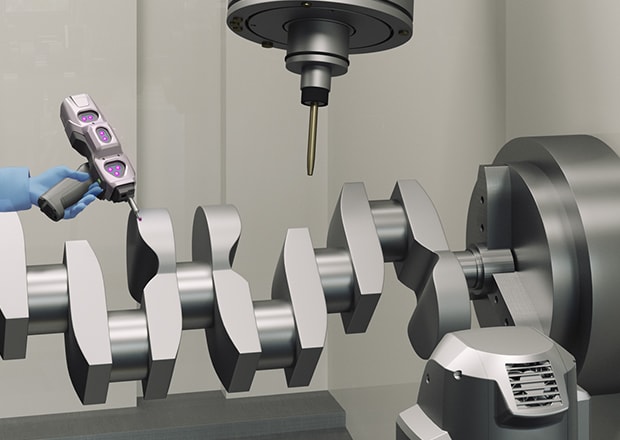
Industrial machine alignment is crucial for maintaining the smooth operation of manufacturing facilities. Machine alignment keeps the power of the machine's motor or engine moving through the machine effectively. Without alignment, the power is unevenly dispersed and can cause damage to the whole machine, parts, and/or products on the production line. Staying on top of machine alignment ensures the machine is working the best way it can.
When equipment operates with proper alignment, energy consumption decreases significantly while output quality improves. As production demands rise, alignment tolerance requirements become more stringent, making accurate alignment essential to maintaining competitiveness.
Inadequate alignment leads to a series of issues that affect more than just one equipment. When misaligned equipment needs regular maintenance or unexpected shutdowns, production schedules suffer.
Industrial machine alignment standards help facilities avoid costly repairs while maintaining consistent product quality and meeting delivery deadlines. Advanced portable CMMs offer the flexibility and accuracy needed for complete alignment checking in complex industrial uses.
Common Types of Machine Misalignment
Knowing the problems that different types of machine alignment create enables personnel to identify faults fast and implement the right fixes. Every kind of misalignment produces varying symptoms and calls for different approaches to treatment. Early detection of these trends keeps small problems from turning into big failures.
Equipment operators should look for signs of misalignment during routine inspections. High noise levels, unusual vibration patterns, or variations in operating temperature are frequently indicators of alignment issues. Equipment longevity is increased, and optimal performance is maintained by routine monitoring.
Parallel and Angular Misalignment Explained
When shaft centerlines stay parallel but are displaced from one another, either vertically or horizontally, this is known as parallel misalignment. Premature wear of bearings and couplings results from this condition's unequal loading. When shaft centerlines cross at an angle, instead of being parallel, there is angular misalignment.
Both circumstances may coexist, posing difficult alignment problems. These minute differences are difficult for manual methods to pick up on, but laser alignment process technology is excellent at doing so. For both parallel and angular misalignment situations, accurate corrective data is provided by sophisticated measurement systems.
Causes: Thermal Drift, Load Variance, Foundation Issues
Thermal expansion and contraction cycles can cause equipment to shift position over time, affecting alignment accuracy. Temperature changes from environmental conditions or operational heat generation create predictable but significant alignment drift. Alignment machine calibration must account for these thermal effects during measurement and correction procedures.
Foundation settling, poor workholding, and inadequate fixturing also contribute to alignment problems in manufacturing environments. Equipment wear on critical components like tooling, spindles, linear guides, and ballscrews gradually degrades alignment precision. Vibration from nearby machinery or sudden shock loads from crashes can instantly knock equipment out of alignment, requiring immediate attention.
Effects of Machine Misalignment
We know that machine misalignment causes damage to the machine, but what type of damage and how?
When shafts are unparalleled or at the wrong angle, they rub against each other and use more energy to power the machine. This rubbing together causes friction, which causes three problems:
- 1. The friction creates heat and causes thermal stress.
- 2. The friction can wear down the material and shorten the service life.
- 3. The wearing down can cause oil leaks.
The effects of a misaligned machine go beyond simply switching out a part; a misaligned shaft affects the entire machine and motor.
Discover more about this product.
Click here to book your demo.

Comparing CMM and Laser Alignment Tools
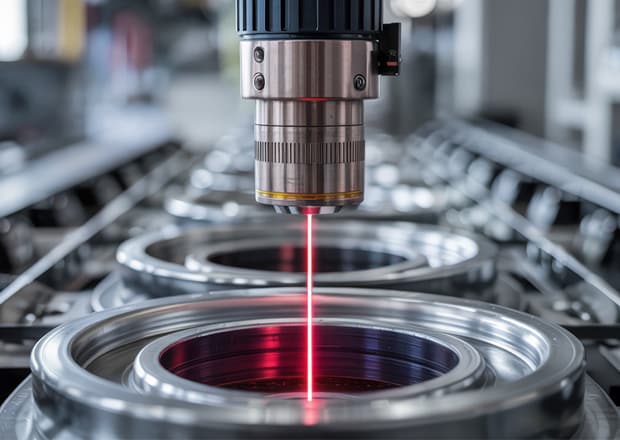
Lasers and portable coordinate measurement machines offer distinct advantages for alignment applications. CMM alignment techniques provide exceptional precision for complex geometry verification and dimension analysis. These instruments work very well in controlled environments where precise measurements are necessary for quality control.
For field measurements and large-scale alignment operations, lasers can provide more freedom. Because of their portability, they are perfect for on-site alignment verification in locations that are difficult for CMMs to reach. Depending on environmental factors, precision requirements, and size limitations, each method meets particular alignment needs.
For example, 2D laser measurement systems offer excellent capabilities for detecting parallel offset conditions across multiple axes, while 1D laser measurement tools provide precise monitoring capabilities for detecting other alignment changes.
CMM Role in Precision and Repeatability
CMMs deliver unmatched precision for critical alignment applications where tolerances are extremely tight. Their capacity to measure several spots at once yields thorough alignment data that is unmatched by human techniques. Alignment fixes are more dependable since CMM alignment techniques consistently produce results.
Modern CMMs integrate advanced software that automatically calculates alignment corrections and generates detailed reports. This capability reduces human error while providing documentation for quality control purposes. Precise measurement combined with automated analysis makes CMMs essential for highly accurate alignment work.
We’re here to provide you with more details.
Reach out today!

How is Machine Alignment Conventionally Done?
When discussing how machine alignment is conducted, there are two sides to the coin. Some alignment techniques produce successful results, and some add to the prevalence of misalignment. For instance, some manufacturers use flat devices or laser technology for securing parallelism, while others use methods that find misalignment rather than alignment.
Some of these methods are proactive and prevent misalignment, while others are reactionary to fixing misalignment. Let’s review some common methods technicians use.
Laser Alignment
Laser alignment is a method that uses a sensor and laser to establish machinery alignment. The sensor is brought to the coordinate, makes a connection with a laser, and then the sensor retrieves measurement data and puts it into the device. The laser alignment device then analyzes the data and responds by giving information about how the machine or component needs to be adjusted. These devices can be used for rotating shafts or analyzing a metal’s operational thermal reaction.
Vibration Analysis
Vibration analysis finds misalignment by reviewing the vibration response, critical speed, and machinery stability. The vibration data is then compared to the baseline/desired vibration. Unlike the laser alignment, doing this analysis doesn’t give definite answers on how to realign correctly; it only determines that there is misalignment within the machinery.
Thermography
Thermography uses a heat map to identify misalignment. Since misalignment causes friction, which then conducts heat, the heat map finds where the misalignment is. Like vibration analysis, this is also a method for finding machine misalignment, but it is not a definite step-by-step for fixing it. In this case, the machine has to be turned on, and the misalignment friction needs to generate heat before thermography can catch it.
Oil Analysis
Oil analysis checks oil health, oil contamination, and machine wear. This can give key insights into the alignment of the machine by finding if the oil is clean, has contaminants, or has leaks. Like thermography, oil analysis requires turning on the machine and witnessing misalignment before any change is made.
Machine Alignment: Proactive Measures vs Reactive Measures
Proactive machinery alignment measures are methods that prevent misalignment, while reactive machinery alignment fixes the misalignment after the fact.
Choosing proactive measures is always better than reactive ones. With reactive machinery alignment methods, the damage is already done when a machine is misaligned—that is irreversible. Proactive machinery alignment saves time and money by preventing misalignment before it can damage your machine or process.
We’re here to provide you with more details.
Reach out today!

How the KEYENCE XM and WM Series Help Simplify the Process
Laser alignment, thermography, and vibration analysis are all productive ways to achieve machine alignment; however, because they give data on the problem without the solution, these methods are sometimes only a reactive measure. On a shop floor where technicians are relying on subpar measuring methods to set up the machine in the first place, these methods are only a band-aid on the issue.
KEYENCE makes tools to assist with proactive machinery alignment, the XM and WM coordinate measurement machines (CMMs). These CMMs are handheld machinery alignment equipment that use GD&T inspection to determine alignment. The XM and WM work by touching their probes to the machine, collecting X, Y, and Z coordinates, and analyzing essential alignment data like parallelism, squareness, and position.
The XM and WM confirm machine alignment by showing you the exact coordinates of shafts, as well as defining parallelism for a perfect fit beyond what the naked eye can see. These devices require fewer than five steps and have no operator training. They are so simple that KEYENCE clients report handing CMMs out on the shop floor without technicians needing instruction. The XM can inspect a shaft up to 2 m horizontally and 1 m vertically; the WM aligns shafts as long as 25 m. Faster and more accurate machine alignment reduces labor costs and downtime and helps machines produce better parts, reducing scrap rates and increasing productivity.
Get detailed information on our products by downloading our catalog.
View Catalog

Ready to Learn More About KEYENCE’s Alignment Solutions?
Staying on top of your machine’s alignment before, during, and after manufacturing is the best way to prevent and fix misalignment quickly. Without it, you risk constantly repairing and replacing your machines while also suffering time loss from bottlenecks. Be a proactive machine alignment technician and study machine alignment all the time.
If your alignment process is reactive instead of proactive and is another hassle for your manufacturing plant, contact us today to learn about how KEYENCE’s machine alignment solutions can help you.
Contact us to learn more about how our advanced technology can help take your business to the next level.
Contact Us
FAQs
How do I choose between angular and parallel alignment methods?
Your particular misalignment type and measurement needs will determine which option is best for you. Shaft angle corrections are best handled by angular methods, whereas offset problems are handled by parallel methods.
Can portable CMMs be used for in-field shaft alignment?
Yes, modern portable CMMs are designed for field use and provide excellent accuracy for shaft alignment verification in various environments.
What are the early warning signs of machine misalignment?
Watch for increased vibration, unusual noise, elevated operating temperatures, and decreased equipment performance as key indicators of alignment problems.
How often should machine alignment be checked?
Check alignment during scheduled maintenance intervals, after equipment moves, following foundation work, or whenever performance issues arise.
What are the common signs of machine misalignment?
Common signs include excessive vibration, bearing failures, coupling wear, oil leaks, and increased energy consumption during operation.
We’re here to provide you with more details.
Reach out today!

Related Downloads

Brochure for the WM-6000 series Wide-Area CMM. A portable setup with a wireless handheld probe that enables users measure large parts and equipment.

![WM-6000 series Measurement / Application Examples [Fabrication Application Examples]](/img/asset/AS_116822_L.jpg)
![WM-6000 series Measurement / Application Examples [In-Machine Measurement Examples]](/img/asset/AS_116821_L.jpg)
![WM-6000 series Measurement / Application Examples [System Versatility Examples]](/img/asset/AS_116820_L.jpg)
