CMM (Coordinate Measuring Machine)
What Is a Portable CMM? Benefits, Types, and Applications
Key Takeaways
- Portable CMMs offer flexible, on-site 3D measurement capabilities, improving efficiency in quality control processes.
- These devices combine portability with high precision, enabling accurate measurements of large or complex parts.
- Portable CMMs reduce the need for part transportation to fixed measurement labs, saving time and costs.
- They support various industries by providing versatile measurement solutions adaptable to different environments.
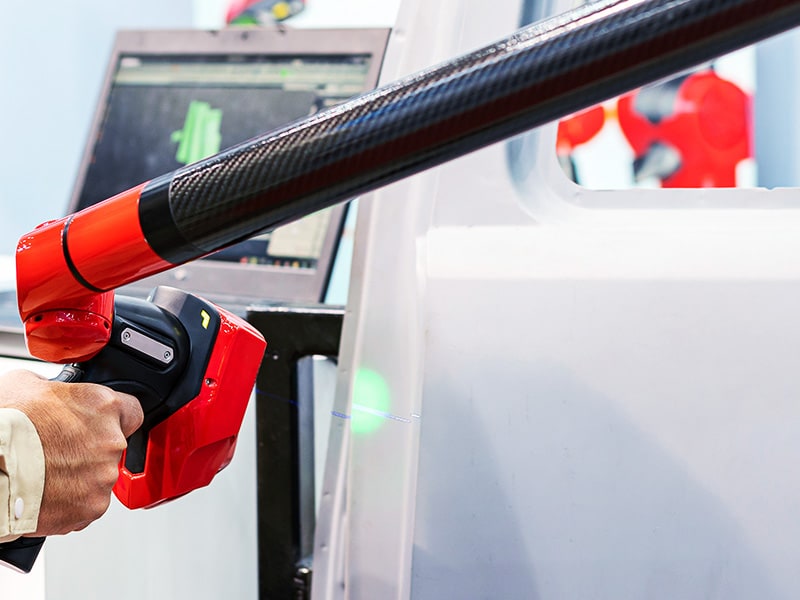
Metrology is an important aspect of parts manufacturing, and the introduction of coordinate measuring machines into the manufacturing process has significantly reduced human error and improved the overall quality of the finished product.
In fact, compared to traditional metrology methods, which can be tedious, less repeatable, and more error-prone, coordinate measuring machines (CMMs) offer more repeatable and highly accurate results.
However, one of the biggest downsides of CMMs is their immobility. Stationary CMMs can be quite bulky, and they often require significant dedicated space in parts manufacturing facilities with a regulated environment. This presents an insurmountable challenge when you're trying to measure large or bulky components that can't be easily moved to the CMM for quality control.
If only there were a way to combine the mobility of conventional metrology tools with the precision of CMMs. This is where portable CMMs, otherwise known as shop floor CMMs, come into play. A portable CMM transforms precision measurement by bringing advanced inspection capabilities directly to your production floor. Unlike fixed coordinate measuring machines, these devices offer the freedom to measure parts wherever they are manufactured or assembled.
In the following, we’ll examine what these machines are capable of, the benefits they provide, and how manufacturers in all industries are utilizing them.
What Is a Portable CMM?
As the name implies, “portable” CMMs are just that—portable coordinate measuring machines that can be easily transported and used in a variety of settings. This makes them especially useful for on-site production floor measurements and inspection. These shop floor CMMs provide all the benefits associated with stationary CMMs in terms of increased accuracy and full 3D measurement ability, but with the added flexibility and portability of conventional metrology tools.
In other words, instead of carrying and mounting the manufactured part onto a stationary CMM, the main benefit of a portable CMM is that it can be brought directly to a part, often while the workpiece is still in the machine, and it can also be used to measure the geometry of parts that are still attached to the machine's workpiece holder.
Understanding Portable CMM Technology
Portable coordinate measuring machines combine sophisticated measurement technology with mobility features that traditional systems cannot match. These systems use laser scanning and tactile probes to capture dimensional data with remarkable accuracy. The technology eliminates the need to transport large or heavy parts to a dedicated measurement room.
Most systems integrate wireless data transmission and user-friendly interfaces that simplify operation. Advanced software processes measurements in real time, delivering instant feedback to operators and quality control teams.
Battery-Powered, Cord-Free CMM: Flexible Mounting on Carts and Tripods, Plus In-Machine Integration
With rechargeable batteries that allow for longer measurement sessions, mobile CMM systems function without the need for power cords. Operators can move freely and unhindered around huge assemblies or production lines thanks to this cordless design.
Mounting options include wheeled carts for easy transport, adjustable tripods for stable positioning, and direct integration into manufacturing equipment. Some systems mount directly onto machine tools, enabling inspection to be performed without removing parts from fixtures.
Contact us to learn more about how our advanced technology can help take your business to the next level.
Contact Us
Benefits of Using a Portable CMM in Manufacturing
Portable metrology solutions deliver significant advantages over traditional measurement approaches. The biggest advantage of portable CMMs is their portability, especially when it comes to scanning and measuring large, immovable, or hardly movable parts and components.
Furthermore, they're quite flexible, require very little setup time, and increase cost-efficiency, particularly by eliminating the downtime and resources required for transporting large parts. This saves time and minimizes the risk of damage during transit, ensuring the integrity of the parts being measured.
Additionally, shop floor CMMs are easier to work with. In most cases, they don't require any pre-programming and typically come equipped with intuitive software and ergonomic designs for simple on-the-spot measurement. These particular advantages cater to general machine operators who might not be metrology experts, making it easy for anyone to take dimensional checks.
Besides their portability and flexibility, portable CMMs can offer valuable cost savings. By eliminating the need for specialized transportation equipment and dedicated measurement facilities, operational expenses can be reduced. Let’s see how these play a role when used during inspection processes.
These systems don't need special measuring rooms or environmental controls, and they fit in perfectly with current operations. By taking measurements while assembling, teams can lower the possibility of finding issues once the project is finished.
Flexibility and Mobility in Inspection
Handheld CMM devices excel in situations where traditional systems cannot operate. Large assemblies, installed equipment, and parts that cannot be moved benefit from portable inspection capabilities. Operators can access tight spaces, awkward angles, and remote locations with ease.
Field measurements become practical for on-site installation verification, maintenance inspections, and quality audits. This flexibility supports faster decision-making and immediate corrective actions when problems arise.
In-Process and Final Inspections
As in-process and final inspections continue to play an important role in manufacturing, outdated machines pose many challenges. For one, time-consuming manual measurements during in-process inspection can lead to potential errors. CMMs address these challenges by offering high-speed, high-accuracy measurement capabilities with automated reporting features. These machines can perform many measurement tasks, including dimensional checks, profile measurements, and surface inspections, directly on the shop floor.
When it comes to final inspection, this necessary step is often tedious and time-consuming. Fortunately, CMMs can speed up this process, excelling in comparison to traditional measurement methods. They can easily handle measurement needs, including dimensional checks, profile measurements, and surface inspections. If inspecting larger parts, portable and handheld devices save time as they are mobile and do not require the disassembly of parts. For smaller components, automated optical comparators accurately measure multiple parts in seconds.
Reduced Downtime with On-Site Measurements
The delays that come with shipping parts to measurement labs are eliminated with portable CMM inspection. Quality checks are carried out concurrently with in-machine and in-process shop floor checks. This on-site processing approach reduces cycle times and improves overall equipment effectiveness.
Immediate results allow operators to adjust processes before producing additional non-conforming parts. Early detection prevents costly rework and material waste.
Discover more about this product.
Click here to book your demo.

How Portable CMMs Compare to Traditional CMMs
Conventional coordinate measuring devices lack the adaptability of portable systems but provide better accuracy in regulated settings. Measurements are possible in industrial settings thanks to portable CMM equipment, which sacrifices some precision for operational flexibility.
Fixed systems require temperature-controlled rooms and vibration isolation. At the same time, portable units adapt to shop floor conditions. Handheld CMMs bridge this gap by combining portability with high-precision capabilities.
Applications and Industries that Rely on Portable CMMs
Because of these benefits, portable CMMs have become indispensable tools across various industries. With their versatility, accuracy, and ease of use, these tools are improving measurement processes and opening doors to new possibilities.
One industry that is realizing the usefulness of portable CMM technology is the aerospace industry. Technicians in this industry need precise measurements, often in tight spaces. For that and other tasks, handheld CMM machines provide the flexibility and accuracy required for aircraft maintenance and inspections. A handheld CMM enables technicians to take measurements directly on the shop floor or even in the field. This reduces downtime and improves productivity.
The automotive industry is another sector where a portable coordinate measuring machine is beneficial. From quality control inspections to reverse engineering, a portable CMM machine offers automotive manufacturers the agility to perform measurements quickly and accurately. Not only does it help ensure the quality of products, but it also streamlines processes.
The medical device industry is also embracing CMM technology. This industry has a need for precise measurements when manufacturing implants, prosthetics, and medical instruments. A portable CMM machine provides the accuracy and reliability required for compliance with strict regulatory standards. Handheld CMM machines also allow medical device manufacturers to conduct measurements directly on the production floor.
Besides these industries, CMM technology is helping other manufacturers across the world. Handheld CMM machines are portable, accurate, and versatile, offering the right mix of technology and results. As this technology improves, portable CMMs present endless possibilities for innovation across different applications.
We’re here to provide you with more details.
Reach out today!

Understanding CMM Technology Types
In the context of CMM technology, both stationary and portable coordinate measuring machines, and other measurement systems in general, are often categorized based on their mode of measurement as either contact or non-contact. Here are a few of the common types:
Contact CMMs
Contact CMMs use a touch probe that lets the software know where the surface of a particular part is. The exact position of the probe relative to the origin point is measured through a combination of precision mechanics, sensors, and computational methods.
Arm CMMs
The most commonly used configuration for portable coordinate measuring machines is an articulated arm. Unlike stationary CMMs, the probes of portable CMMs are manually moved by the operator to the part being measured.
The joints in the articulated arm have rotary encoders, which track the probe's position, thus enabling the measuring system to track its exact location in real space. These PCCMs are relatively inexpensive and easy to operate, but the downside is their sensitivity to vibrations, limited range, and a need for a rigid supporting structure.
Vision-Based CMMs
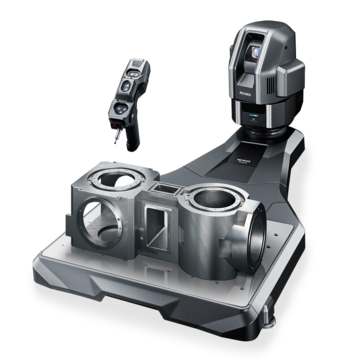
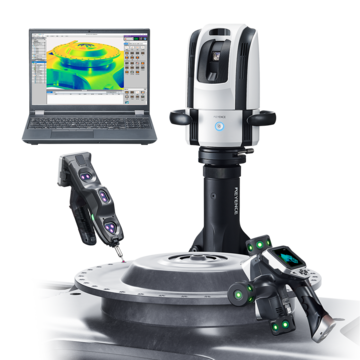
Another contact-based CMM is a vision-based CMM. These work with a wireless probe containing sensors that are tracked via a camera head unit that locates where in 3D space the probe is. The KEYENCE XM Series is a perfect example of a vision-based CMM. These are great for all the same reasons as arm CMMs, but without as many downsides. The full range of motion of the wireless probe, easy-to-use, intuitive software, and adaptability allow for 3D, GD&T, and CAD comparison on a desktop, on the shop floor, or in the machine tool. This makes vision-based CMMs the ideal choice for a portable, shop floor CMM.
Laser Trackers
Laser Trackers emit a laser beam onto a mirrored reflector, which is typically held against the surface of the part that's being measured. The light reflects off the target reflector, retraces its path, and re-enters the tracker.
The tracker then measures the angle of rotation and the phase shift of the light, allowing the system to calculate the position of the reflector—and, by extension, the position of the object against which the reflector is held—in real 3D space.
Laser trackers offer accurate measurements over long scanning distances—up to 200 feet. However, they require a clear line of sight and aren't the fastest solutions when it comes to processing speeds.
Non-Contact CMMs
Contact-based portable coordinate measuring machines aren't practical when scanning is the goal, as they would require hundreds, if not thousands, of data points. Furthermore, contact-based solutions aren't the best solution for scanning sensitive parts as they could chip, deform, or scratch them.
Non-contact CMMs take measurements without having to physically touch the part being measured or controlled, which makes them more suitable for parts where an STL file is desired or fragile parts. The most commonly used non-contact CMMs are blue light, white light, or laser scanners.
Get detailed information on our products by downloading our catalog.
View Catalog

Comparing Traditional CMMs and Portable CMMs
Both stationary and portable CMMs come with their respective advantages and drawbacks. Stationary machines are fixed in one location and often in controlled environments, which contributes to their increased precision and high levels of repeatability and accuracy. This is particularly important if you're working with industries where tight tolerances are a must.
Additionally, their size, especially for bridge and gantry types, provides a substantial measurement volume, thus allowing for measurements and scanning of large parts and structures. However, they have their limits, especially in terms of setup or fixture and specialized equipment requirements, which add to the costs associated with measurements and quality control.
On the other hand, portable CMMs offer portability and flexibility that stationary machines just can't match—with portability being the former's primary advantage. This makes them particularly useful in situations where parts are too heavy, too large, or simply positioned in a way that makes them difficult to move.
Portable CMMs require significantly less setup time, especially when it comes to measuring complex geometries. However, they don't always match the measuring accuracy provided by their stationary counterparts. Furthermore, their accuracy might be impacted by environmental factors and operator skills since they would be used on the shop floor rather than in a clean, temperature-controlled room like a traditional CMM.
We’re here to provide you with more details.
Reach out today!

Selecting the Right Portable CMM for Your Needs
There are a few main considerations when deciding on the right equipment for your needs. Keep in mind, not all portable CMMs are made equal; thus, not all are suitable for every application. In fact, there are numerous factors to consider when choosing the right CMM. Let's go through each factor:
- Accuracy—The accuracy requirements differ from one application to the other. If you're making general metal parts, you'll likely have lower accuracy requirements compared to medical or aerospace manufacturing machine shops.
- Size—Even portable CMMs have part size limits and can only measure parts within that size range.
- Inspection Requirements—Not all portable CMMs will be able to meet every requirement. For example, if you need a 3D scan as your final result, look into a 3D scanner, not a touch-probe CMM. Make sure to get the equipment that caters to your parts requirements.
- Speed— Production volume will help determine the inspection system needs to ensure speed requirements are met, to avoid creating bottlenecks or backlogs. If a high throughput is required, an automated system would be beneficial for repeating processes. On the other hand, manual systems can be ideal options for low-volume, high-mix part production.
- Contact or Non-Contact—This mostly depends on the nature of the part you're inspecting. We recommend non-contact methods for flexible or fragile parts.
Discover more about this product.
Click here to book your demo.

Best Practices for Using Portable CMMs
Due to the complexity of the equipment, using shop floor CMMs effectively requires conscientious and reasonable use by knowledgeable and trained operators and staff members. Here are some of the best practices for using portable CMMs:
- Calibration—Calibration is essential, as it ensures that the shop floor CMM device is accurate and can produce consistent measurements. In most cases, recalibration is done every 12 months.
- Environment—Being able to function outside controlled environments is one of the main selling points of portable CMMs. However, the environment doesn't only affect the measuring tool but the workpiece as well. For example, sunlight exposure will cause thermal expansion in the workpiece or part being measured, thus affecting the accuracy, but temperature compensation functions built into the KEYENCE shop floor CMM software work to combat this. Regardless, trying to maintain some level of control over the environment is still highly recommended.
- Maintenance—Keeping the shop floor CMM equipment clean, especially touch probes and optical sensors, is crucial. Any dust, dirt, or other debris and contaminants can affect the measurement accuracy.
- Repeatability—Make repeat measurements on a known component or part to ensure that the shop floor CMM is providing consistent results. If it isn't, it might be time to recalibrate the machine.
Future Trends in Portable Metrology
As portable metrology continues to evolve, many exciting possibilities are on the horizon. Technology like AI and machine learning is making these devices more intelligent and efficient. Manufacturers will continue to demand greater flexibility, accuracy, and speed, and KEYENCE will remain at the forefront of these requests.
- How KEYENCE's Technology Can Help:
- KEYENCE is a leader in portable metrology with the XM and WM Series of portable CMMs. Follow this link to check out how they work, determine which system fits your needs, and reach out to see a demo today!
Get detailed information on our products by downloading our catalog.
View Catalog

FAQs
Q1: What types of parts are best suited for portable CMMs?
Large assemblies, installed equipment, delicate components, and parts that cannot be easily transported work well with portable systems.
Q2: Do portable CMMs require a controlled environment?
No, these systems operate effectively in production environments without temperature or vibration controls. Often, portable systems contain temperature compensation functions to provide the highest accuracy when used in a manufacturing environment.
Q3: Can portable CMMs be used for reverse engineering?
Yes, portable coordinate measuring machines excel at capturing geometry data for reverse engineering applications.
We’re here to provide you with more details.
Reach out today!

Related Downloads

Brochure for the XM-5000 Series Handheld CMM. Portable CMM to easily and accurately measure 3D and GD&T features anywhere including the shop floor and in the machine tool.
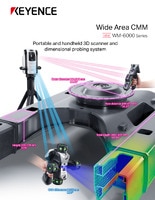
Brochure for the WM-6000 series Wide-Area CMM. A portable setup with a wireless handheld probe that enables users measure large parts and equipment.

![WM-6000 series Measurement / Application Examples [System Versatility Examples]](/img/asset/AS_116820_L.jpg)
