Machine Vision
Machine Vision Lighting Selection Guide
Key Takeaways
- Machine vision lighting controls contrast, clarity, and inspection repeatability.
- The right lighting setup depends on the part surface, inspection goal, and environment.
- Specular, diffuse, and transmitted lighting are the main starting points for selection.
- Light shape, size, angle, color, and wavelength all affect image quality.
- Glare, shadows, and low contrast can often be corrected through better lighting geometry or wavelength selection.
Vision inspection lighting determines image clarity and stability. Improper setups cause glare on reflective surfaces or shadows that obscure features, especially when parts shift during handling. Effective machine vision lighting highlights targeted features while minimizing background interference, which improves detection reliability and reduces false failures. Optimized vision system illumination ensures stable results despite minor variations in part positioning, surface conditions, and environmental factors.
Logical Steps for Lighting Selection
Image processing is the process of detecting changes in pixel density data through calculation. As such, stable detection requires projection of a clear image. The lighting selection plays an important role in determining the performance of image–processing–based inspection. This section introduces the basic knowledge required for selecting the correct lighting.
Three Steps for Selecting Lighting
- 1. Determine the type of lighting (specular reflection/diffuse reflection/transmitted light).
- Confirm the characteristics of the inspection (flaw, shape, presence/absence, etc.).
Check if the surface is flat, curved, or uneven. - 2. Determine the shape and size of the necessary light.
- Check the dimensions of the target and installation conditions.
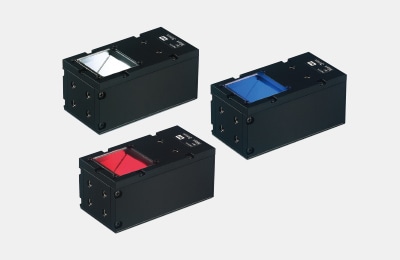
Examples: ring, low-angle, coaxial, dome. - 3. Determine the color (wavelength) of lighting
- Check the material and color of the target and background.
Examples: red, white, blue.
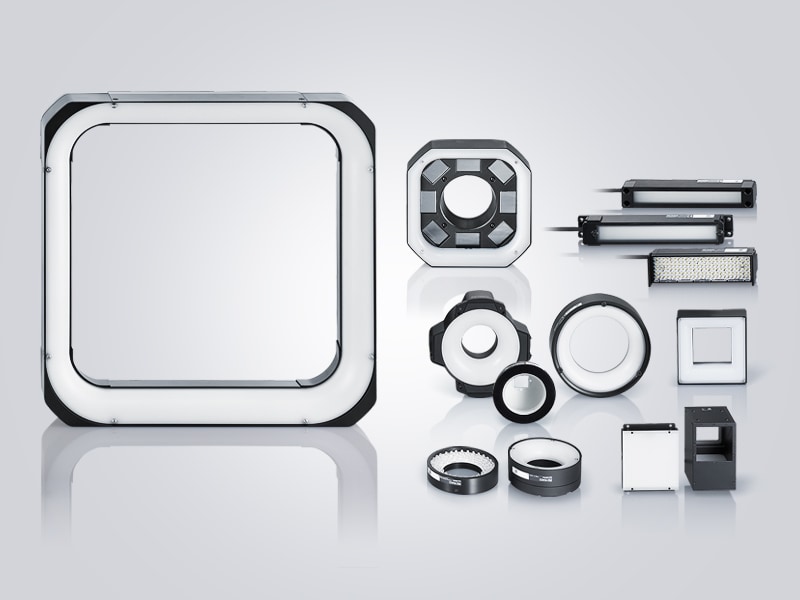
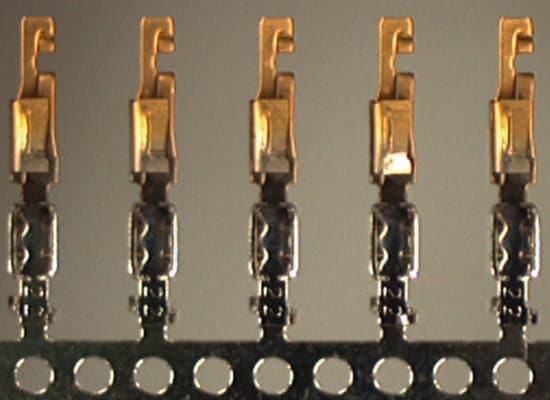
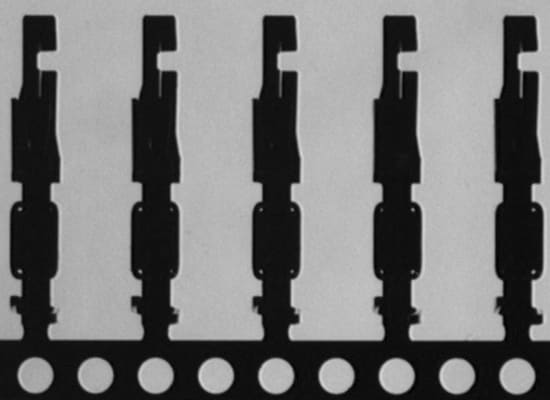
Shapes of Typical Lights (LED Lighting)
Coaxial vertical: CA-DX

Low-angle: CA-DL
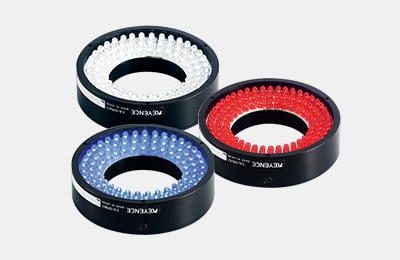
Direct ring: CA-DR
Backlight: CA-DS
Dome: CA-DD
Bar: CA-DB
Types of Machine Vision Lighting
Different types of machine vision lighting are selected based on how the light needs to interact with the part.
- Bright Field Lighting: Light reflects directly into the camera, ideal for reading markings or confirming presence.
- Dark Field Lighting: Low-angle light scatters off surface defects, highlighting scratches and texture variations against dark backgrounds.
- Diffuse Lighting: Multi-directional light from dome or axial setups reduces glare for uniform imaging.
- Backlighting: Light placed behind objects creates silhouettes for edge detection and dimensional checks.
- Coaxial Lighting: Light aligned with the camera axis provides consistent visibility for flat, reflective parts.
Lighting Techniques for Different Applications
Lighting selection is driven by the feature being inspected and how the surface of the part responds to illumination. Small changes in angle or wavelength can shift what the system captures.
Low-Angle Lightin
Used when inspecting defects (like scratches or embossing), light travels across the surface and causes small features to reflect into the camera.
Direct/High-Angle Lightin
Produces a more evenly lit image that is typically used for inspecting printed information or verifying part presence.
Wavelength-Based Lighting
Different colors of light can separate features from the background. An example of this is infrared lighting, which helps reduce surface reflection or reveal subsurface details in certain materials.
Lighting Selection: Step 1 (Specular Reflection, Diffuse Reflection, Transmitted Light)
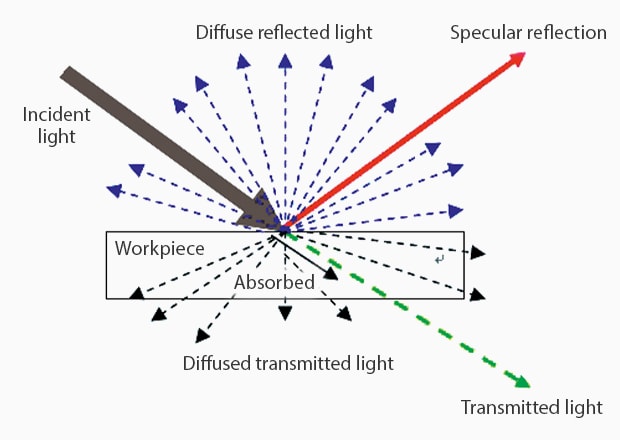
LED Lights can be roughly divided into the following three types:
- 1. Specular reflection type:
- Light is applied to the target, and the lens receives the direct reflection.
- 2. Diffuse reflection type:
- Light is applied to the target, and the lens receives uniform ambient light.
- 3. Transmitted light type:
- Light is applied from behind the target, and the lens receives the transmitted silhouette.
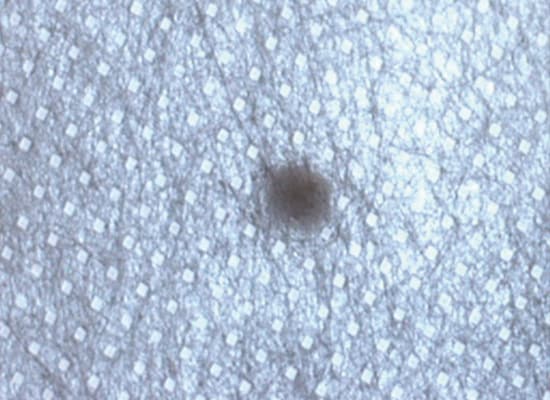
1. Sample Image of Specular Reflection: Inspecting for the Presence or Absence of Inscriptions on Metal Surfaces
Normal lighting
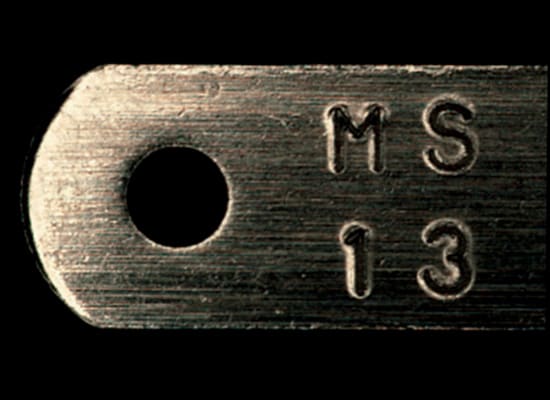
The inscription is unclear.
It is necessary to bring out the contrast between the flat metal surface and depressions of the inscription.
Using illumination
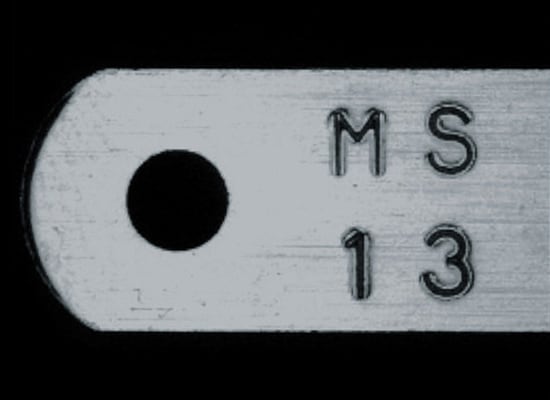
The inscription is clear.
Since a metal surface reflects light easily and the inscription does not, the optimum method is to use specular reflection to enhance the difference between the surface and inscription.
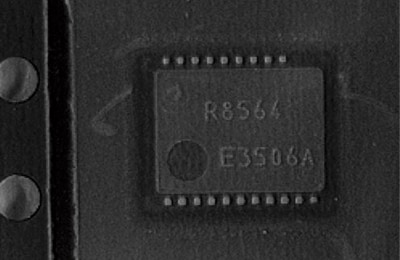
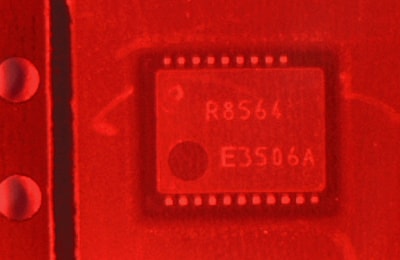
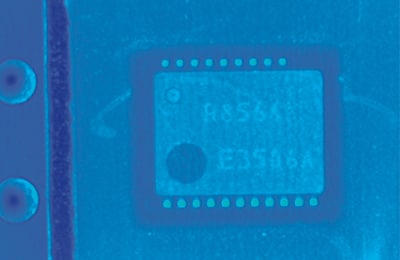
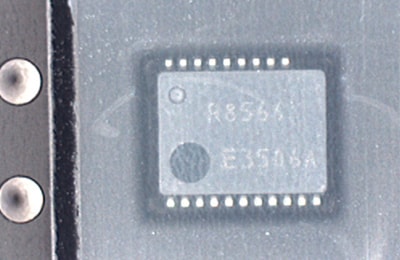
2. Sample Image of Diffuse Reflection: Inspecting the Print on a Chip Through Transparent Film
Normal lighting
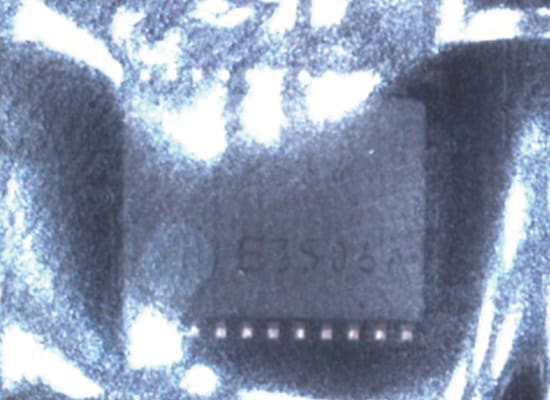
The Lighting reflects on the film surface.
It is necessary to bring out the contrast between the surface of the chip and the print by eliminating the reflection from the transparent film (halation).
Using illumination

The image is not affected by the film.
The optimum method is to use diffuse reflection to prevent specular reflection on the transparent tape.
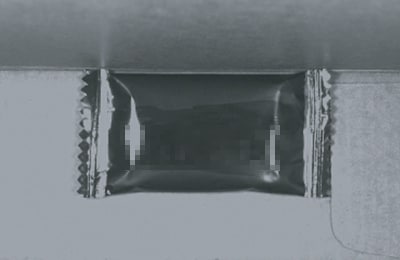
3. Sample Image of Transmitted Light: Inspecting Foreign Matter on Nonwoven Fabric
Normal lighting
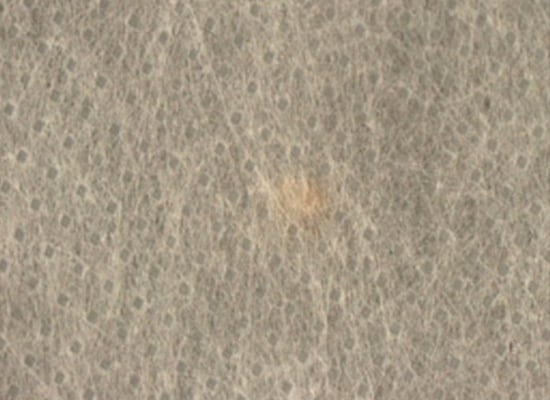
The Lighting reflects on the film surface.
It is necessary to bring out the contrast between the target surface and the foreign matter, which is difficult to recognize because of the subtle difference in color.
Using illumination
The silhouette of the foreign matter is clearly recognized.
Even when no difference can be detected with reflected light, applying transmitted light from behind the target will show foreign matter as a black silhouette.
The first step of light selection is to select the lighting method, specular reflection, diffuse reflection, or backlighting, according to the shape of the target and the inspection purpose. Then, select the size and color of light that allows you to capture an optimum image for processing.
Lighting Selection: Step 2 (Lighting Method and Shape)
1. Sample Image of Specular Lighting: Detecting Chips in the Edge of a Glass Plate
- Selecting lighting according to the work piece characteristics and detection details:
- 1. The light reflects on the glass surface.
- 2. It is necessary to enhance the difference between the glass plate and background.
- 3. It is best to apply lighting vertically to the work piece.
- 4. A space can be provided above the work piece.
The best selection is coaxial-vertical lighting.
Simple reflected light
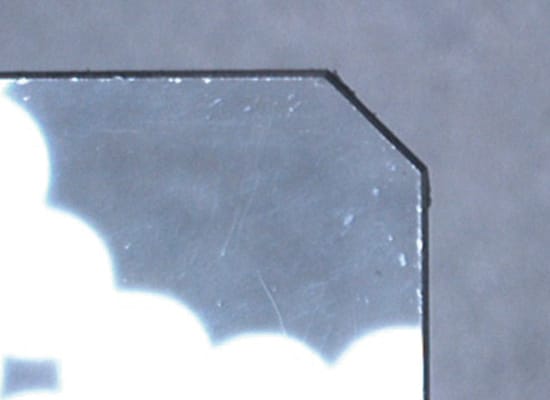
Reflected light is reflected randomly on the glass surface.
Coaxial-vertical illumination

The entire glass surface can be illuminated uniformly.
2. Detection Example of Diffuse Reflection: Inspecting Chips in Rubber Packing
- Selecting lighting according to the work piece characteristics and detection details:
- 1. The work piece is black rubber which does not reflect specular light.
- 2. The chipping is also black and will not reflect specular light.
- 3. Illuminating the work piece from an angle to reflect the specular light from the chipped area proves effective.
- 4. A light can be installed close to the target.
The best selection is low-angle light.
Simple reflected light
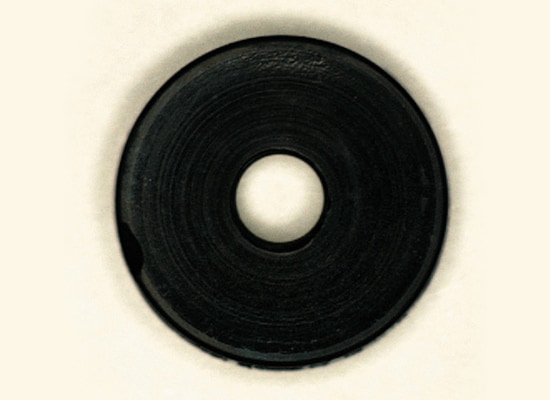
The chips on the outer-circumference cannot be recognized.
With low-angle illumination
The chip at the edge appears white.
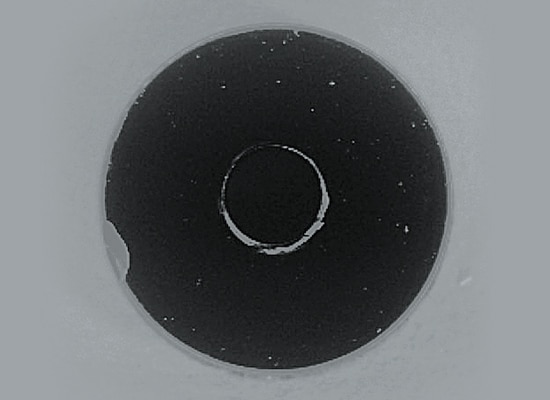
3. Detection Example of Transmitted Light: Inspecting Lead Shapes
- Selecting lighting according to the work piece characteristics and detection details:
- 1. The target is a metal object with projections and depressions, resulting in irregular specular reflection.
- 2. By using a transmitted light, the edge of the target can be detected without the influence of the projections and depressions.
- 3. A light can be installed behind the work piece.
The best selection is a backlight.
Simple reflected light
The edges show little contrast.
With a backlight
The complicated outline can be recognized clearly.
After you choose the lighting method, select the type of light based on the detection purpose, background, and surrounding environment.
Basic selections are: coaxial illumination, ring illumination, or bar lights for specular reflection; low angle lights, ring illumination, or bar lights for diffuse reflection; and area illumination or bar lights for backlighting. Ring illumination and bar lights are generally used in particular because they can be used for various purposes by adjusting the installation distance.
Lighting Selection: Step 3 (Color and Wavelength of Lighting)
The last step is to determine the color of illumination according to the target and background. When a color camera is used, the normal selection is white. When a monochrome camera is used, the following knowledge is required.

Work piece
Detection Using Complementary Colors
A red candy wrapper is in a cardboard box. The following is a comparison of the contrast when LED illumination is used to detect the presence or absence of the candy.
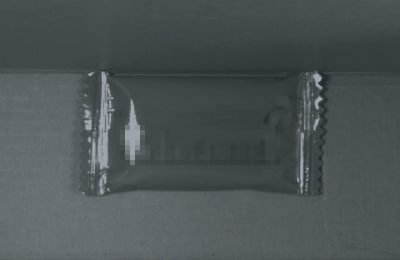
With a white LED
The brightness is uniform for the entire image and there is almost no contrast between the work piece and background.
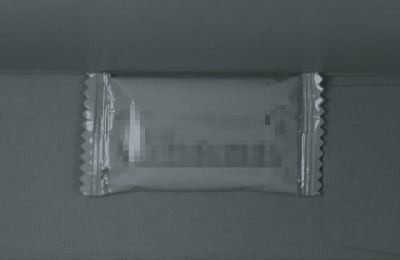
With a red LED
The red work piece is shown brighter, but the contrast is still insufficient.
With a blue LED
A blue LED is optimum
The red target appears black, allowing for stable detection.
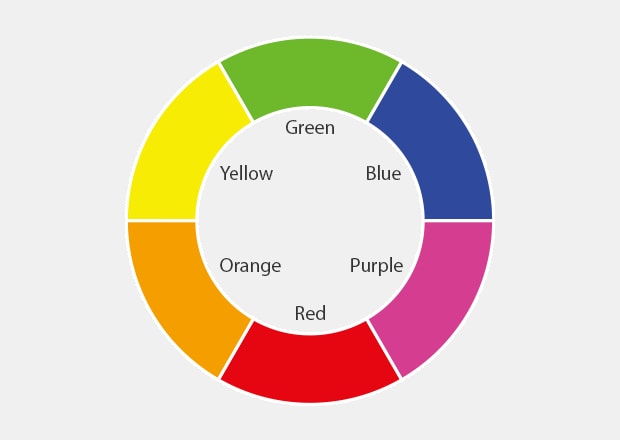
Color wheel
Reference
What is a complementary color?
A complementary color is the opposite color in the hue circle. When a light of the complementary color is applied to an object, the object will appear nearly black.
Detection Using Wavelength
The following is an image comparison of print on a chip in carrier tape taken through a transparent film. The contrast is higher with red illumination than with blue illumination, because of its higher transmittance (lower scattering rate).
Color camera image White illumination
Color camera image Red illumination
Color camera image Blue illumination
Gray camera image Red illumination
The contrast between the print and chip appears clearly through the film.

Gray camera image Blue illumination

Lights of different wavelengths appear as different colors. The wavelength determines the characteristics of a particular color such as being transmitted easily (red light - long wavelength) or being scattered easily (blue light -short wavelength).
Common Lighting Challenges and Solutions
Glare is one of the biggest obstacles (especially when working with highly reflective surfaces), but it can be reduced with diffuse lighting or angle adjustments. Another issue is uneven brightness and shadows that come from directional or poorly placed lighting. This can be improved by repositioning the part.
Low contrast is typically caused by mismatched lighting selection and can be corrected by adjusting wavelength or angle. Many lighting inspections take place in closed-off areas to prevent ambient lighting from introducing any variation.
Summary of Logical Steps for Lighting Selection
Light selection determines the conditions of captured images, which is most important for image processing. Instead of trying every light without consideration, you can select the right one efficiently by following the procedure below:
- Decide which of specular reflection, diffuse reflection, or backlighting is most appropriate.
- Decide on the type and size of the light.
- Decide on the color of the light.
The next volume will cover “the effects of color cameras and image enhancement”. It is an important factor for processing the image to the optimum application such as appearance inspection and position detection. The next guide will outline points for selecting the optimum color extraction and image enhancement.
Techniques in Vision System Lighting
The applications of some vision system lighting techniques require a special kind of light and geometry or different placement of the camera relative to the observed object, while other applications don’t. Whatever the case might be, most lighting manufacturers offer lights with various combinations of illumination techniques for vision systems available within a single product. This allows for greater flexibility and reduction in potential costs associated with lighting for different inspection methods.
Backlighting
Backlighting projects even illumination from behind the observed target to highlight its silhouette. This type of lighting is mostly used for presence/absence detection, detection of holes and gaps, and measurements of target outline shape. However, this type of lighting isn’t best suited for the detection of surface details.
Bar Lighting
Bar lighting illuminates the target along its edge or provides uniform lighting along a localized area. It can be combined with other bar lights to illuminate the target from all directions. This type of light can enhance or reduce specular reflection, depending on light and camera placement and angle. It’s typically used to add contrast to matte surfaces and to highlight surface features of matte objects.
Dark Field Lighting
This type of machine vision lighting provides light in a way that exposes surface defects, such as scratches, imprints, notches, and all imperfections, which reflect the light back to the machine vision system camera.
Diffuse On-Axis Lighting
Also known as co-axial lighting- is a machine vision lighting technique that transmits light perpendicular to the target. All surfaces hit at an angle to the camera will be dark and thus more visible. It’s an exceptionally useful technique for detecting flaws on flat, shiny surfaces.
Dome Lighting
Dome lighting provides uniform illumination from various angles, resulting in the absence of glare. It’s perfect for inspecting shiny, bumpy, or cured surfaces, but it needs to be close to the target to be effective.
Applications of Machine Vision Illumination
Machine vision lighting follows machine vision systems across innumerable applications within the industrial setting. This includes automated inspection and quality control during manufacturing processes, electronic assemblies, and food and beverage packaging and labeling.
Uniform illumination also helps robots identify different items for pick-and-place applications and capture clear images on fast-moving conveyors in the packaging and logistics industries. Machine vision lighting is also used to detect whether the pills are the correct size, shape, and even color before they’re packed and shipped to the local pharmacy.
Summary
Machine vision lighting is one of the most important factors in reliable inspection. The right setup helps the camera capture clear, stable images by improving contrast, reducing glare, and highlighting the features that need to be measured. By selecting the proper lighting type, shape, size, color, and wavelength, manufacturers can improve detection accuracy and reduce false rejects across a wide range of inspection applications.

Machine Vision Lighting FAQs
What is Machine Vision Lighting, and Why is It Crucial for Vision Systems?
Machine vision lighting helps optimize the visibility of objects that are viewed and captured by cameras, enabling more precise image capture for analysis. It often enhances contrast, reduces shadows and reflections, highlights specific features, and enhances the effectiveness of image processing.
Are There Specific Considerations When Choosing Machine Vision Lighting for Certain Applications?
Yes, there are specific considerations when choosing machine vision lighting for specific applications, and they mostly relate to object characteristics, such as color, size, and surface properties. However, it also depends on the features that need highlighting.
How Does Machine Vision Backlight Enhance the Visibility of Certain Features in a Vision System?
Backlight projects illumination from behind the object, creating a silhouette. Depending on the light source, this type of machine vision lighting can also be used to measure the dimensions of a particular object precisely or detect its presence/absence. Illumination selection is crucial in machine vision as it affects the accuracy and reliability of a vision system. For instance, ring illumination versus dome illumination for printed images on aluminum.
What Considerations Should Be Taken Into Account When Implementing Vision System Illumination for Optimal Performance?
The most important considerations when implementing machine vision system illumination are illumination type, lighting geometry, color and wavelength (as they can significantly improve the visibility of certain objects), and camera compatibility. There can also be differences in lens structure and material that can impact image quality, as seen in KEYENCE's high-resolution lens CA-LH16 and standard lens CV-L16. This can affect the amount of contrast in captured images and general image resolution.
Why Is Lighting Important in Machine Vision?
Machine vision lighting controls how features appear in an image. Strong contrast and stable illumination support accurate flaw detection and measurement.
What Are the Different Types of Machine Vision Lighting?
Common types include bright field, dark field, diffuse lighting, backlighting, and coaxial lighting. Each of these types of lighting is suited to different surface conditions and inspection goals.
How Do I Choose the Right Lighting for Inspection?
The type of lighting selection should match the surface, the feature being inspected, and the inspection environment (including motion and ambient light).
What Lighting Reduces Glare in Vision Systems?
Diffuse lighting and angle adjustments are typically used to reduce reflections.
What Are Advanced Machine Vision Lighting Technologies Like Lumitrax, Multispectrum, and Pattern Projection?
These approaches improve visibility by separating reflections by using multiple wavelengths or projecting structured light to capture fine detail and surface variation.

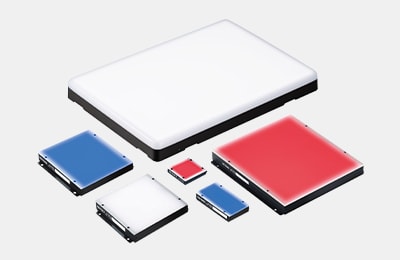
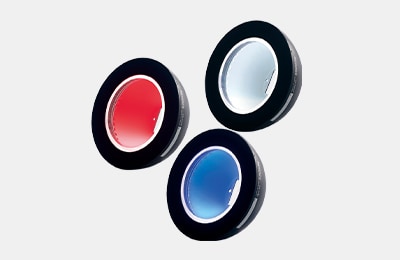
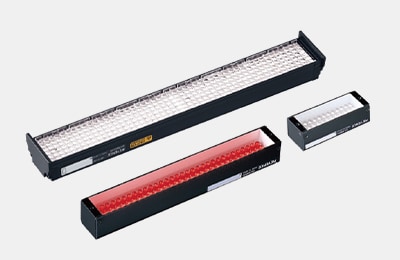
Related Products
Related Downloads
-

IMAGE PROCESSING USEFUL TIPS Compilation
This guide is a compilation of trivia pertaining to vision systems. Figures are used to provide easy-to-understand explanations of principles and characteristics for items ranging from lenses, image capturing, lighting, and color to communication and preprocessing. This guide is a must-read for anyone wanting to learn all about vision systems.