I want to change the appearance of parts.
This section explains how to change the appearance of parts.
This section explains how to configure settings from the properties and how to use the tool changer.
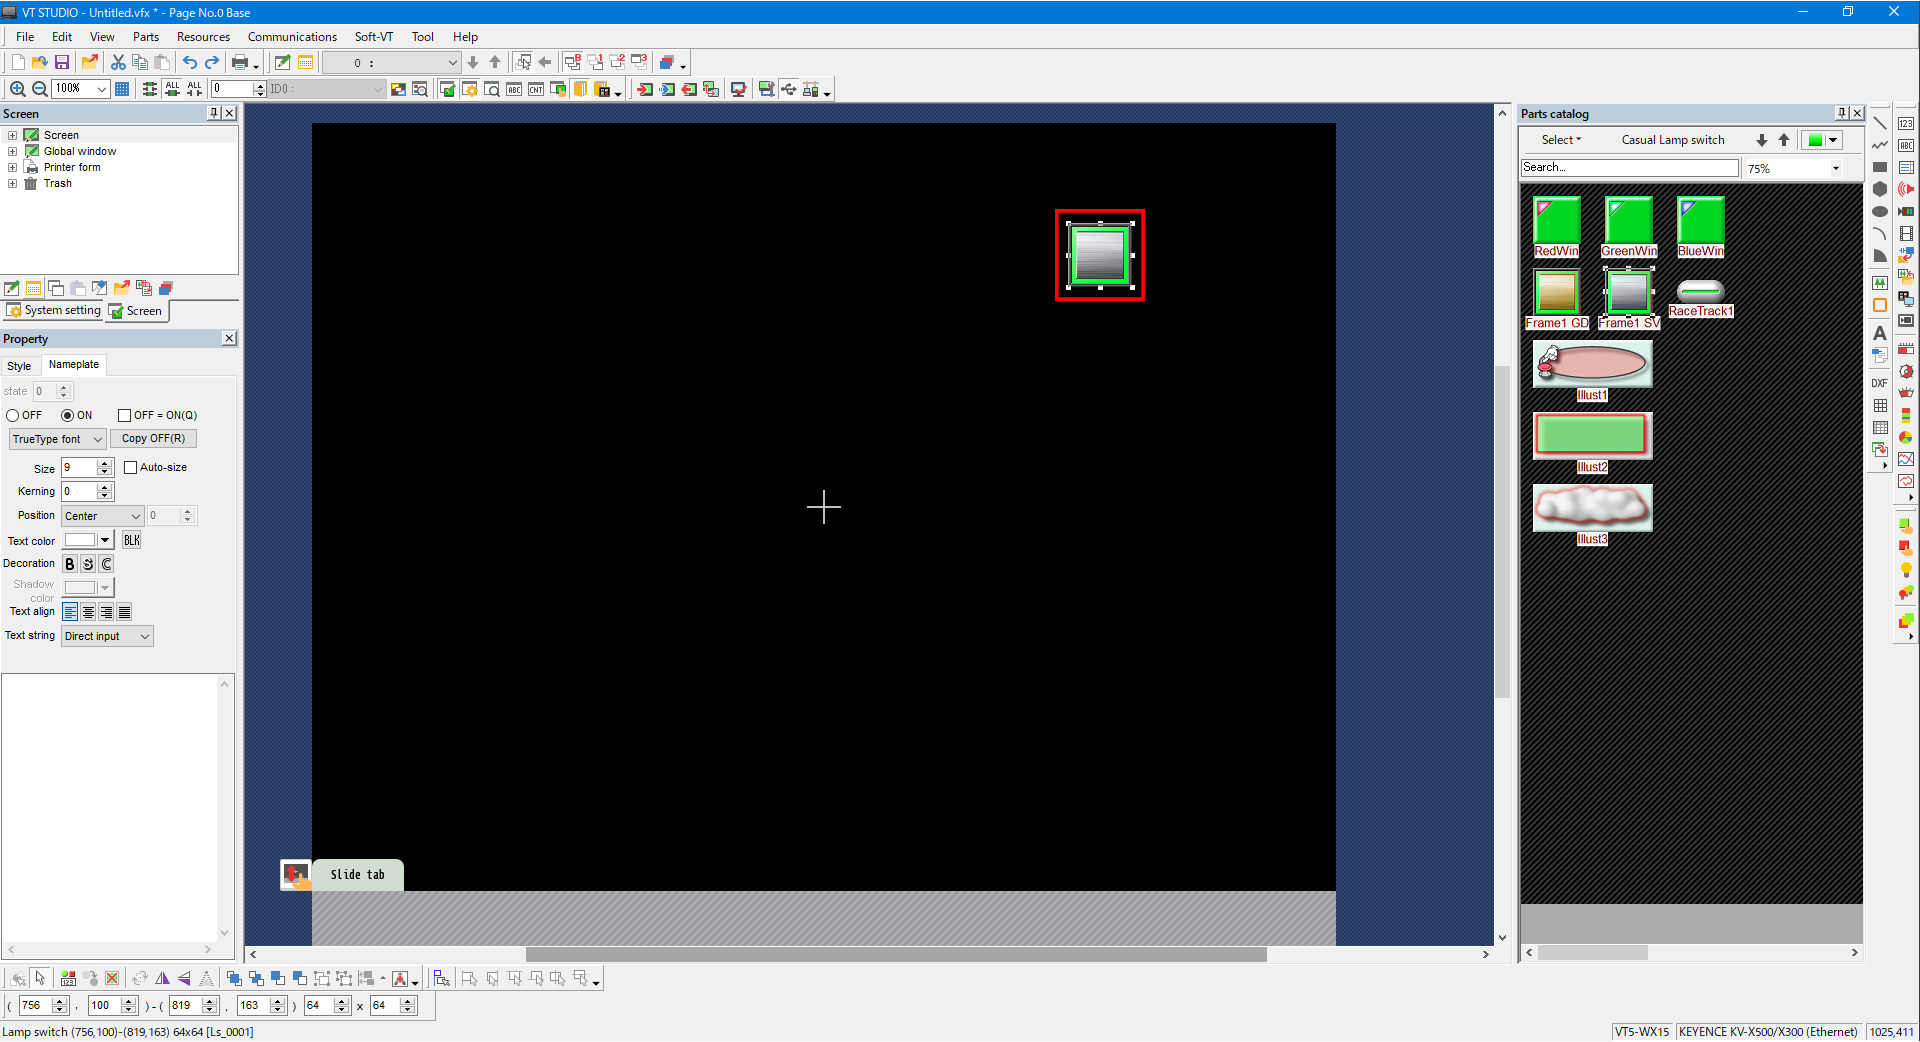
The explanation uses a lamp switch part as an example.
Setting the appearance with the properties
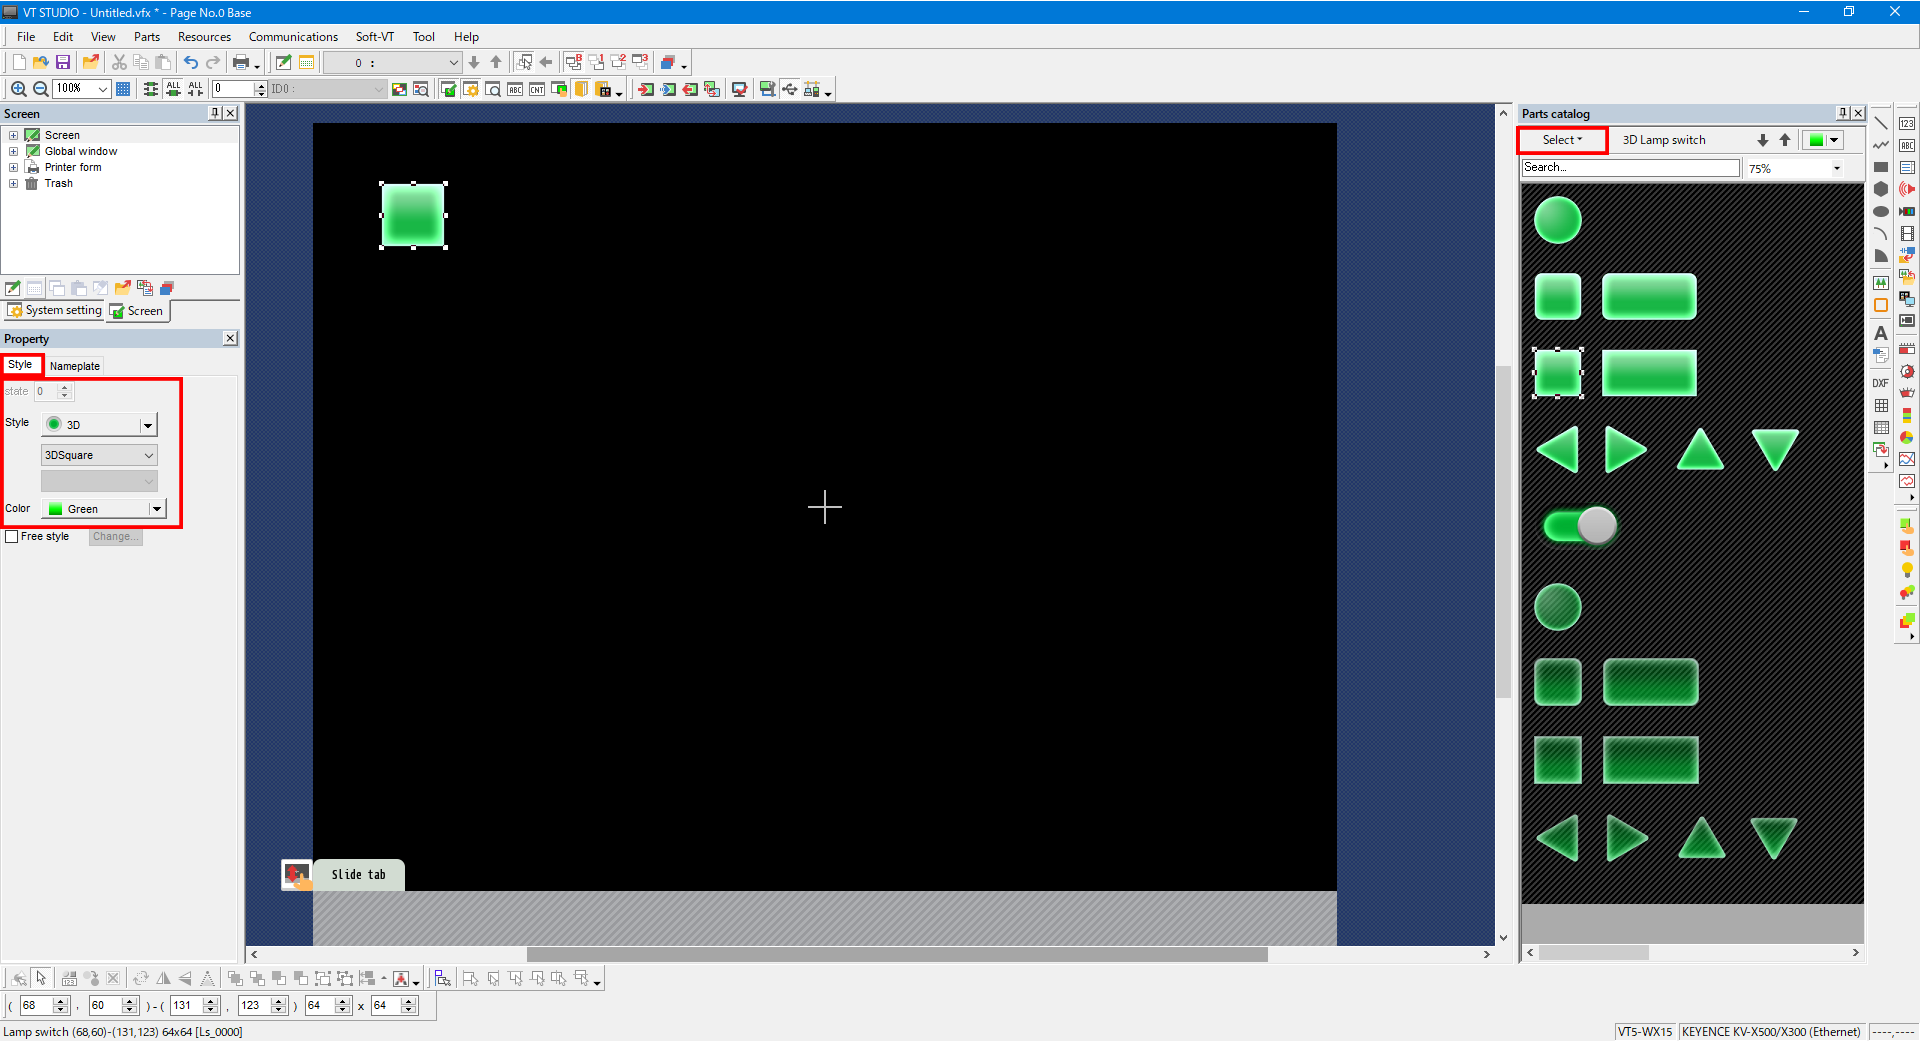
1. Select a part and open the “Style” tab of the properties.
Select the style, shape, and color from the pull-down menus.
2. Select the “Free style” check box and click [Change] to freely change to a different color according to the ON/OFF status of a device or switch.
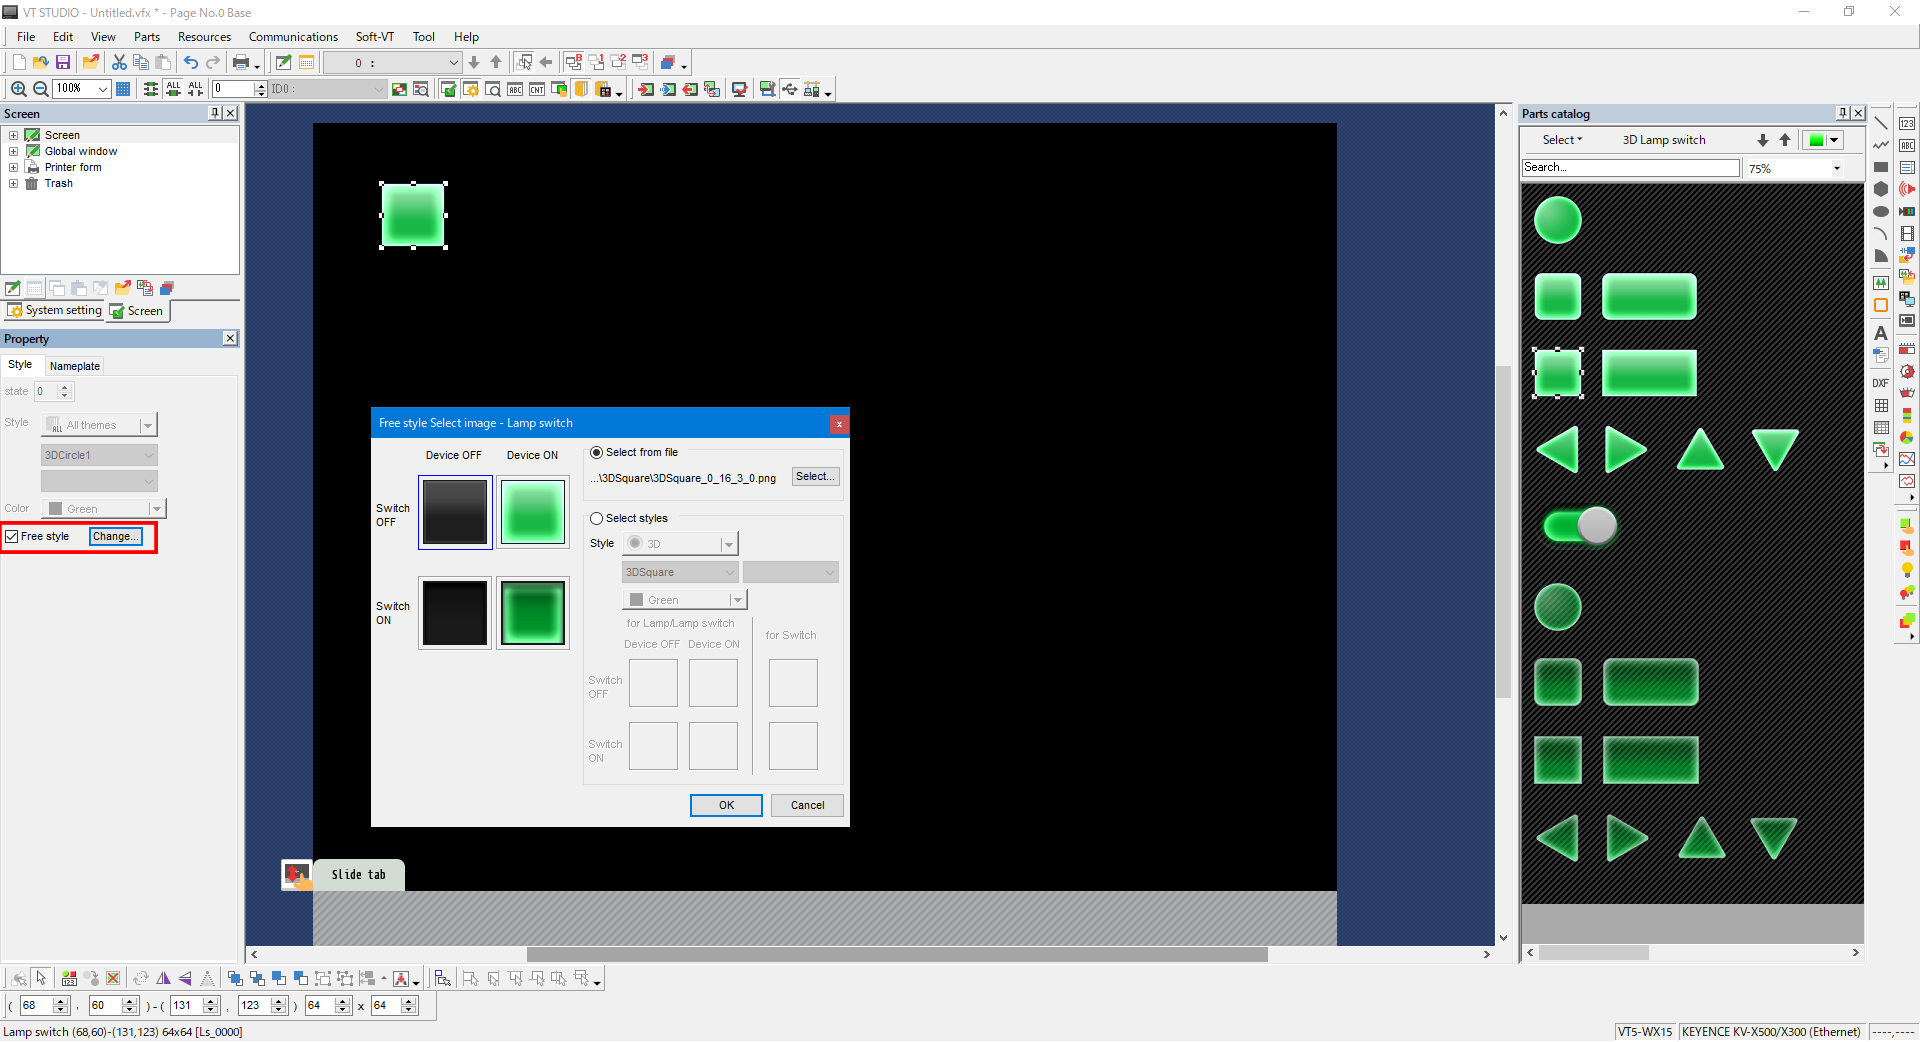
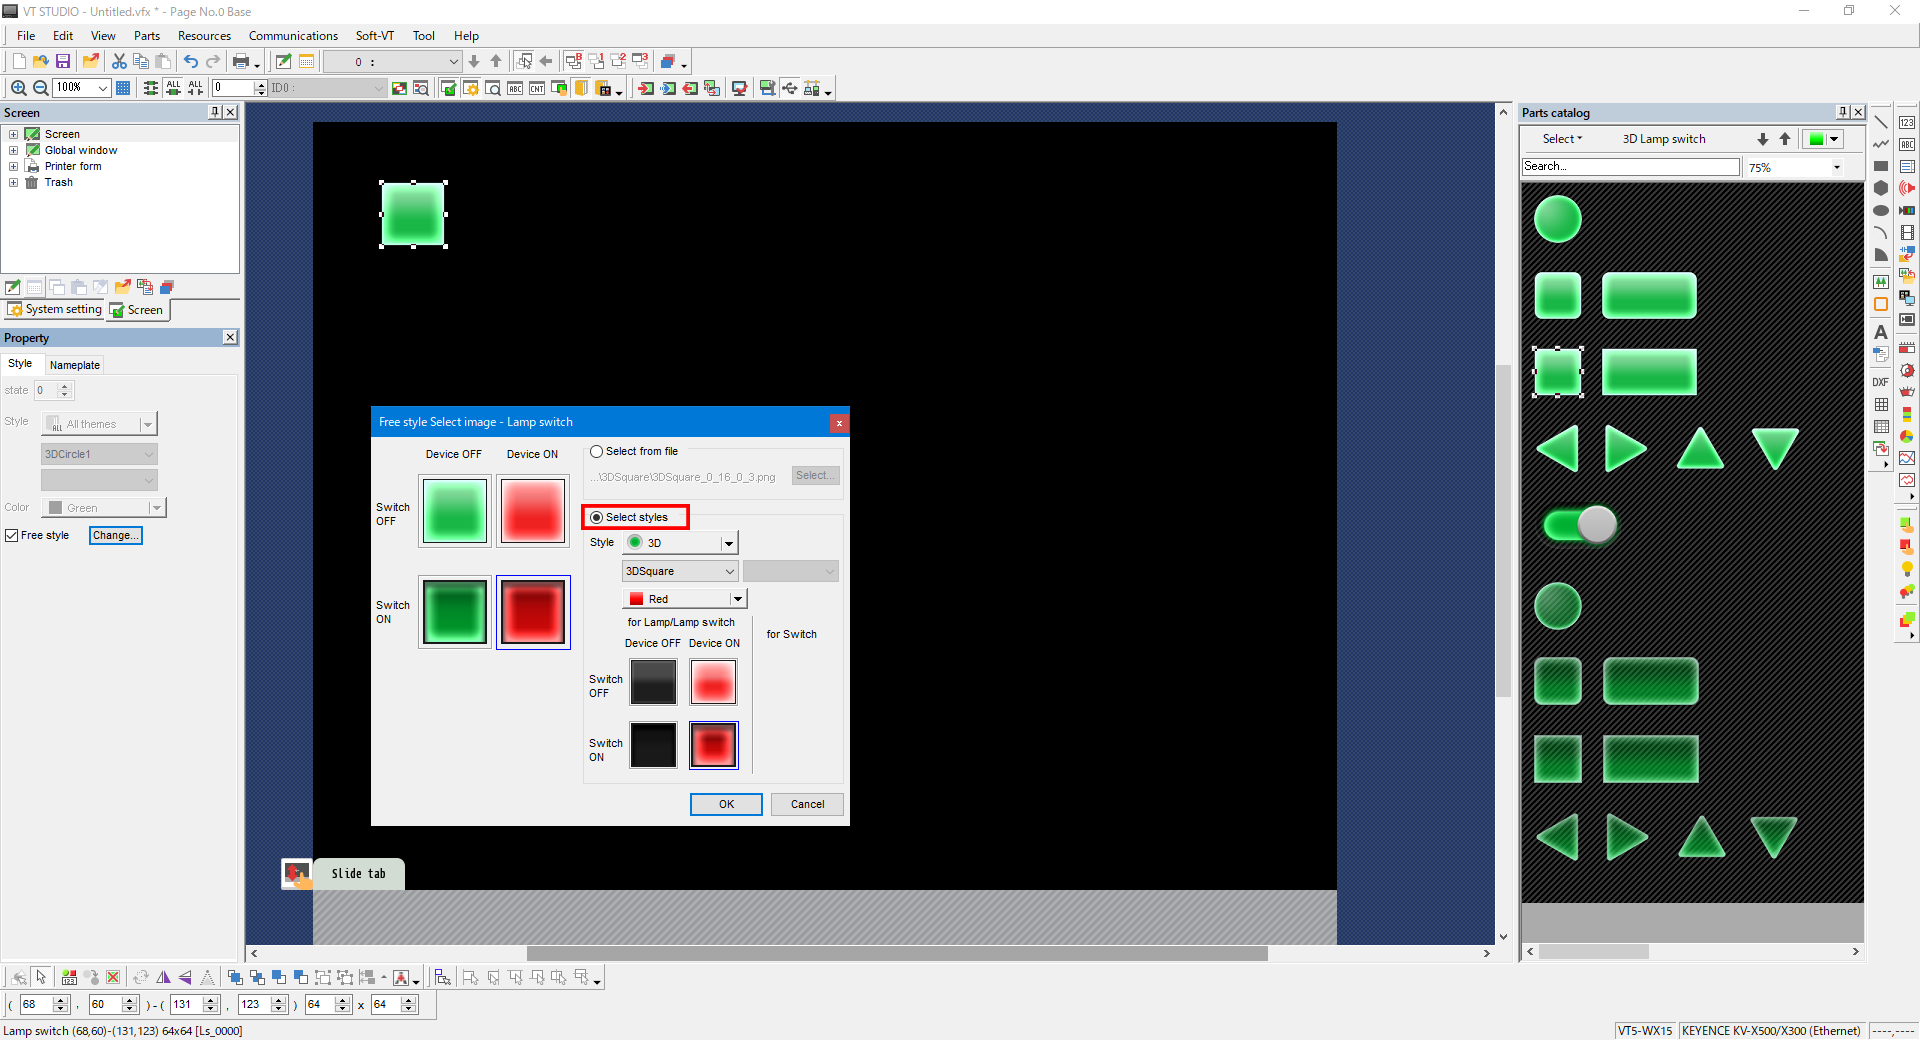
3. Select the “Select styles” check box, and then set the styles for the ON/OFF status of the device and switch.
Setting the appearance with the tool changer
The tool changer is a function for setting the appearance of parts on the screen to the same appearance as parts in the screen catalog.
For details on the part catalog, see the following section.
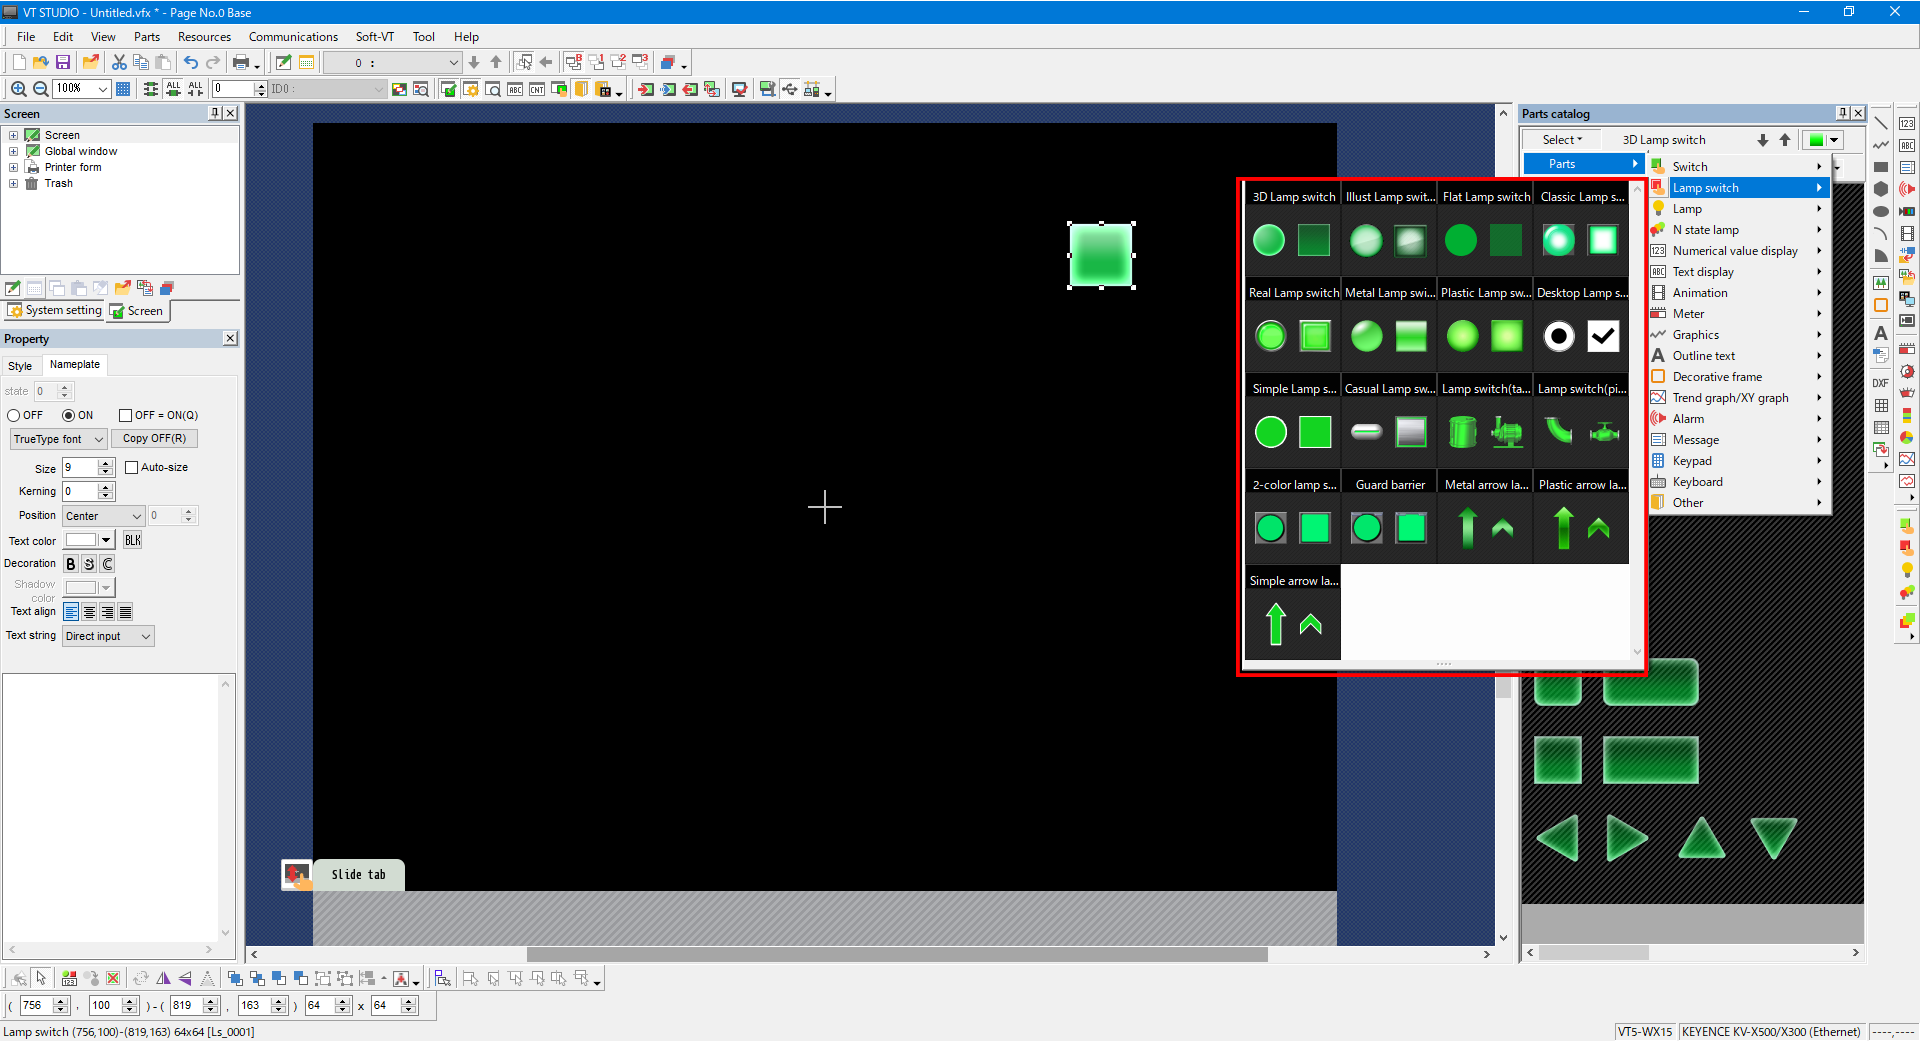
1. In the part catalog, select [Select] -> [Parts] -> [Lamp switch], and then select the appearance to change.
2. Select the part whose appearance you want to change, and then click the part in the part catalog.

3. The appearance of the part on the screen is changed to match the appearance of the part in the screen catalog.